Archive for December, 2005

Pitot line

Saturday, December 31st, 2005

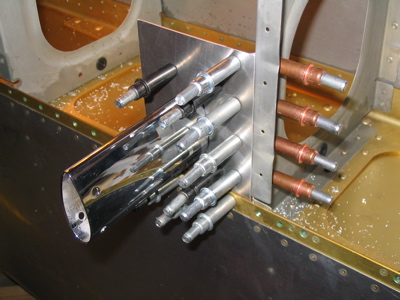
Continuing work on the pitot system, I got the pitot line run inside the wing today. While some folks use a short length of aluminum tubing and then transition to plastic line, I chose to use aluminum throughout since I'm comfortable working with it and I know it won't ever go brittle and fall apart on me (a problem I had with the pitot/static lines in my last RV!)

The pitot tube itself has a short and twisty length of tubing attached to it, although not so twisty that it can't be inserted through the pitot mast from the bottom up. This will allow the short aluminum tube to be disconnected just above the pitot mast, and the pitot tube can then be removed for service. The pitot mast doesn't have to be removed in order to remove the pitot tube.

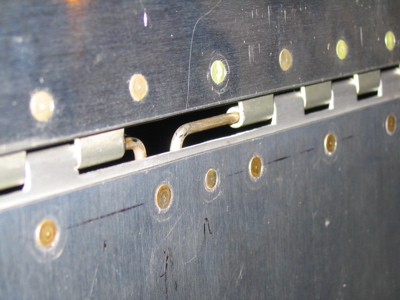
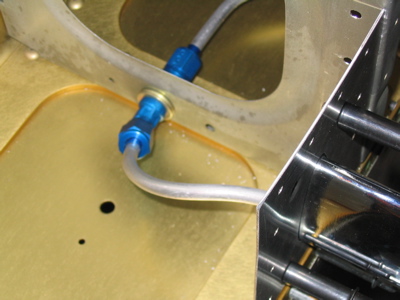
Inside the wing, the short length of tubing connects to a 45° bulkhead fitting:

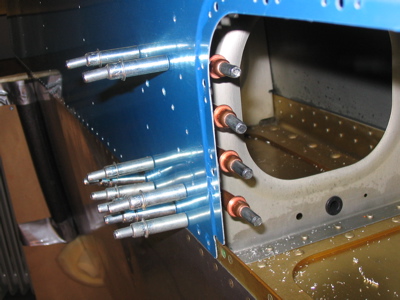
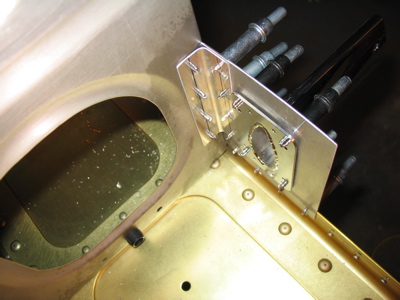
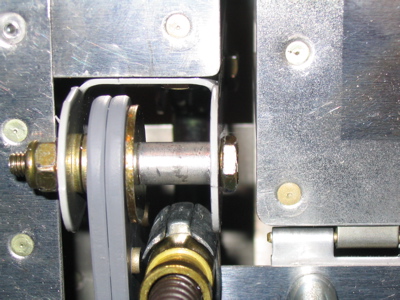
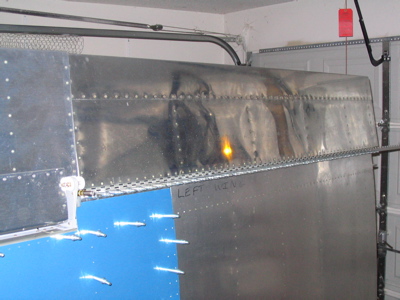
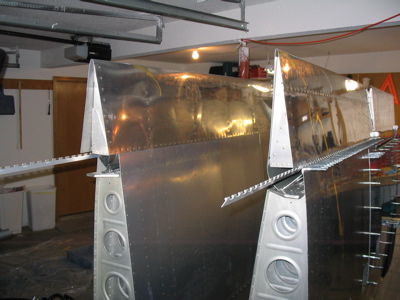
Then another length of tubing runs all the way to the wing root, first bending down and behind the aileron bellcrank and then passing through a snap bushing in the next rib. An Adel clamp on one of the bellcrank bolts (one size longer to compensate for the extra stuff it's holding) anchors the tubing firmly in place. Note that the short length of tubing between the bulkhead fitting and the pitot tube can be reached easily through the access panel that will eventually cover all this.

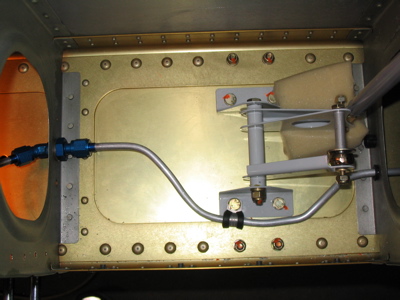
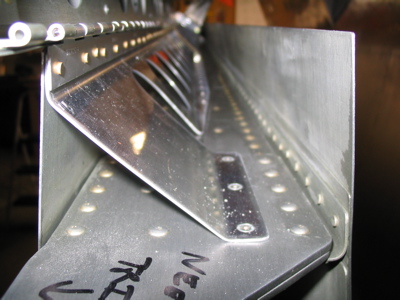
At the root end, I put a 90° bulkhead fitting in the rib that's just outboard of the root rib:

My thinking here was that there probably wouldn't be enough space between the root rib and the fuselage to get the fuselage side of the pitot line connected straight to the root rib – not to mention the placement of these snap bushings causes the pitot line to dead-end right into the center section bulkhead – so I'll bring in flexible tubing from under the pilot's seat, through the second lightening hole aft of the spar, and onto this fitting.

And yes, it was a pain to get all that tubing in there, especially the process of flaring the inboard end.

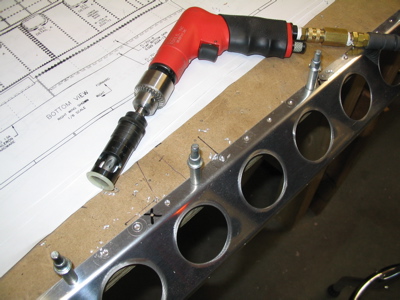
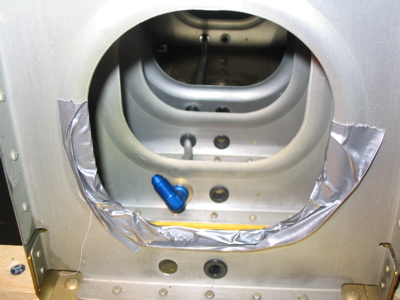
P.S. The duct tape is to protect the primer on the aileron pushrod from getting scratched; it's not structural.

Fabricated pitot mount

Friday, December 30th, 2005

I fabricated a spacer out of 0.020" Alclad that will go between the pitot tube backing plate and the skin. Measure, mark, drill pilot holes, rough cut, Dremel, file, deburr. Here's a time-lapsed series of shots of its creation:

As for match-drilling the backing plate to the bottom skin, the Gretz plans have you clecoing the skin to the wing and back-drilling through the plate into the skin. That would work okay if I could remove the top skin to get in there, but on the quickbuild wings the top skins are of course already permanently attached. I thought about trying to get an angle drill back in there, but that seemed like a recipe for frustration and/or disaster. Instead, I came up with this approach:

I match-drilled the pattern of the spar rivet holes in the backing plate onto a piece of bar stock I found in my scrap box, to make a stand-in for the actual spar flange. Then, I clecoed the backing plate, spacer, pretend-spar, and skin to the workbench through the spar rivet holes. After that, it was a simple matter to match drill the skin to the backing plate, right into the table. Having a sacrifical layer of MDF on top of the workbench is incredibly handy.

Here's a test fit with the skin, spacer, backing plate, and mounting angle all clecoed together. Alignment is good and the skin lays down just right with the spacer in place.

On to the pitot mast cutout in the bottom skin. No pressure, it's just a $64 replacement skin and a similar cost in shipping and handling if you screw it up. First comes starter holes with the unibit:

Then a rough pass with a carbide cutting bit in the Dremel:

Lots and lots of filing later, it fits pretty well:

The gap between the mast and the skin isn't exactly symmetrical – it's about 1/16" on one side and between 1/32" and 1/16" on the other:


I could file the sides to match, but what I'll probably do instead is just blend the mast into the wing skin with a small fillet of Proseal during final assembly. I can't think of a situation outside of major wing damage where you'd need to remove the pitot mast from the wing – the pitot tube itself, sure, but the tube can be removed from the mast just by taking out four little screws and unhooking the air line and heater wires. Good enough. It might even help to keep water from getting up into the wing that way (think about it, ice + heated pitot). Who knows?

Anyway, the pitot mounting stuff is basically done for now. Now if I could just beat the head cold I brought back from last week's ski trip.

Attached flap hinges / Started pitot

Thursday, December 29th, 2005

I got up this morning and primed the flap braces (only on the side that won't eventually be painted) and then riveted the flap hinges to the wing bottom skin and the flap braces. Notice how the temporary rivet holes are now filled with small-head rivets that have their flush surfaces facing out. Also visible here is the section where I removed three hinge eyes to allow insertion of the flap hinge pins, per the plans.

Here's the backside of the same area. During final assembly I'll capture the bent ends of the hinge pins with some safety wire through the little holes I put in the flap brace.

The flap brace itself is riveted to the rear spar with monel rivets along the entire length, with the exception of the three inboard-most rivets – those are Cherry flush structural blind rivets. Big, solid-looking suckers. Cool.

Here's the finished product. The alignment is correct and the motion of the flaps is smooth throughout the entire range of motion. The outermost foot or so of the hinge isn't riveted yet, since the outboard bottom skin doesn't get riveted on until everything inside the wing is finished.

Once I got the flaps on for good, I started messing around with the pitot tube. I'm planning to mount it just outboard of the rib bay where the aileron bellcrank lives. The Gretz bracket is match-drilled to the spar flange, and a piece of angle stock I cut ties it to the rib. Here's some random photos of the setup so far:

I'm not totally happy with the way the backing plate is a little bit recessed from where the skin will be. I'll probably have to make a shim from 0.020" Alclad or thereabouts.

Hung the flaps

Wednesday, December 28th, 2005

Lots of progress today. First I primed and attached the aileron gap seals:

All these rivets can be reached with the squeezer and the longeron yoke, which made it a piece of cake. The gap seals themselves are made of pretty thin material (0.020" I think) but when they're riveted in place they add a ton of stiffness to the overhanging edge of the upper skin.

Then it was on to the flaps. I used Dan Checkoway's temporary rivet method of securing the flap brace while drilling the flap hinge. You can read it on pages 8 through 10 of this pdf file.

First I drilled eight additional 3/32" holes through the bottom wing skin and the mating flange of the flap brace, along the pre-drilled rivet line. These holes I countersunk for NAS1097 rivets (used because they have smaller heads than normal AN426 rivets) on the inward side of the flap brace flange, and the preexisting holes on that flange of the flap brace were countersunk on the outward side to accept the dimples in the bottom skin.

The idea is that you put temporary rivets in the additional holes, to hold the flap brace in alignment with the skin while you clamp and drill the hinge. The flush heads of these temporary rivets are on the inward side so the hinge can lay flat against the flap brace:

When the hinge is completely drilled, the temporary rivets are drilled out and the skin is countersunk to accept another NAS1097 oriented with the flush head outward. For now though, the shop heads protrude outside the wing.

The forward half of the flap hinge is the clamped to the wing, with one cleco clamp on either end. Although it's tight, you actually can get the clamp onto the outboard end if you insert it into position before you bring in the flap. The two halves of the flap hinge are pinned together so as to eliminate any possibility for the hinge line to come out crooked (which would prevent smooth operation of the flap). The gap between the aileron and flap is set at 1/4" per the plans – I just juggled things around until a drill bit of the appropriate size fit snugly between the two control surfaces.

Once everything is lined up, you match drill through the prepunched holes in the skin into the hinge. It helps to have a compact and patient building partner. Mary stood between the wings and pressed on the hinge with a piece of wood to keep it from bowing outward from the pressure of the drill:

Five or six dozen holes later, the first flap is hung:

I used a straightedge to ensure that the alignment between the trailing edges of the flap and aileron would come out even for both wings:

Plenty of edge distance on both hinges. Some people wind up having to use a wider -P4 hinge instead of the supplied -P3 hinge stock in order to end up with enough material between the edge and the rivet holes, but mine came out okay.

Both flaps are hung:

Tomorrow I'll cut the hinges to length, drill out the temporary rivets, prime the flap braces, and permanently attach the braces and hinges to the wing.

Misc wing work

Wednesday, December 21st, 2005

Not much progress since the weekend. I fitted, drilled, deburred, and dimpled the aileron gap seals, but it's been too cold and dark to prime them. That means I can't progress to hanging the flaps, because the ailerons have to be hung to do that, and I want to get the gap seals on permanently first. And, I'm waiting on all my lights and electrical junk to arrive from Van's, so I can't work on that stuff either. So, I've mostly been hanging around. I redid the safety wire on the autopilot roll servo, and generally cleaned up the workbench. Oh, I also made these dimple test strips for use later, e.g. for countersinking the flap brace and in other places:

I plan to get a lot of work done between Chrismas and New Year's, if fate is kind.