Archive for September, 2006

More work on brakes

Saturday, September 30th, 2006

Today's mission was to finish installing the brake system. Sadly, it didn't quite work out like I planned. I started out by installing all the AN822 elbow fittings in the four brake master cylinders, using plenty of Bakerseal to lube and seal the pipe threads:

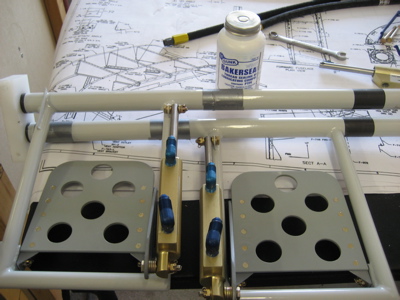
Unfortunately, I managed to twist one of the fittings off inside a cylinder, thus ruining it. Arrgh! Since I'm trying to keep this site PG-13 I won't relate what I said when this happened. Use your imagination. On Monday I'll be calling Van's to order a new $78 brake cylinder, I guess. Today's lesson: aluminum pipe threads won't take a lot of torque, even if you only need "just a little more" to get the fitting clocked the way you want it. Grrr.

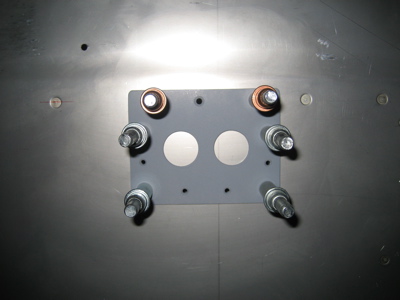
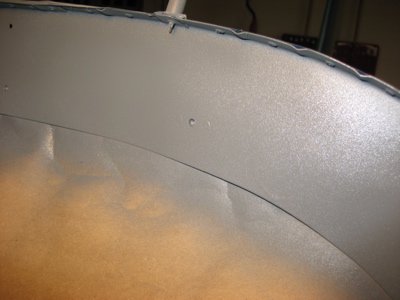
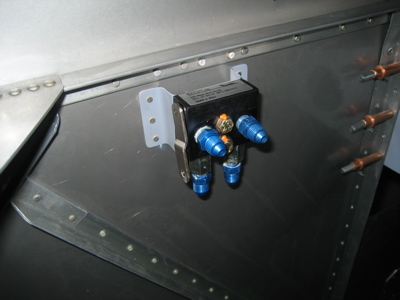
I got the parkng brake valve installed in its home on the firewall:

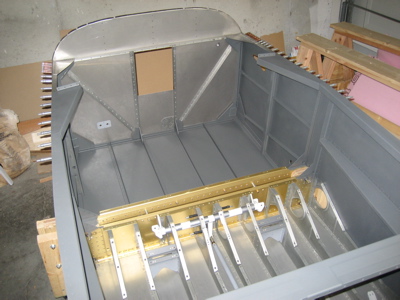
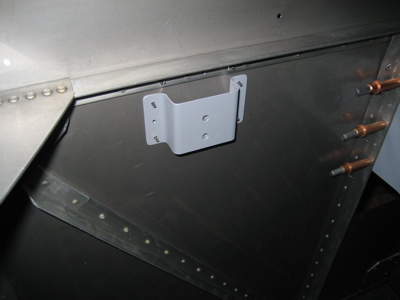
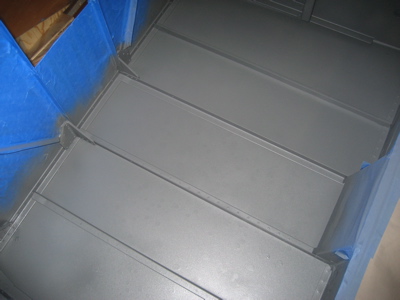
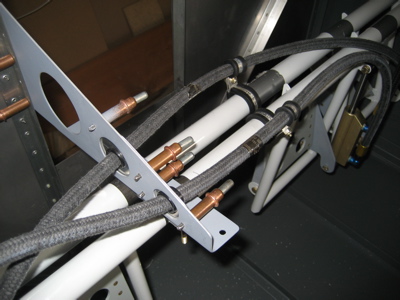
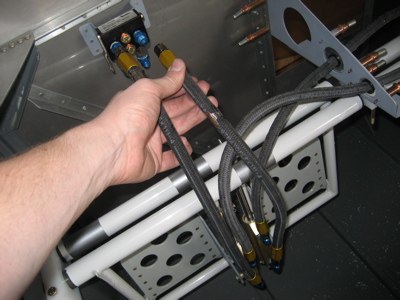
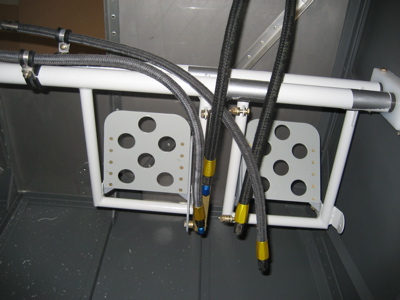
Here's how I ended up routing the crossover hoses from the passenger side to the pilot's side. Adel clamps secure each hose to its respective torque tube – they are splayed out and offset so they won't interfere with each other when full right rudder is used. Then at the F-6118 rudder pedal brace, I fabricated a small plate that will be riveted on to cover two of the lightening holes. When the pedals are moved, the hoses pivot inside a pair of SB625-8 snap bushings in the plate. I kind of wish I hadn't cut the optional lightening holes in the pedal brace, because it would have given me better options for more direct routing of the hoses. These "anti lightening holes" (weightening holes?) seem like they'll work okay though. If you're reading this and you haven't made your pedal brace yet, wait to cut holes in it until you're sure about how your brake lines are going to run.

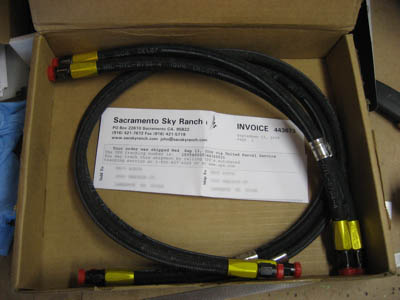
Second major frustration of the day: the hoses from the pilot's side brake cylinders to the parking brake valve are too short! I think I must have had the valve in a different location when I originally measured to see what hose lengths I'd need. Now that the valve is permanently mounted, the left side hose gets stretched when full left pedal is used, and the right side hose just doesn't reach at all. Grrr. On Monday I'll have to order a new pair of hoses – it looks like one 17" and one 18" will do the trick.

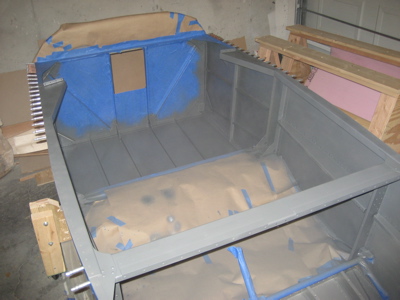
Other than the busted master cylinder, things seem to be mostly okay on the right side. The clamping arrangement in use on this side means the crossover hoses don't need to flex or pivot on this end when the pedals are moved. I think the hoses from the brake reservoir to the passenger pedals are going to work as well, but if they don't I can always remake them myself since they're low-pressure only.

So in conclusion, I didn't get to finish this piece of the project today like I planned, and it was a pretty expensive day in terms of parts that need to be replaced. Grrr.

Finished painting fuselage / Worked on brakes

Sunday, September 24th, 2006

I spent some time yesterday sanding out more ugly spots and touching up paint. Today I declared the fuselage painting complete and took off all the masking tape. Look at all its majesty:

After that I took all the clecoes that had overspray on them and soaked them in lacquer thinner to loosen up the paint. Then I took each one and cleaned it up with a rag, which took approximately half of forever. But I got this cool photo of the paint being bubbled off the surface:

Next I spent some time playing with the brake lines and rudder pedals. I think the brake hoses I ordered will work out, which is good because custom hoses are expensive. But before I permanently install the pedals I need to get the parking brake installed, so I fitted the bracket I made earlier to the firewall:

Since the hoses put a noticeable amount of torque on the parking brake, I was worried about the thin firewall flexing and cracking. I made a 0.063" doubler for the forward side to beef up this area. It ties into the crosswise stiffener on the back of the firewall and helps spread the load out. The weird rivet spacing along the top side is to clear the rivets that are already there underneath, and the two big holes are just lightening holes.

While I was priming the above parts, I primed and painted the F-742 seat floors. Although I didn't prime the fuselage interior before painting (there is some PPG wash primer on there already when it arrives from the quickbuild factory, for whatever that's worth) I did decide to prime the floorboards before painting since they will be subject to greater wear. I'll do the remaining interior panels as time permits.

I would have gotten more done today, but I had to deal with this little situation this morning:

Stupid fence. Grrr.

Another coat of interior paint

Wednesday, September 20th, 2006

I picked up a pistol grip handle made for spray cans. It certainly helps you control the spray better, and it prevents drips. And now, on to the second coat of interior paint…

I'm pretty pleased with how it turned out, even though this photo looks a lot like the other one.

I didn't do anything about the drip-spots on the floor, other than to just spray more paint on them. They're still visible, but not as much. There will be carpet here anyway so I don't really mind – what I'm really after in this area is a moisture barrier to keep rainwater and tracked-in snow off the floorboards.

I went over the problem areas with 220 grit sandpaper and a red roloc wheel before recoating. It looks pretty good – not perfect but acceptable, especially considering my lack of painting skills. I didn't bother much with flaw-hiding in the areas that will eventually be covered by the interior panels, but I want the most visible areas (baggage area and side rails, primarily) to look nice. Compare this photo with this one and you can spot the improvement.

And just because I can:

"Luke. I'm your dad. Seriously."

Received brake hoses

Wednesday, September 20th, 2006

The brake hoses I ordered from Sacramento Sky Ranch arrived today. These will go in after I finish painting the interior.

Painted fuselage interior

Monday, September 18th, 2006

Okay, so since I have the paint now, why not use it? I strapped on the respirator and put a coat of paint on the interior of the fuselage. I ended up using about three cans for this first coat. It didn't turn out too bad:

There are some drips that I'll probably need to sand out:

It didn't coat very evenly on the vertical surfaces. I'll have to recoat a lot of this:

The floorboards got coated with liquid drops that were shaken off the end of the nozzle while I was spraying other areas. It'll be interesting to see how these settle out, if at all.

I'll let everything cure for at least 48 hours, then come back and sand down the drips and put on another coat.

"Luke, I am your father. P.S. Buy Garmin."