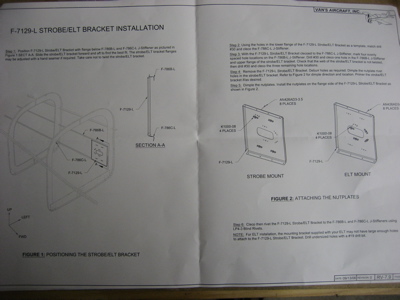
The plans that come with the ELT mounting bracket are similar to the plans for the RV-10 and the new prepunched RV-8. Compared to the vague and confusing RV-7/9 plans, the new style is practically a comic book that shows you how to pound airplane parts together. You RV-10 builders don't know how easy you've got it. (Note to pre-quickbuild RV builders: Please don't email me with stories about how you had to mine your own bauxite from the Earth's crust and turn your own rivets on a lathe – I already know the kit could be a lot worse.)
The rivets that attach the lower flange of the ELT bracket to the bottom J-channel stiffener are really hard to get to. In order to drill the holes, you need to use a 1/2" stubby drill bit in an angle drill. I also had to use a mirror just to figure out where the prepunched holes were.
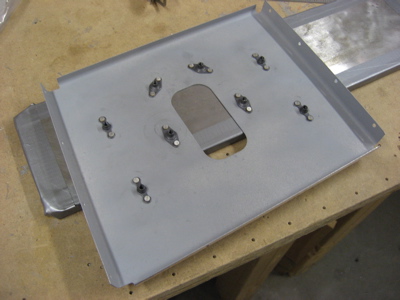
Here's the bracket with all the holes drilled:
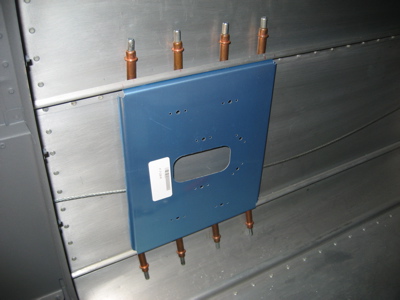
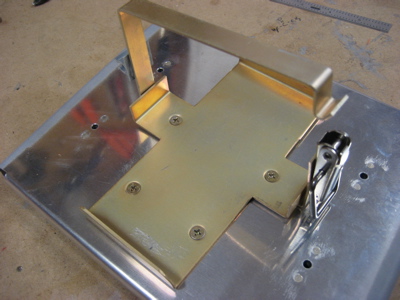
After all the holes were drilled, I pulled the bracket out of the fuselage, deburred it, primed the back side and the mating flanges, and installed the nutplates. You actually only need to put nutplates in four of the eight prepunched positions, since half the holes are for the ELT and the other half are for mounting a strobe power supply. However, I figured that since I won't be able to remove the bracket later, and I'm not 100% sure I won't need to mount something else here instead, I might as well go ahead and put nutplates in all eight holes. I may thank myself later, who knows.
I used K1100 dimpled nutplates in the four holes that the ELT attaches to, so I could also dimple the ELT mounting tray and not have to worry about protruding screw heads underneath the ELT itself. The plans would have you use round-head screws here, which doesn't make much sense to me.
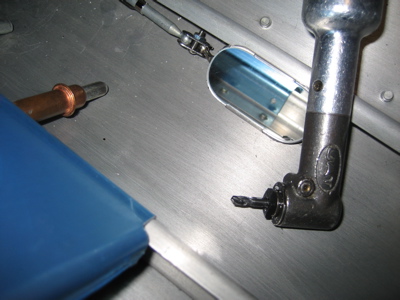
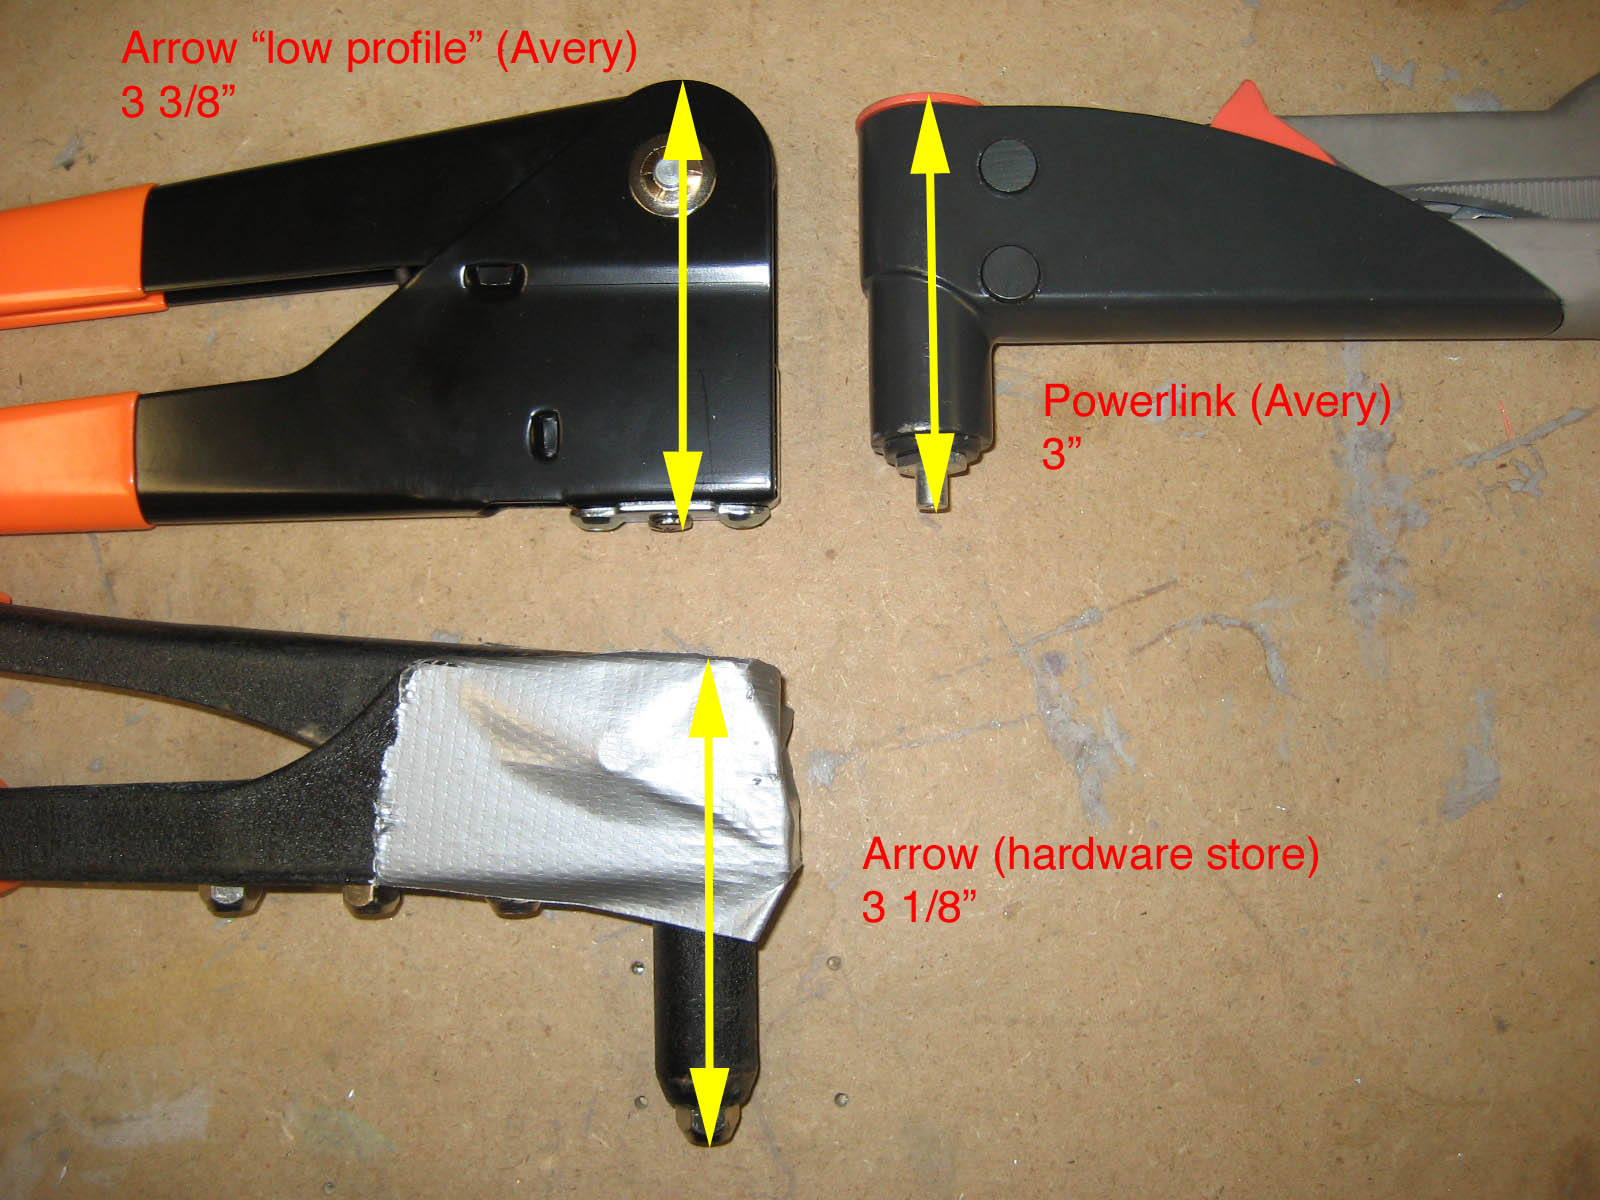
Finding a way to actually pull the rivets on the bottom side is harder than drilling the holes. The curve of the fuselage gets in the way, so you need to use rivet puller that's as short as possible. I ordered a supposedly low-profile riveter from Avery just for this task, but it turned out to actually be even bigger than the other two riveters in my toolbox – a cheap Arrow-brand puller from the hardware store, and a Powerlink riveter, my usual blind riveting weapon of choice, also from Avery. Click the image below for a comparison of rivet puller sizes:
I ended up finagling the Powerlink riveter down in there, although the lower rivets are still a little tipped. I think this is pretty unavoidable given the geometry of the bracket, stiffener, and skin.

After all that, I wasn't happy with how floppy the ELT mount was. You could grab it with your hand and literally bend it back and forth. That seemed pretty dumb, considering how this thing is supposed to survive an airplane crash. Since the bracket was already riveted in place for good, I decided about the only thing I could do was find a way to tie the front end of the ELT tray to the bracket more securely.
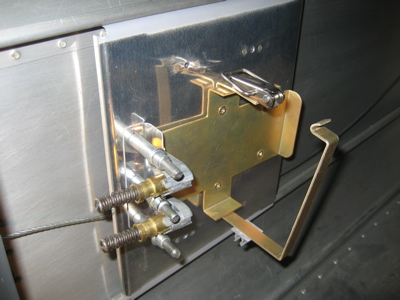
Here we go – two more flush screws attach the tray to an aluminum angle that I pop riveted to the bracket. It's still not perfect but it's a lot sturdier. Now when you grab the ELT and try to shake it, it mostly moves around inside the tray – unavoidable since it's only held in place by that strap thingy – instead of the tray itself moving around like it did before.

Update: The Van's ELT bracket turned out to be a stupid idea. See this entry for the alternate ELT mounting location I eventually decided to go with.
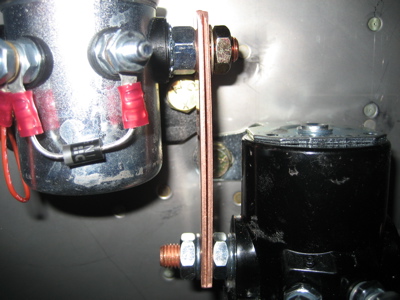
While I was messing around in the garage, I noticed that the plans actually call for a pair copper bars between the master and starter relays, not just one like I had, so I quickly fabricated another chunk of copper and slapped it on there.