I decided that I should work on the empennage tips next, because it will be a lot easier to mess with them while I have the tail removed from the fuselage. Once the engine goes on I'll have to keep the tail attached to prevent the fuselage from tipping over on its face, so I'm trying to get as much done on the empennage while I have the opportunity.
For no particular reason I decided to start with the top rudder fairing. I trimmed the flanges enough to get the part to fit onto the rudder, and match drilled #30 holes through the skin into the fiberglass.
It isn't a terrible fit, although it is quite a bit shorter than it needs to be. I'll have to build up the forward face with filler.
The plans have you attach the fairing to the rudder skin with flush pop rivets. A lot of people use filler to make their fairings match the contour of the empennage surface, then use a layer of fiberglass to hide the joint between the aluminum skin and the composite fairing. Me, I really like the look of a well-fitted fairing with a perfect, visible seam between the two parts, so I decided to steal Randy Pflanzer's method. He made his fairings removable by using 4-40 screws and nutplates instead of blind rivets, which lets you take the fairing off to clean up the join line.
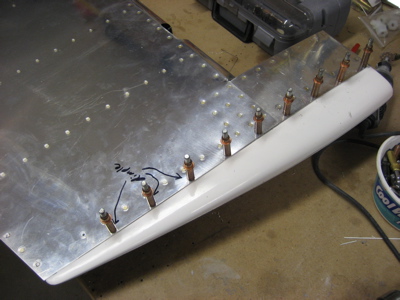
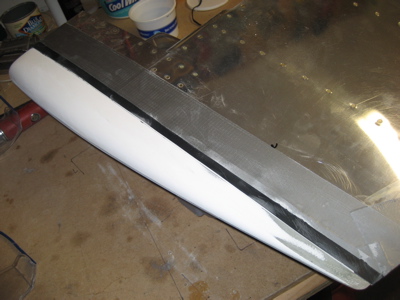
I riveted nutplates to the fairing, using a thin strip of alclad as a backing strip to keep the rivets from pulling through the fiberglass. On the first side I did (facing down in this photo) I used the same rivets to attach the nutplates to both the aluminum and the fiberglass. That turned out to be a pain to do properly, so on the other side I first riveted the nutplates to the aluminum strip, then riveted the strip to the fairing with one rivet between each pair of screw holes. That way turned out a lot better, since I could do the tricky riveting of those tiny little nutplates out in the open where I had better access.
By the way, the gaps in the alclad strips in the photo above are there because I made the them out of scrap and I didn't have anything long enough to span the full length of the fairing.
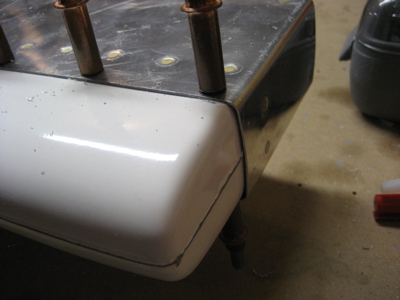
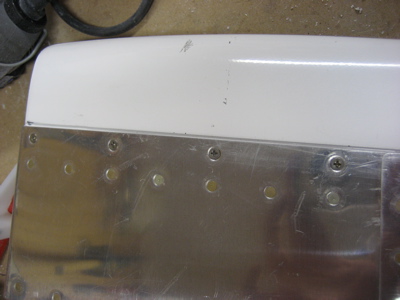
Here's an initial view of how the fairing looks when screwed in place. A #4 flush screw fits in the same dimple as a 1/8" rivet, and I really like the look of the visible fasteners. There is about a 1/16" gap along the join line, which will need filling.
I protected the rudder skin with a layer of electrical tape (very thin but rugged enough to resist sanding) and some duct tape too for good measure. Then I used some 60 grit to knock down the high spots in the fairing. The very tail end was the worst spot, as the fairing was quite a bit thicker than the rest of the rudder back there.
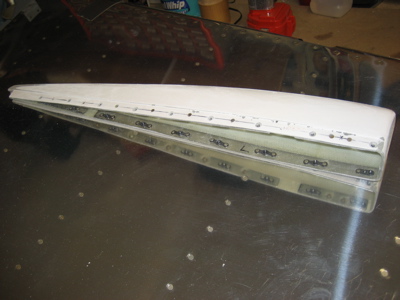
Then I mixed up a batch of epoxy and microballoons that was about the consistency of peanut butter, and slathered it all along the join line, making a special effort to try and force it down into the gap. I also tried to build up a big glob of filler on the forward face where the fairing is too short, but I expect I'll have to revisit it a couple more times in order to get enough material where it needs to be.
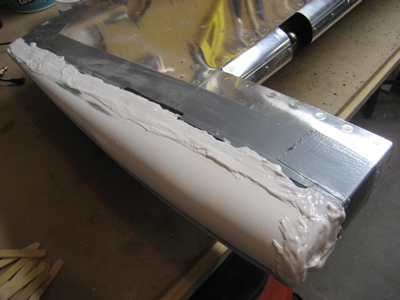
I'll let the whole mess dry overnight, then sand off all the excess and see where it leaves me.
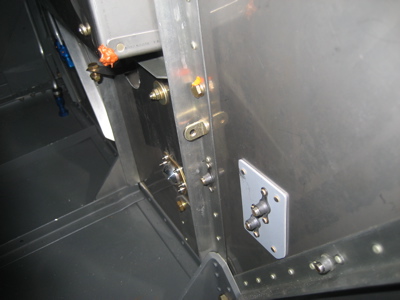
Oh yeah, while I was doing stuff in the airplane workshop I installed the eye bolts through the firewall, to which the rudder pedal return springs will attach.