Somehow I managed to get not much done despite having a three day weekend. Hmm.
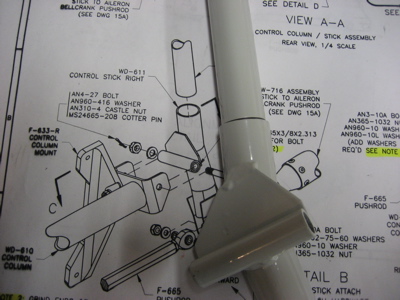
I decided to install the electric aileron trim kit, but first I needed to get the control sticks and associated pushrods installed. I spent a bunch of time filing and grinding the inside of the passenger stick weldment, which had a big ugly weld bead clogging up the bore. Eventually I got it reamed out and smooth enough that the passenger stick could slip in and out.
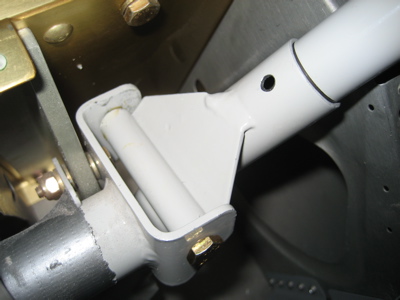
I drilled a 3/16" hole through the passenger stick and weldment. There is a service bulletin that advises you to put a bolt through here, making the passenger stick non-removable. Since that would defeat the whole purpose of making the passenger stick in two pieces in the first place, I think I will use some kind of quick-release pin instead. After I drilled and deburred the hole, I greased up the brass bushings and bolted both sticks in place.
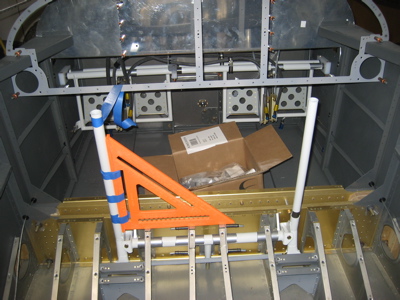
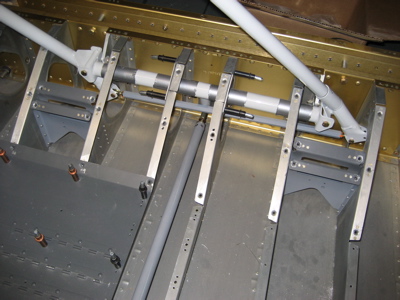
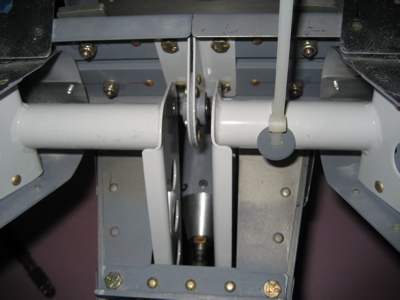
I then spent a bunch of time getting the transverse pushrod that goes between the sticks set to the right length. Here's my shade tree method for making sure the sticks were upright.
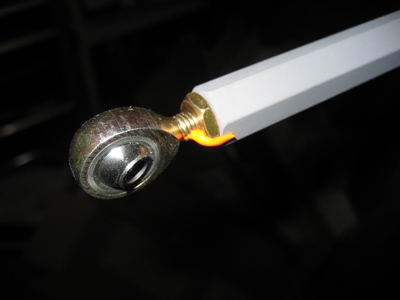
This photo is to confirm that I did torque the jam nuts on the F-665 pushrod.
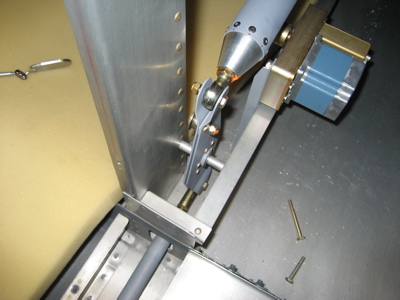
Then I put in and adjusted the forward elevator pushrod. It worked out okay, but I would have liked to have had another quarter inch or so of pushrod length to work with – that would have given me more options for moving the neutral stick position around without worrying about keeping proper thread engagement on the rod ends. The duct tape is to protect the finish on the control column in case it bangs into the seat ribs while the elevator pushrod isn't hooked up.
I attached both elevator pushrods at the bellcrank, including all the little washers that go in there. That took a lot of time too. Thank goodness for washer wrenches, or else I'd still be trying to get those washers installed. I haven't tightened any of these nuts yet.
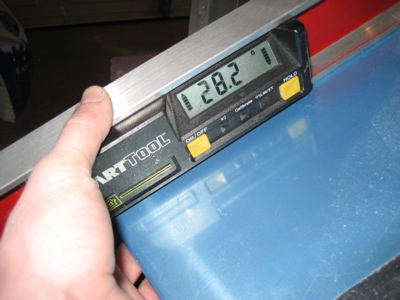
With the elevator pushrods in place I was able to verify that the elevators hit both pitch stops without anything binding (check) and measure the travel. Here's the neutral position:
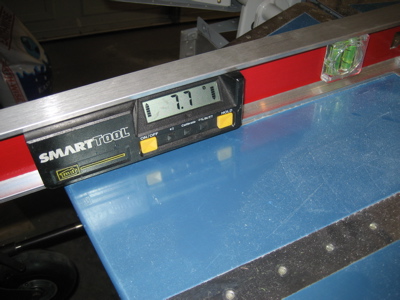
Maximum down elevator travel is 20.5 degrees. The plans call for a minimum of 20 degrees and a maximum of 25, so I am inside the OK range here.
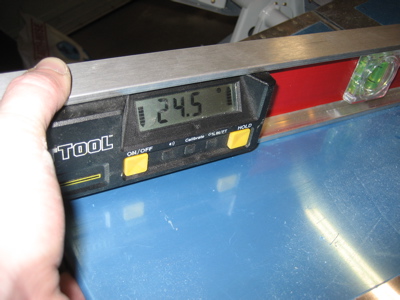
Maximum up elevator travel is 32.2 degrees. The plans give an allowable range of 25-30 degrees, so I have too much travel here. The elevator horns also contact the aft bulkhead at the same time they hit the up elevator stop. I don't know exactly what that means or whether I should worry about it. Need to call Van's I guess.
There are two mild steel washers that are used on the bolt that goes through the center elevator bearing. I scrubbed all the rust off them, primed them, and painted them with enamel. Then I tie wrapped them to one of the elevators so I won't spend an hour looking for them when I go to install the elevators for good.
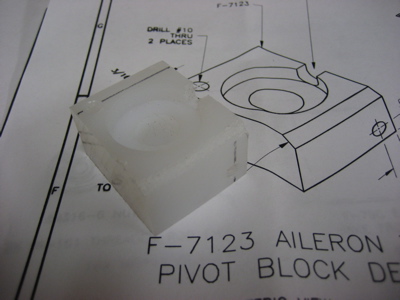
After all that I finally was able to start in on the aileron trim. First you have to modify this plastic pivot block by drilling some holes, cutting a notch, and rounding off one edge. No big deal.
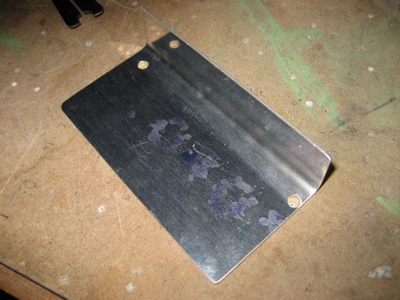
Then you cut the mounting plate to length and drill some holes. But – argh! Not a lot of edge distance there if you follow the plans and then get carelss when drilling. Great. Now I have to re-order this part before I can make further progress.