Archive for May, 2007

Fabricated canopy side skirts

Monday, May 28th, 2007

This afternoon I fabricated the six pieces that form the lower canopy skirts. Here are the C-759 and C-791 pieces after being cut and deburred. I used a hole saw to cut the lighteninng holes in C-791, then went through three or four scotchbrite wheels deburring the insides of all the holes. That was kind of tedious.

I cut the C-660 side skirts out of the supplied raw sheet stock, and then painstakingly measured and marked the locations of each of the four rows of holes that go in this part. That kind of sucked because each row has a different rivet spacing, and the vertical and horizontal spacing measurements are actually given on two separate drawings. To avoid doing it all twice, I lined up both parts and match-drilled them both together at the same time.

Here's the finished result. Hey Van's, how about making these prepunched parts? This sure seems like a good application for one of those fancy CNC machines – flat sheets with lots of precisely-located holes in them.

Finished aileron trim

Monday, May 28th, 2007

The plans call for the aileron trim springs to be connected to the servo arm by short lengths of 0.041" safety wire. I'm sure this solution works just fine, but I felt like doing something a little extra here. So, I made these little clevis links out of RC model airplane parts. They each consist of a piece of 2-56 steel pushrod material with a Sullivan clevis threaded onto one end and a Z-bend formed in the other.

Personal aside – when I was a kid, building balsa models, I used to dream of the day when I'd be so rich I could afford to spend fifteen dollars on a special tool for making perfect Z-bends, instead of making sloppy ones by hand with a needle nose pliers. Well, inflation has raised the price of a good pair of Z-bend pliers to $18.99, but in the scheme of things that doesn't seem like a whole lot of money anymore so I bought a pair just to have around for things like this.

Here they are installed in the airplane, with the servo arm in the neutral position. You can just barely make out the little steel clips that keep the clevises from popping open. I may actually come back and solder them permanently shut just to be extra safe.

Even with the servo arm and control sticks at each end of their total range of motion, the springs have a little bit of tension in them. That means they should never go slack and get tangled up on anything. Later on I can thread the clevises in or out later on as needed, although it looks like I got the lengths set pretty much right on the first time.

Commercialized

Sunday, May 27th, 2007

Today I earned my commercial pilot certificate. It was a pretty good day.

Polished canopy edges

Sunday, May 20th, 2007

Not much work on the airplane this weekend, and even less that was worth photographing. I spent several hours sanding the edges of the canopy with increasingly finer grades of sandpaper, starting with 120 grit and working my way down to 600. Then I broke out this buffing wheel and plexiglass polishing compound that I'd previously ordered from Ridout Plastics. (Nice people to deal with on the phone, but they really screw you on shipping – $25 in shipping and handling fees for ten dollars worth of parts?!?)

The special "plexiglass polishing wheel" turned out to just be a normal garden-variety soft cotton buffing wheel. The polishing compound, however, was interesting – instead of the liquid goo I'm used to seeing for a buffing/polishing application, it was almost like chalk in composition. To get it where it needs to be you peel back the cardboard tube and run the wheel across the chalky stuff until it picks enough up.

It certainly did the trick – the edges of the canopy and windshield are now as smooth as the edges of a pint glass. Excellent.

I think I may have finally seen the last of the most obnoxious plexiglass work – or at least I don't think I will need to do much more cutting or sanding. (and I also have enough magic polishing stuff to do another dozen airplanes)

The next tasks will be the canopy latch handle and the rear latch blocks, but I have other stuff I have to do first.

Fitted windshield

Sunday, May 13th, 2007

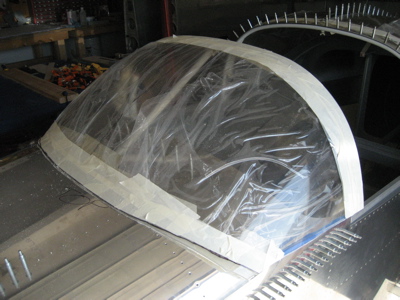
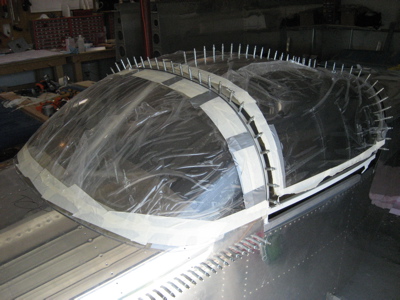
In order to fit the windshield to the fuselage, I clecoed on the forward top skin and bolted the rollbar brace in place:

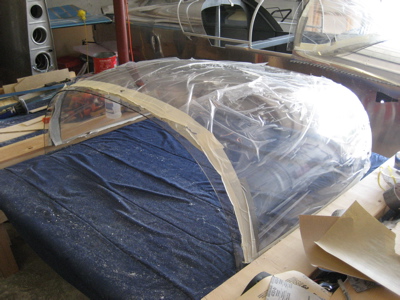
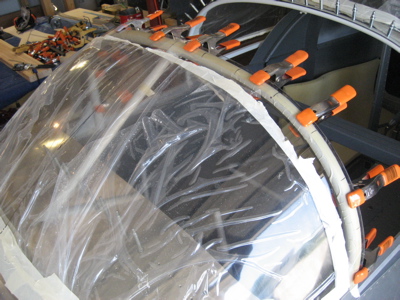
Here's the windshield on the fuselage before any trimming was done. The contour along the front doesn't match the fuselage all that well.

Here it is about halfway through the trimming process – getting better.

There isn't a lot of excess material to work with at the rear corners – actually the glass just barely overlaps the side skin. In retrospect, I wish I had waited to trim the lower edges of the canopy until after making the big cut, but I was blindly following the plans and didn't know any better.

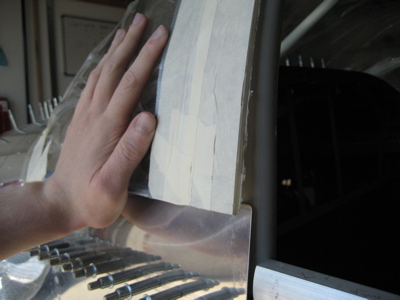
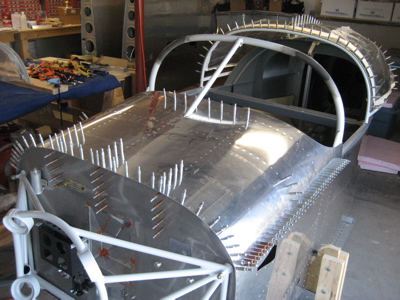
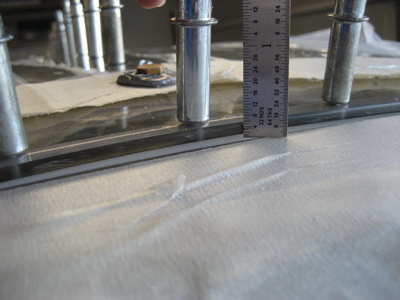
Much trimming and belt-sanding later, I got the front contour to match the fuselage shape pretty well. Once the windshield is fastened down, there will be essentially zero gap here.

There is gap of about a quarter inch on both sides of the windshield where it turns aft towards the lower corners. The fasteners will pull this in somewhat, but I'll still have to cover it up with the windshield fairing. If I'd had more material to play with I think I could have made this come out better, but overall it's not too bad.

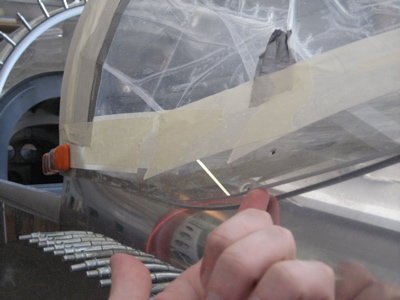
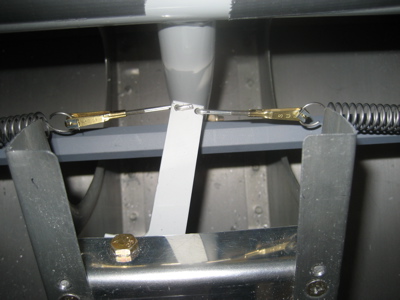
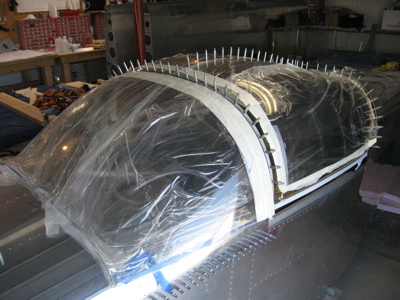
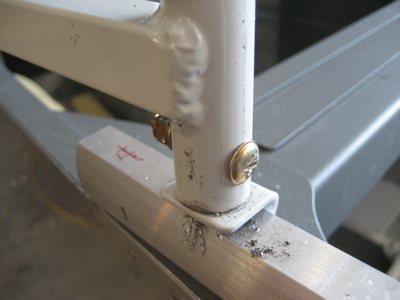
I duct taped the windshield to the rollbar in order to measure the height difference between the windshield and canopy:

The apex of the canopy was about 3/16" higher than the windshield. To fix this you can either raise the windshield with shims, or lower the canopy. I chose the latter because of the afforementioned issue at the aft corners.

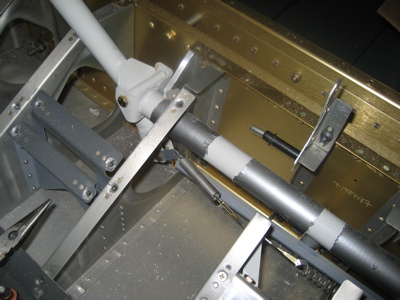
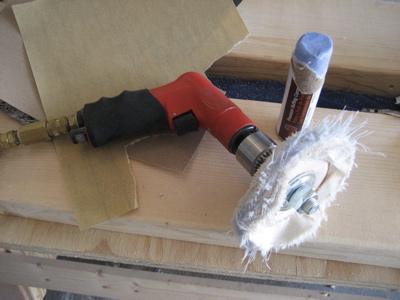
The canopy is lowered by whacking a piece off both ends of the forward bow tube:

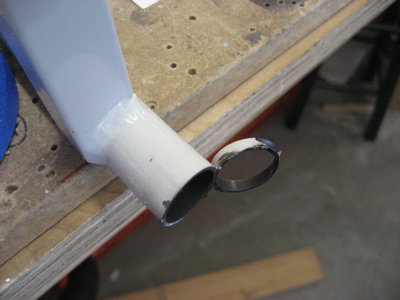
With the canopy back on the rollers, there's now a smooth transition between the top of the windshield and the top of the canopy:

With the height properly set, and everything clamped straight and true and triple-checked, I drilled the holes for the screws that attach the rollers to the canopy frame:

The canopy rolls very easily, thus making the hours of fitting and measuring that led up to this point all worth it.

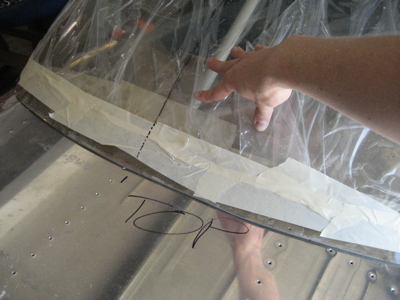
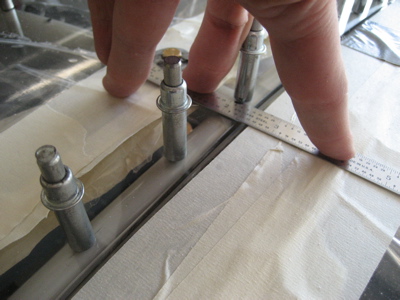
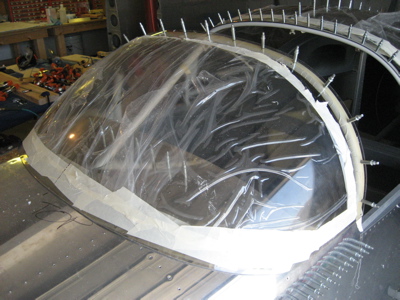
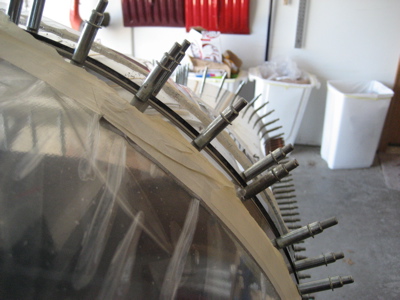
The next job was to drill the windshield to the rollbar, so I started with the same masking tape setup I used to drill the canopy to the slider frame:

Here is it after drilling. Because of the angle the windshield makes with the rollbar, the actual centerline where the holes need to go is not where you'd imagine it would be just by looking at it – it's important to use the tape method to get everything square.

The glass overlaps the side skin by about 3/16" on either side. This will all be hidden by a fairing later.

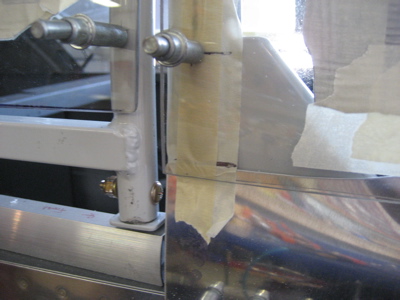
In the photo below you're standing on the right side of the fuselage looking forward towards the firewall. The rollbar and slider frame contours don't quite match, so the windshield bulges out from the canopy by about 1/8" at the 10 and 2 o'clock positions. This will also be covered up by a fairing. I'd be worried if the canopy was sitting proud of the windshield because that would have made the fairing difficult, but this way should be no big feal.

I still need to do at least one more round of trimming to finish off the aft edge of the windshield and finalize the gap between the canopy and the side frame tubes, but I'm hot and tired of being covered with grit.

Update: I couldn't resist spending another hour grinding away and making a mess. I got the canopy trimmed to its final size (I think) and I cleaned up the aft edge of the windshield. Of course I then had to take another shower to wash off all the grit. My next airplane will have a solid aluminum canopy and a TV screen to let me see out.