Archive for June, 2007

Started fitting aft canopy skirts

Saturday, June 30th, 2007

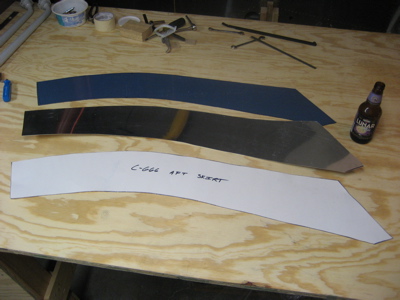
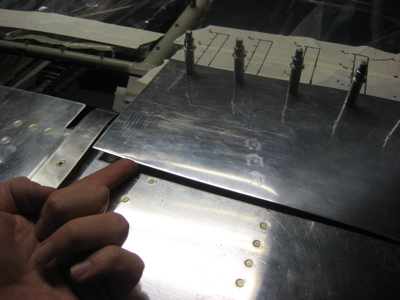
I cut the left and right C-666 aft canopy skirts out of the provided 0.032" material, using the pre-drawn outlines as a guide (though I left plenty of extra material on all sides). Since I know people often end up making multiple sets of these before they come out right, I made a posterboard template before doing anything else.

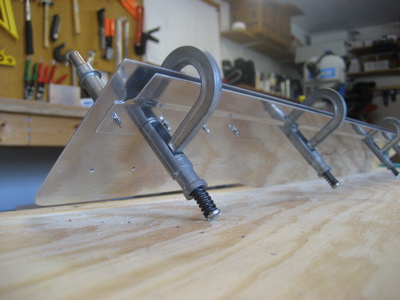
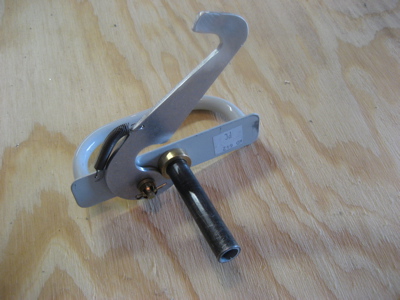
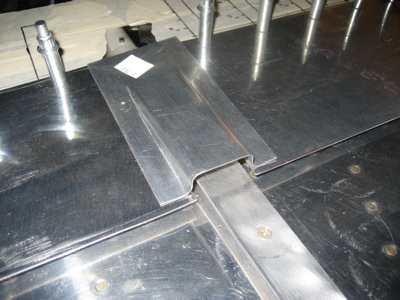
I built this roller out of wood in the hopes that it would do a superior job of bending the skirts to fit the canopy, but in the end it was just as easy to bend them by hand over my knee. This was a fun little side project though. Here I'm rolling a curve into a piece of scrap:

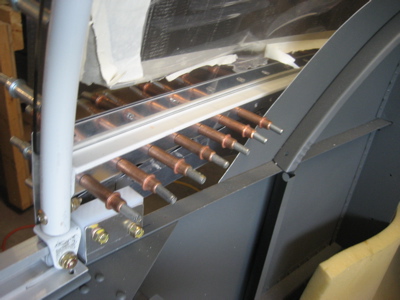
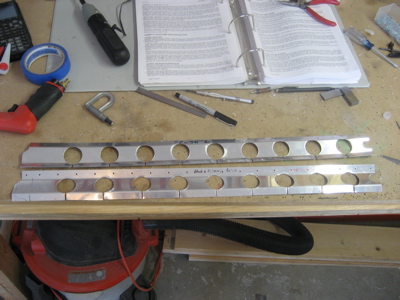
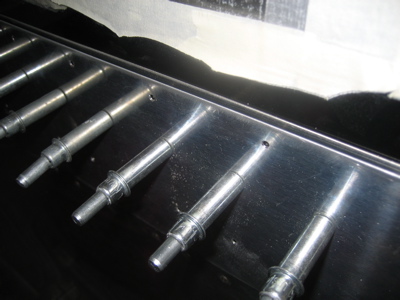
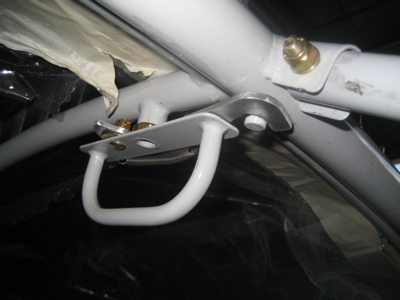
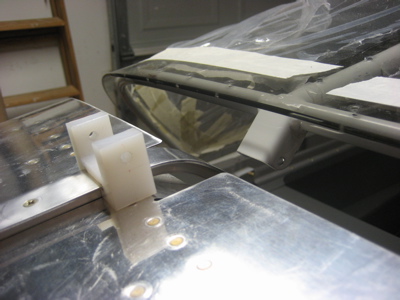
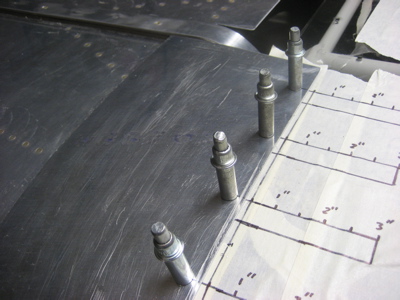
In an attempt to ensure a better fit of the aft skirts, I made and inserted 1/8" spacers between the fuselage longerons and the brackets that hold the rear canopy pin anchor blocks. I'll fit the skirts as best I can with these spacers in place – then when I remove them, the fit should improve a little bit more.

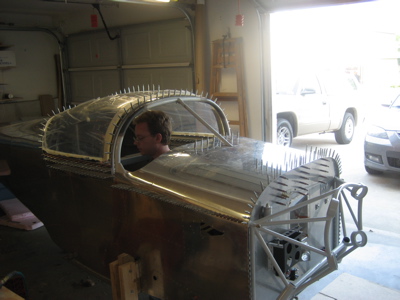
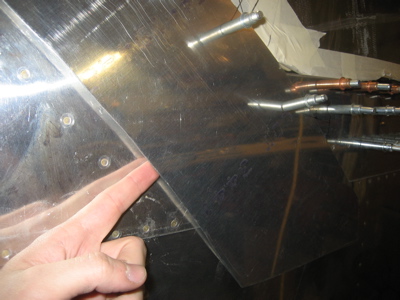
Since the spacers raised the aft end of the canopy, I had to disconnect the slider block from the frame in order to get the canopy shut:

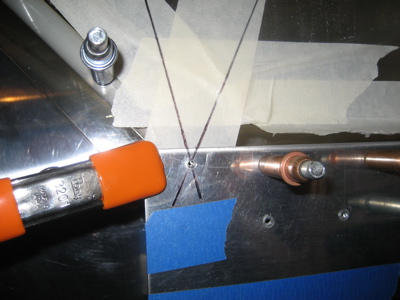
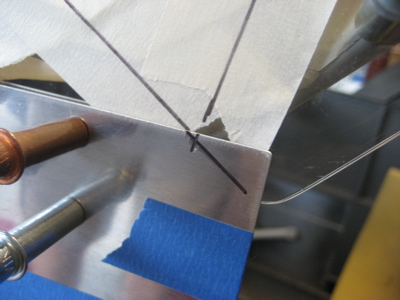
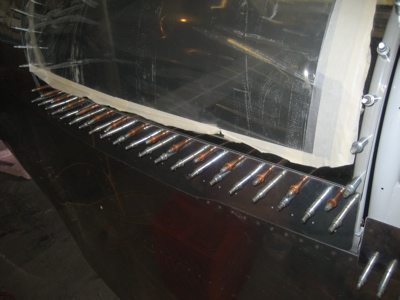
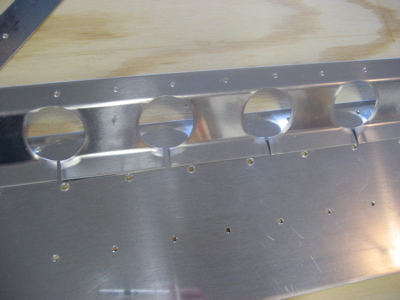
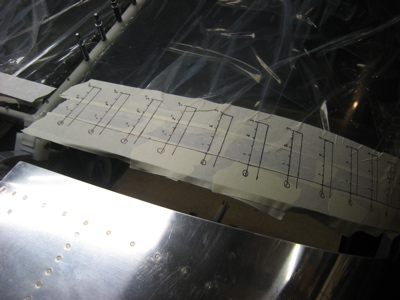
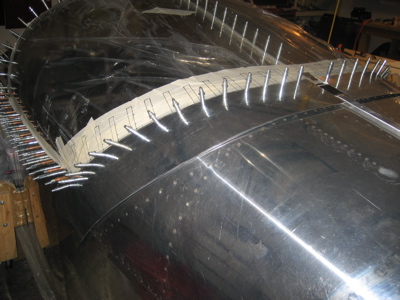
I order to locate the pre-existing holes in the canopy while fitting the skirts, I put down some masking tape and drew a bunch of guide lines using the method shown in the Orndorff video (i.e. line up a ruler with the hole, then draw an outline of it so you can find the hole later).

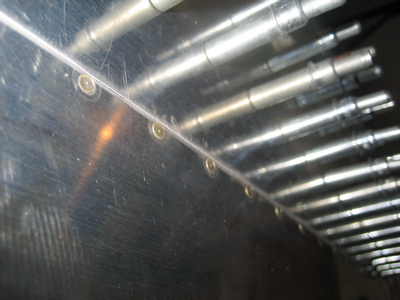
Mary came down and helped hold the right skirt in place while I marked and drilled the holes.

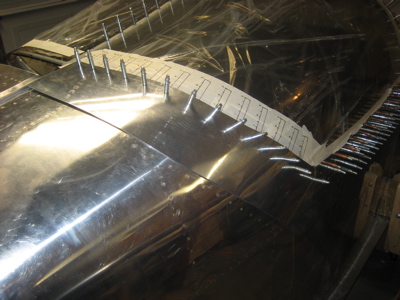
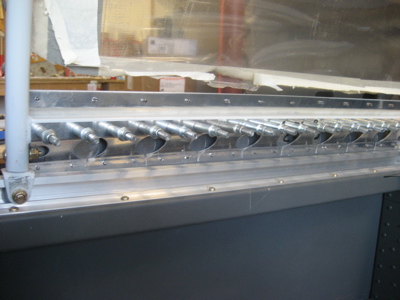
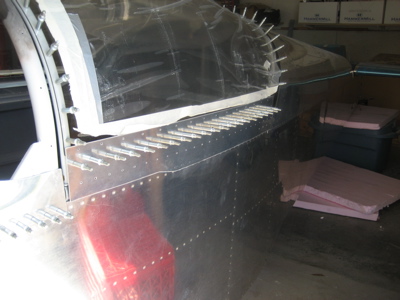
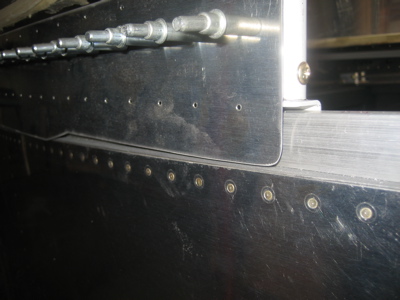
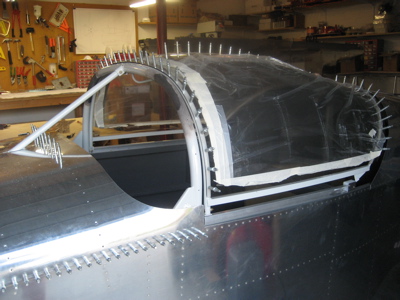
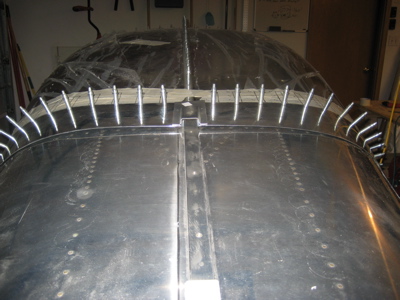
As I expected, there's a pretty big gap at the top…

…and also at the bottom. I know now that this is due to less than optimal positioning and shaping of the rear canopy bow at the outset of canopy construction, but in my defense it's hard to know exactly how to shape an RV canopy frame until you've tried to fit a set of RV canopy skirts.

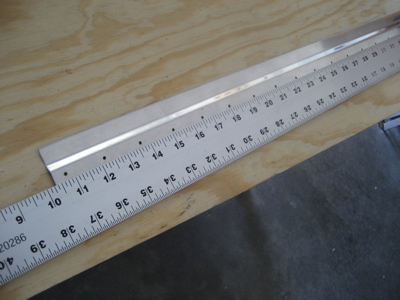
Once the pilot holes were drilled, I took the skirt off the plane, trimmed and smoothed the forward and aft edges, and reinstalled it.

Then I fitted and trimmed the left aft skirt, same as the first. It also has similar fit issues.

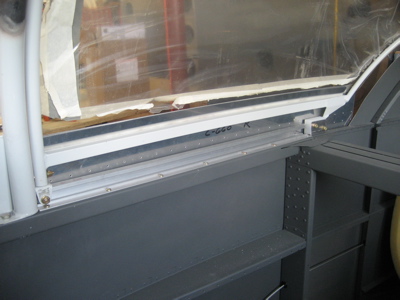
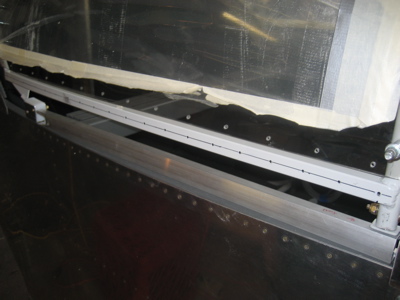
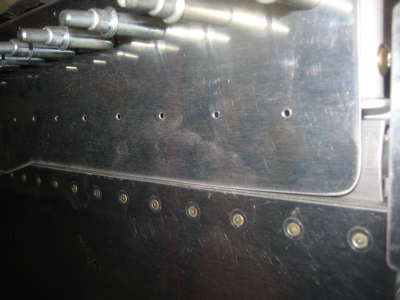
Here's another problem for later – the C-792 piece that covers the slider block is shorter than my canopy skirts. Oh well, I'll deal with the fit problems first.

Here's another view of the problem areas on top. I ordered a metal shrinker from Avery in the hopes that I can work the aluminum to get it to lay down on the fuselage properly, so hopefully this will be a "before" picture.

If all else fails, I'll throw the aluminum skirts away and make properly-fitting ones out of fiberglass, but I want to try doing it in metal first.

Misc canopy skirt stuff

Sunday, June 17th, 2007

The bottom-most holes in the slider frame rear bow ended up behind the side skirts, so I used the old intersecting-lines method to locate the proper hole location in the skirt. This is the passenger side:

Unfortunately, there wasn't enough edge distance on the pilot side to put a hole there. It's no big deal, since this will all be hidden underneath the aft skirts anyway. I'll probably put the pop rivet under the skirt and call it good.

I also enlarged all the holes in the C-791 skirt brace and slider frame to #30. This photo was taken after I'd removed enough clecoes to open the canopy and escape the fuselage, but you get the idea.

Not shown in the photos above: I also spent many hours playing with ideas for the aft canopy skirts. I spent a great deal of time fooling around with posterboard templates, but didn't reach any conclusions. I think I'm going to first try the plans method of fabricating the left and right aft skirts from single pieces of aluminum… if that doesn't work, I have some ideas for multi-piece skirts. As a last resort, I'll think about making the aft skirts out of fiberglass, like this or this.

Finished fitting canopy side skirts

Saturday, June 16th, 2007

The replacement parts arrived, so I replaced the mangled C-759 inside skirt on the passenger side. It's visible just above the lower canopy frame tube in this photo:

Then I drilled #30 holes through the pilot holes I'd already drilled in the outer canopy skirts, into the plexiglass, and out through the inside skirts. I used a plexiglass drill bit to go through all three layers, and it worked okay. The plexiglass bits seem to be able to go through thin aluminum without too much trouble.

After drilling, I removed the skirts and deburred all the holes. No reason to get a drill chip wedged in there and start a crack.

Then I made a new pair of C-791 canopy skirt braces. This time, I ignored the lightening hole spacing given in the plans. Instead, I located the holes and slots so they'd be sure to miss the rivets that attach the braces to the C-660 skirts. I also moved the forward-most lightening hole back an inch or two from the plans location, for reasons that will be made clear below.

The adjusted spacing gave me 9 lightening holes per part instead of the 10 called for by the plans, but whatever.

Then I crawled into the fuselage, slid the canopy shut, and drilled and clecoed the skirt braces to the slider frame. (This photo is actually from later on, but you get the idea) Then I had to remove the clecoes so I could open the canopy and get out.

Al came by to help with the next step, since it requires two people and Mary was at work. I sat inside the fuselage and held the bottoms of the skirt braces flush against the skirt with a wood block, while he pushed the skirts in to be flush with the fuselage sides and drilled the rivet holes from the outside. The goal here is to get the skirt braces to pull in on the side skirts so they sit flush with the fuselage sides at rest, and resist bowing out in flight due to the low pressure air going by the sides of the canopy.

Here's a view of the finished product, looking up at one of the side skirts from below, with the canopy shut. Except for at the yet-to-be-finished aft end, the fit is excellent. You can just barely get a piece of paper in between the fuselage and canopy skirt. Once the UHMW anti-scuffing tape is applied under the skirts, there should be a pretty good airseal here.

This photo explains why I moved the forward lightening holes in the skirt braces. It let me cut these little notches that prevent the nut holding the slider rollers to the frame from bending the skirt brace, as I've seen happen on other RV's.

I also had to do some trimming at the aft end to get the skirt braces to clear the anchor pin thingies.

Working on canopy side skirts

Saturday, June 9th, 2007

I marked a centerline on the outside of the lower canopy frame tubes, and drilled the C-660 side skirts to the frame:

I had to do a bunch of trial-and-error fitting of this area at the front of the skirts…

…because when the canopy is opening, the forward corners of the skirts want to dig into the fuselage decks unless you trim them back enough. I think I did an okay job here – there's a minimum but sufficient amount of clearance between the skirt and fuselage while the canopy is opening, which results in the minimum possible gap when it's closed. This will be covered by the fairing strip that goes over the rollbar, so it shouldn't leak much air. Also, note to self: Touch up the paint on the fuselage decks that you scratched up while fitting all this stuff.

The plans have you clamp the C-759 inside skirt to the C-660 skirt, and match drill the first four holes at the forward end:

Then you're supposed to sandwich the undrilled C-759 in between the canopy frame and the C-660 (both of which you already drilled) and just sort of let fly with the drill and hope for the best. I was skeptical, but it seemed to work okay on the second try. Here you can see the canopy sandwiched between the C-660 and C-759 skirts:

Unfortunately, on the first try I managed to let the C-759 slip down about halfway through, so the line of holes goes off in the weeds. This will cause edge distance problems once I drill the holes through the plexiglass, so I'll have to remake this part.

I also discovered that I need to remake both of the C-791 canopy skirt braces I made last week. You see, if you follow the dimensions in the plans, you end up with a bunch of places where there's not enough edge distance for the rivet holes. I'll have to make another set, this time substituting my own dimensions in order to make everything work. Sigh. Luckily these parts are cheap.

Hopefully the replacements will arrive by the time I get back from vacation. Sometimes I think I'm on track to set a new world's record for the number of RV-7 parts replaced. I guess that's what happens when you're a clumsy perfectionist…

Working on canopy latch

Thursday, June 7th, 2007

The sliding canopy is held shut by a simple latch that engages a pin welded to the rollbar. The latch mechanism also doubles as a handle you can grab to open and shut the canopy from inside the cockpit. I assembled all the parts per the plans, then spent some time filing material from the latch arm until it fit properly.

Here it is being fitted to the canopy and rollbar. I had previously filed enough excess material from the steel latch pivot tube to place the latch arm at the proper vertical position relative to the pin. The latch shuts with a gentle over-center action, just enough to keep it from vibrating loose; I didn't want to force it to put a lot of strain on the canopy and maybe break something later.

The exterior latch handle is made from a piece of tapered aluminum stock that Van's gives you, which you're supposed to whittle into a pleasing streamlined shape. Me being me, I spent the extra bucks to order a nice machined handle, which should arrive one of these days.

Lately I've been taking a lot of closeup photos but no shots of the big picture, so here's a snapshot of the current state of the canopy. You can see the afforementioned latch, as well as one of the pins and anchor blocks I was working on yesterday.