Archive for June, 2008

Sniffle valve

Sunday, June 29th, 2008

Fuel-injected Lycoming engines can sometimes experience a phenomenon wherein excess fuel drips down the induction tubes and pools in the intake manifold after shutdown. This can be a problem, since it could cause a troublesome fire during the next start. To alleviate this, you install a simple little one-way check valve in the bottom of the intake, which lets the fuel drip out of the engine onto the ground. For whatever reason, this item is colloquially referred to as a sniffle valve.

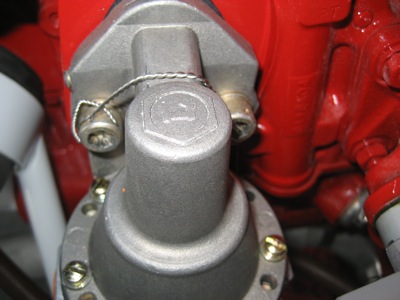
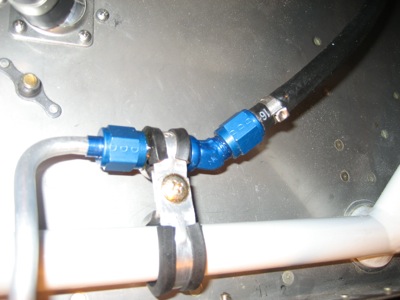
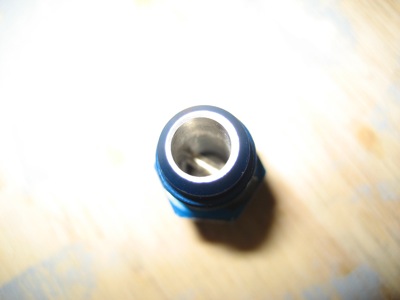
Here's a bad picture of the one I bought from Airflow Performance for a few bucks – it's basically just a normal AN fitting that's been drilled out and had a ball bearing and retainer clip inserted. Reduced pressure inside the manifold causes the ball to be sucked up to close the valve when the engine is running, but it drops down and lets the fuel drip out when the engine is shut down.

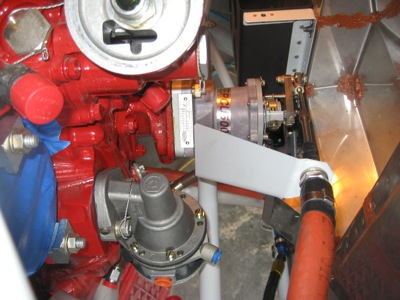
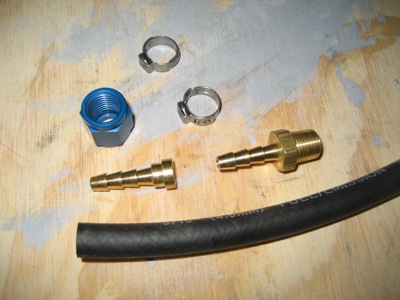
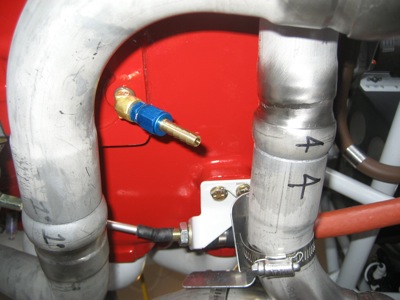
I knew from previous reading that the sniffle valve is too close to the exhaust pipes on an IO-360 with horizontal induction, so I installed it in a 45-degree brass street elbow to clear the pipes. The exact orientation of the valve is said not to matter much, as long as the ball is free to drop when the airplane is at rest. I also attached a 1/4" hose barb to 1/4" AN flare adapter, similar to the one I used for the fuel pump drain line.

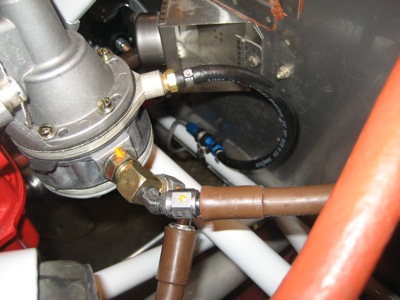
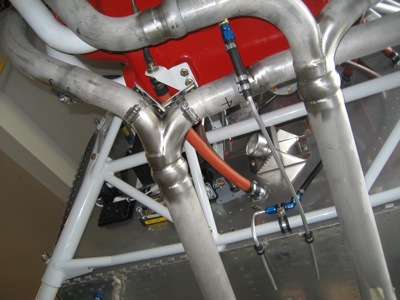
I ran another 1/4" aluminum line from the firewall up to the sniffle valve, using a length of 1/4" rubber fuel hose as a flexible coupling. The forward (engine) end of the aluminum tube is ever so slightly flared to give the clamps something to work with – using a real beading tool would have been best, but I can't afford one and this is not a critical application. The aft end of the drain tube is attached to the firewall flange with an adel clamp, just like its twin the fuel drain line.

One more of the million firewall forward tasks is complete… and with that, I'm off to try and make a dent in the beer and ice cream still left over from Saturday's party.

Installed new fuel pump

Sunday, June 29th, 2008

At last, a chance to work on the airplane! Following much finagling, I managed to get the new fuel pump installed on the engine. It's pretty tricky to keep the thing aligned correctly and get the bolts started, while making sure the pump actuator lever isn't hitting the side of the pushrod way up inside the engine that actually drives the thing.

Not really visible here is the new gasket I installed between the pump and the drive pad. I couldn't get a torque wrench on the bolts – actually I could barely get a hex wrench on them with the engine installed on the airplane – so I just torqued them by feel and installed safety wire. It only took me about five tries to get the safety wire installed properly in the narrow space available.

Since replacing the fuel pump seems like kind of a big deal, I decided to make an entry in the engine logbook. It says: 0.0 hours – Original fuel pump damaged during installation – Replaced fuel pump with new Lycoming LW-15473 in accordance with manufacturer's instructions.

With the fuel pump replacement finally finished, I was now back to where I was a month ago. The next step was to hook up all the hoses, but this time around I didn't want to use a steel fitting for the drain line and risk fracturing the pump again. I decided to use a brass fitting, but I couldn't find one that I could easily substitute for the previous one. Luckily, one of the things I learned when I owned an airplane with a car engine in it – besides the most important lesson, being for goodness sakes, don't ever buy an airplane with a car engine in it – was how to make aircraft and automotive plumbing play together. Here's some 3/16" I.D. automotive rubber fuel hose, a brass hose barb to pipe thread adapter, a brass 3/16" hose to 1/4" AN flare adapter, an AN818-4D flare nut, and some Oetiker stepless hose clamps:

Down at the bottom of the firewall, the rubber hose comes off the suspended plumbing contraption that carries the dumped fuel out the back of the cowling. I really like this method of adapting cheap rubber hose to AN plumbing. Of course, I wouldn't use it for anything other than a vent line, but it's easy to make and I think it looks more professional than the plastic ice maker hose the plans specify for this application. I already had the special tool needed to install Oetiker clamps, so no problem there.

The drain line attaches to the fuel pump via the hose barb fitting, and that's that. I also installed the other three fuel hoses (input, output, and pressure) and torqued all the fittings.

Woodworking

Tuesday, June 10th, 2008

I haven't worked on the airplane in a little while, but I have been keeping busy with other things. For example, we finally broke down and bought a new TV to replace the third-hand 27-incher I bought from a guy at work for fifty bucks many years ago. However, I'm too cheap to pay hundreds of dollars for a simple stand to set the new display on, so I decided to build my own.

Woodworking is not my forte, but I managed to put together a pretty decent looking cabinet out of laminated pine planks and a sheet of birch ply for the back. It took me about three evenings to get all the pieces cut, fitted, and sanded, and then Mary and I spent half a Saturday putting it all together. The top is attached with Miller dowels for a smooth finish.

I've built plenty of workbenches, storage shelves, and sawhorses in my time, but never anything that actually had to look good, so the wood-finishing process was new to me. I was worried that the low-quality pine I used wouldn't take the stain evenly, but after a coat of pre-stain sealer and a coat of oil-based stain, it looked pretty darn good:

I let it dry overnight, and then applied the first coat of clear varnish. Almost immediately I could tell something was wrong… the varnish started moving the stain around! Arrgh. The varnish topcoat went on okay, but it seemed to somehow soften the stain and cause blotchiness. Either the stain wasn't all the way cured, or perhaps the wood really is of such bad quality that the stain didn't really soak in. Oh well – I'll just tell people it's a "distressed" finish. I was pretty distressed when I saw it.

I sanded the first coat of varnish with 400 grit, then put two more coats on over the next couple days. I sanded the final coat with 800 grit crocus cloth for a nice smooth finish. So here's the final product – my old stereo stuff will go underneath, and the cables will pass through the holes in the back:

Overall it turned out pretty good, except I'm pretty disgusted with the finish. The total cost was under a hundred bucks, not including the value of my time. If I had it to do over again, I'd probably make it out of something better than pine – oak, maple, maybe something else? – and be more careful about the staining process. I'll probably also use a semi-gloss topcoat next time, instead of satin.

Well, that's done. We now return to our regularly scheduled airplane building.