Archive for July, 2009

Elevator/aileron speed controller

Sunday, July 26th, 2009

One of the things that always annoyed me about my last RV was that the electric elevator trim was incredibly sensitive at normal cruise speeds… trying to trim out control pressures would always turn into a game of "how fast can I press and release the trim button so the airplane doesn't get out of trim in the opposite direction". So to improve that situation with this airplane, I bought a Safety-Trim two-speed trim control unit, which gives you the ability to slow down the trim servos when flying faster than a preset airspeed threshold. It also provides some protection against trim runaway due to a stuck switch, which is nice.

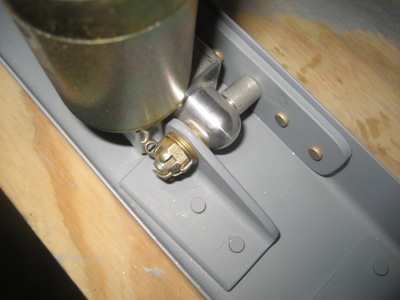
To mount it, I made some little standoffs from scrap alclad:

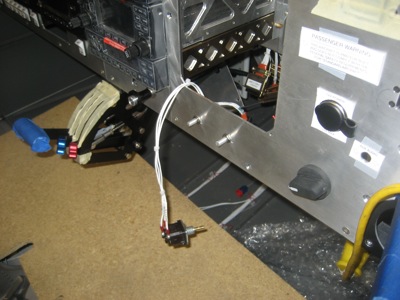
I attached it to one of the ribs under the pilot-side baggage floor. It's a pretty short run forward from there to the control sticks, and the wires to the servos can go fore and aft through the center tunnel. I'll run the wires to it later – right now I'm just trying to get all my boxes mounted where they need to go so I can plan my wire runs.

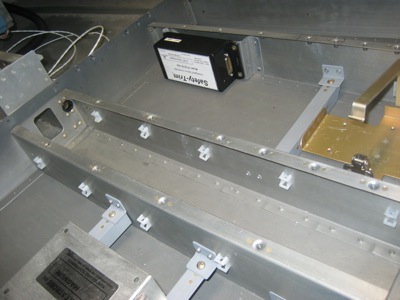
In the photo above, you can also see that I've riveted a bunch of plastic tie wrap anchors to both sides of the left and right tunnel ribs. They'll get put to use soon when I start running wires through the tunnel

Transponder antenna doubler

Sunday, July 26th, 2009

I bent a doubler for the transponder antenna out of 0.050" alclad and drilled a bunch holes for rivets and mounting studs and antenna connectors through it:

Then I crawled into the fuselage and match-drilled the doubler to the belly skin and the F-729 bellcrank rib, about a foot behind the baggage bulkhead. In terms of the length of coax needed to reach this location, I'm right at the limit of what the Garmin install manual allows, but I couldn't find a better place to put it. Not to mention, I hope the transponder-rays won't do anything weird to the pitch servo. Also, I shortened the doubler slightly between these two pictures, since I'm thinking about moving the ELT back here and I wanted to be sure to leave plenty of room.

A view from the outside. I need to deburr, dimple, and alodine the mating surfaces, and then see if I can coax Mary into helping with the riveting duties.

Marker beacon adapter

Sunday, July 26th, 2009

For whatever reason, designers of audio panels with marker beacon receivers in them never seem to do the obvious and put a BNC connector on the back (as you'd find with a comm radio, GPS, etc). That means you have to fabricate an adapter to go from the antenna coax to the D-sub pins on the back of the audio panel:

Here's a closer look… the center conductor is spliced to a 22 AWG wire, and another one is soldered to the shield. A female BNC connector is crimped onto the other end, and then I put heatshrink over the joint. What makes it a little harder is that the butt splice can't withstand the heat used to shrink the solder sleeve (ask me how I found out) so the order of operations gets a little fiddly.

I haven't run any antenna coax yet, of course, but this is just one more little item on my to-do list.

Tail weight

Sunday, July 26th, 2009

I got tired of the fuselage swaying and rolling back and forth while I was leaning over the gunwales working on something, so I took out the tailwheel fork and built this rig… it's just a plastic bucket filled with concrete, with a dowel sunk into it.

In the middle of the concrete glob is the business end of a toggle bolt, and the dowel is drilled to accept the bolt and act as a guide. After letting it cure for a day, I ended up with the world's heaviest nutplate.

To dress it up a bit, I cut a disc out of some scrap particle board.

Another piece of drilled dowel goes on top, and the tailwheel fork slips over it.

I made a wooden washer and bolted the tailwheel fork into the bucket of cement. It's now so secure that it might as well be anchored to the floor. I don't know why I didn't do this a couple years ago.

Flap motor wiring

Sunday, July 19th, 2009

Since I had one of the required components in hand already, I decided to also work on the flap motor and associated wiring this weekend. Here I've mounted the flap positioning system control box on the new backrest brace:

Here's another view to show how it stands off from the underlying rivets, thanks to a few nylon washers. That dimpled hole in the foreground is for mounting an adel clamp.

As I previously threatened, I cut the wire harness between the control box and position sensor and crimped on some connectors. Now the motor and control box don't have to both come out of the fuselage at the same time.

Since the flap motor is now no longer permanently tethered to anything else, I couldn't think of a reason not to (semi) permanently attach it to the flap actuator channel. This photo is proof that I did put the cotter pin in:

Then I spent several hours running wires to the flap switch and pulling wires back to the flap motor. Properly bundling and securing new wires takes me about ten minutes per linear foot per wire (longer if I have to drill new grommet holes or install new clamps or tie wrap anchors) so consequently this took all afternoon. I left the flap switch hanging from the panel for now, since there's no need to go to the trouble of bolting it in place for an electrical test.

Once I had all the connectors installed, I plugged it in and gave it a floor run… it works! Bump the switch, and the flaps move one notch up or down. Nice. I'll clean up the wires in a future work session.