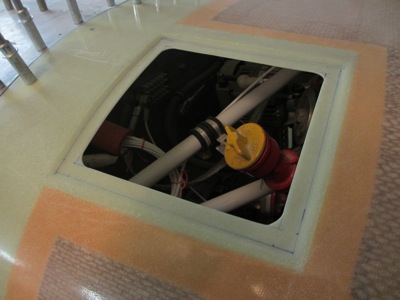
One of the many places on the airplane where builders are given the opportunity to customize is the little door on the engine cowl that lets you stick your hand in and check the oil level. The standard RV oil door is a piece of fiberglass with a piano hinge and a couple of quarter-turn fasteners – nothing wrong with that, but I wanted something a little different. I had the fiberglass door on my last airplane, and it had a tendency to flex during high-speed flight, and would even pop open unexpectedly on occasion. The solution, of course, is to either add stiffness to the fiberglass door, or build the door out of something stronger. I had some 0.063" aluminum laying around, so I decided to make the oil door for this airplane out of metal instead of glass. I also decided that I wanted a different hinge and latching mechanism, for purely personal reasons.
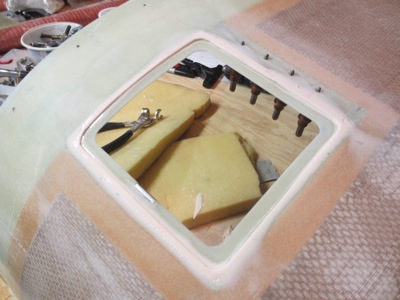
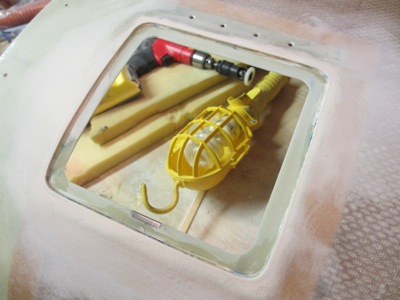
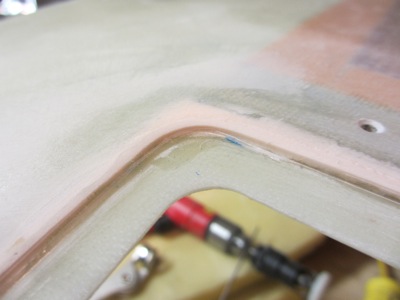
I started by squaring up the edges of the cowl cutout and making the corners nice and round:
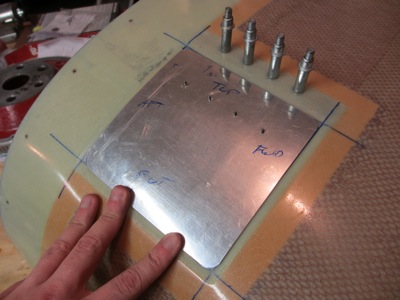
Then lots of iterative fitting, trimming, and bending to get the aluminum door to fit the opening. The cowl has a gentle conic section at this point, a shape which the aluminum doesn't naturally want to follow without some smashing persuasion.
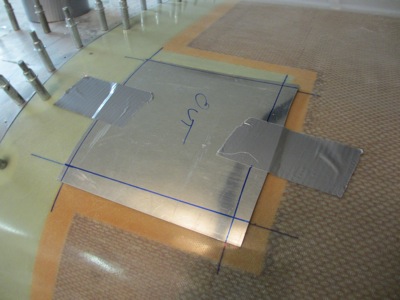
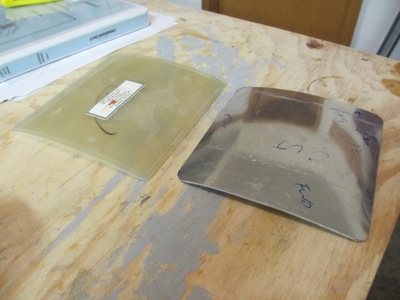
Here's the aluminum door, shaped and trimmed, sitting next to the stock fiberglass door that came with the kit:
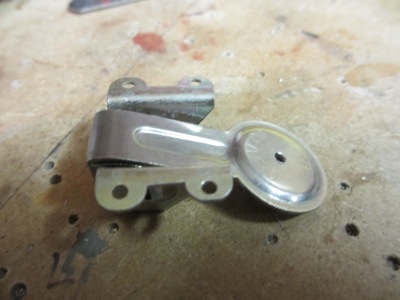
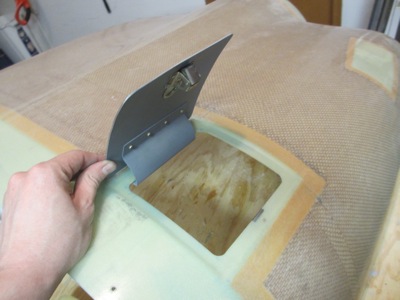
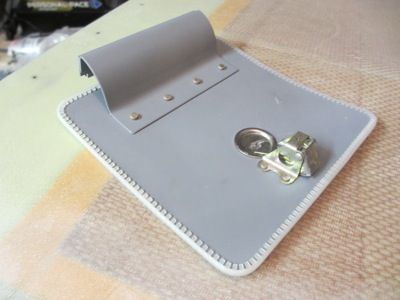
Instead of the standard piano hinge, I bought a "hidden hinge" from Nonstop Aviation (whose name always makes me think of an old Brian Aldiss novel, which by the way was not great). Lots of folks install this type of hinge, including plenty of certified airplane factories. It's just a piece of regular hinge with a sort of gooseneck extension riveted on, thus allowing the pivot axis to be tucked cleanly out of sight underneath the cowl – I could probably make my own if I had a decent bending brake. It works the same as a piece of piano hinge, of course, but it looks a little nicer. It's spring-loaded too, although I left the spring out while I was fitting the oil door so it wouldn't launch itself across the garage.
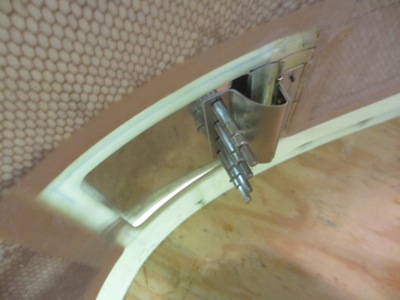
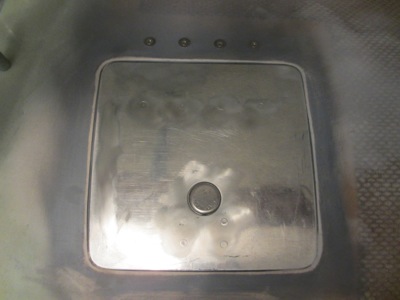
Here's what it looks like with the door closed – no visible hinge line:
It takes some adjusting to get the door to open properly without binding, and without the inside edge crashing into the cowl and scratching the paint.

The hinge is flat and the inside of the cowl is curved, so I made it flat by laying up an epoxy/flox mixture and letting it cure with the hinge clecoed in place:
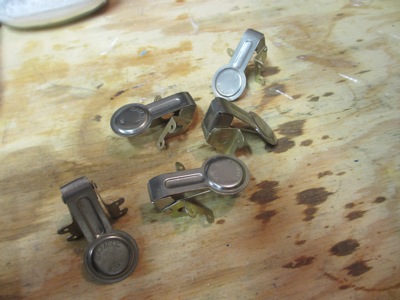
I wanted to use a push-button latch instead of the quarter-turn fasteners called for by the plans, so the oil door can be opened without tools and without anything sticking out into the breeze. There are basically two choices here: the Hartwell H5000, which holds very securely but is hard to make look nice, and the Camloc KM610, which is easier to install but trickier to make latch properly. The tie-breaker for me is that the Hartwell latch when operated tends to spring open like a demented mousetrap, and I've bruised my knuckles on them too many times to want to go to the trouble of having one on my airplane.
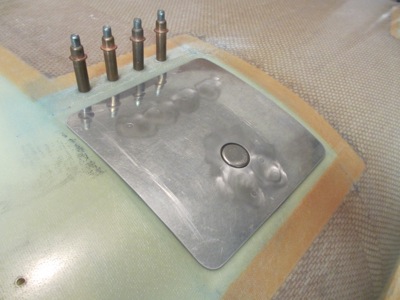
Also, pay no attention to the prices in the preceding links – those are new-certified prices, which are ridiculous. There's a surplus place in the neighborhood that sells new-condition Hartwells for ten or fifteen bucks and Camloc pushbuttons for five, so I picked up a handful of the latter in various sizes to play with:
Since they were so cheap, I removed the spring from one and drilled a hole in the exact center of the button, thus turning it into a drill jig for properly locating the mounting holes relative to the main hole:
It was then no sweat to drill the holes to mount it, although you do have to be super careful about where you position it relative to the edge of the cowl cutout. Too far forward, and it won't latch; too far back, and it will latch easily but it won't hold properly. Patience counts here.
So does test-fitting:
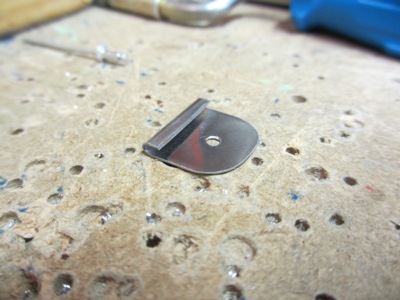
Here's a view from the underside. Note how the latch tongue is pretty short as well as pronouncedly rounded, which is what causes the difficulty.
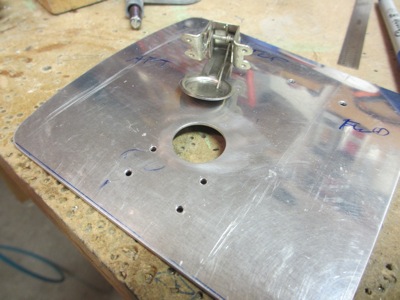
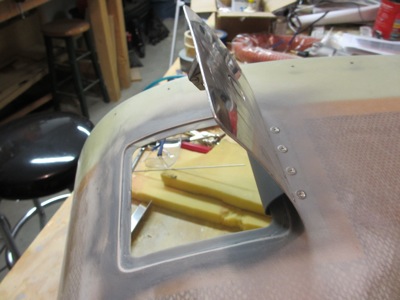
To get the clecoes out of the way and make sure the whole works was properly rigid, I riveted the latch and hinge to the door:
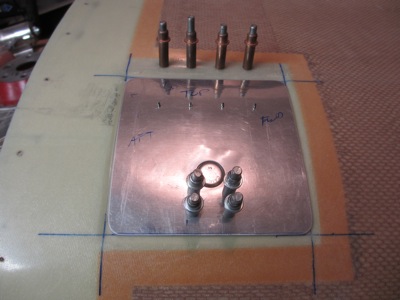
As pictured, the latch tongue bears on an un-reinforced fiberglass surface, which of course won't do at all. To fix this I fabbed a little striker plate out of some thin stainless steel material I bought from the K&S display down at the local hardware emporium:
A single flush rivet holds the striker plate to the cowl:

Once I had the metal parts built and the overall mechanism working (which was fun) it was time to make the fiberglass look cosmetically acceptable (which is never fun).
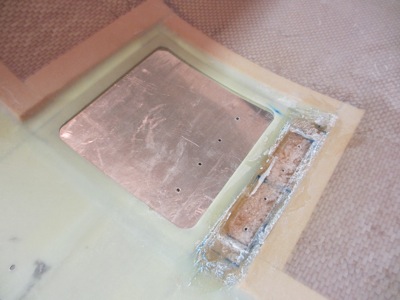
I protected the door with packing tape, then latched it in place and squeegeed a flox/microballoons/cabosil mixture into the gaps between the door and the cowl.
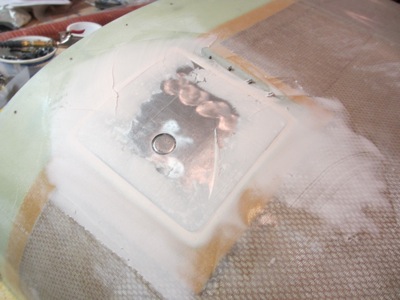
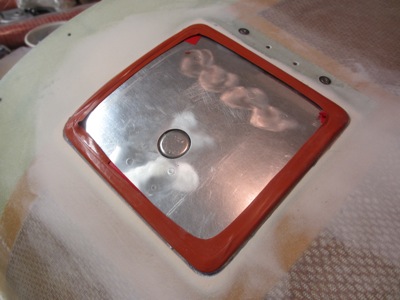
After a couple iterations of sand-fill-sand, the cowl was a good match to the shape and contour of the oil door. But I had a problem – there wasn't enough gap around the door to let it actually open. Hmm, obviously zero-clearance is no good here.
What I wanted was something I could put around the circumference of the door to provide a uniform separation between the metal and fiberglass for a cast-in-place operation. I experimented a bit with some of this nylon grommet edging material I had laying around, but it wasn't quite right. Kind of an interesting idea to keep in mind for the future, though.
In the end I hit upon the idea of using some silicone fusion tape instead. This is close to ideal, since it's fairly thick, resists epoxy, and follows the curved corners without wrinkling. I dremeled out a gap around the cowl opening, then wrapped the door with two layers of silicone and latched it in place.
Then I spackled in a new layer of filler:
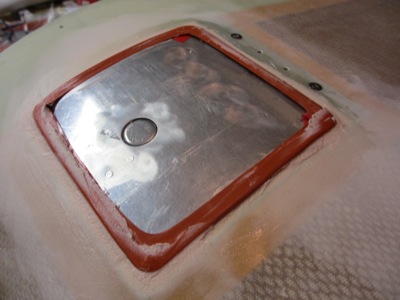
The result, after puling the door out and sanding down the high spots, was a set of nice straight edges and round corners. I forgot to take a photo of it, but this technique gave me a fairly uniform 1/16" gap all around the door opening.
As I expected, the clearance was a bit less around the corners where the rubber tape stretched, but I got that cleaned up pretty well with a file.
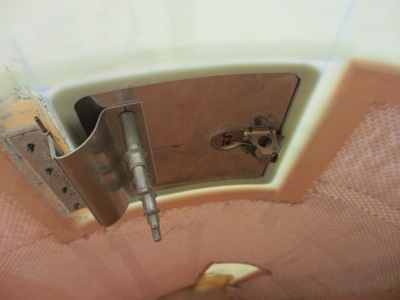
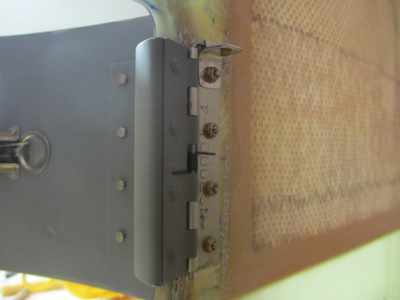
I attached the hinge to the cowl with stainless screws and tinnerman washers, the better to keep the fasteners from pulling through the fiberglass. The grey splotch here is just a misting of primer I sprayed on as a guide coat to help me sand down the filler.
Inside, I made a little hinge pin retainer out of some angle stock and a leftover hinge eye I found in the scrap pile. It picks up one of the mounting screws and keeps the hinge pin from getting away.
Here you can see how the gap looks – it's a bit deceptive in a photo because the coloring is uneven where I sanded, but in person it looks pretty nice. I'll let the painter fix up the last 10%.
Here's a video I shot showing how the whole thing operates. Dig that solid latching action!
And now I need to clean up the garage before I do anything else. What a complete mess.