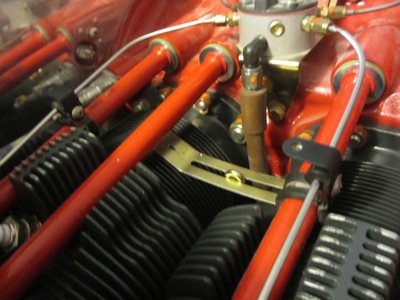
The ignition leads for the magneto all originate from a sort of combination cap/connector thingy, which screws into the back of the magneto housing:
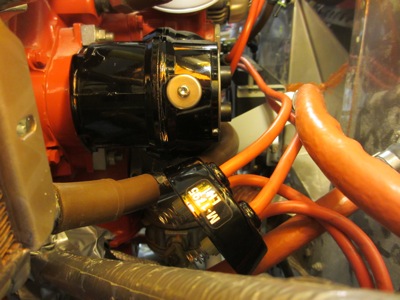
It only goes on one way, so it's hard to mess up. I had to use a Torx bit and a ratchet to get the screws in. Also note how close the ignition leads are to the prop governor cable. This is another time where I wish I'd known then what I know now – I might have moved the firewall penetration for the prop governor an inch or so to keep it away from the mag. Remember what I said earlier about chickens and eggs?

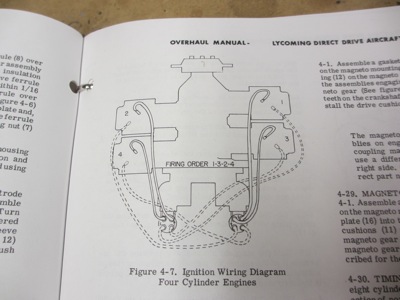
The firing order of the magneto isn't specifically written on the unit anywhere, other than a symbol that identifies the lead for the #1 cylinder. I found what I hope is the correct firing order in the Lycoming overhaul manual. In my installation, the magneto fires an aircraft-type plug in the bottom hole of each cylinder, and the P-Mag fires a set of auto plugs on the top side.
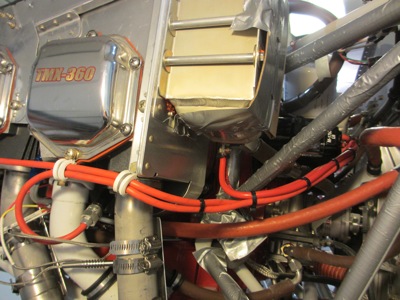
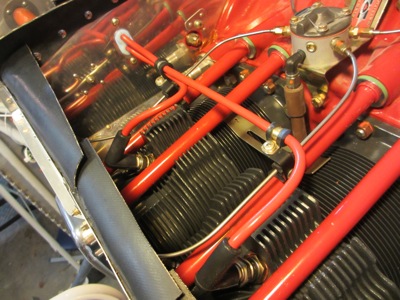
The #1/#3 plug wires from the mag head over to the right side of the engine, and the #2/#4 leads from the P-Mag come back the other way, so there's a continuous bundle of plug wires strung across the back of the engine. High-temperature tie wraps hold it all together, and keep the wires out of the way of the prop cable.
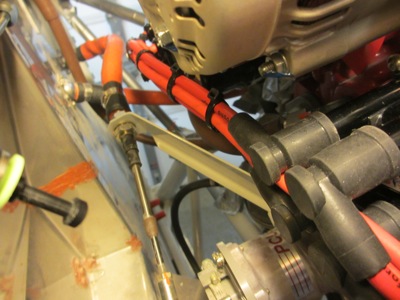
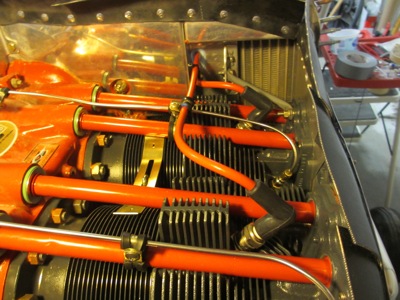
Moving around the lower left side of the engine, the bundle of ignition leads ducks under an engine mount tube and turns the corner with the help of an adel clamp affixed to the bottom of the #4 cylinder baffle. You can also see where I put cardboard on the oil cooler to keep the delicate fins from being smashed by a wayward wrench.
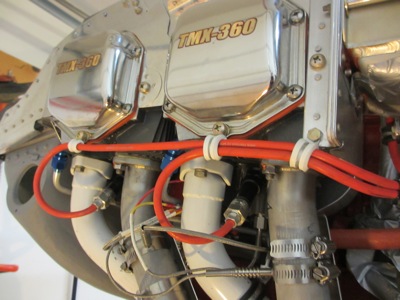
Clamps on the rocker covers bring the ignition wires forward to the bottom plugs on #2 and #4. I used high-temperature silicone adel clamps here since they're screwed directly to the hot cylinder heads. Maybe not necessary, but I felt like doing it.
Aft of the #4 cylinder, the wire bundle splits in half and a pair of leads heads upwards, inboard of the oil cooler. You can sort of see where I used a pair of adel clamps to affix those two wires to the fitting on the bottom of the oil cooler.
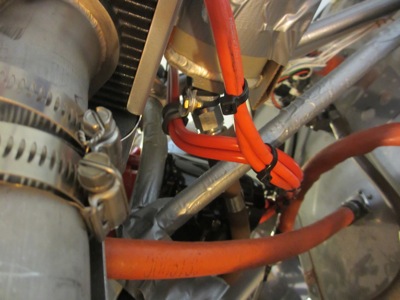
Here's a view of the same pair of wires, looking down from the top. After passing up between the oil cooler and engine mount, they turn forward again and run through the special grommet in the rear baffle.
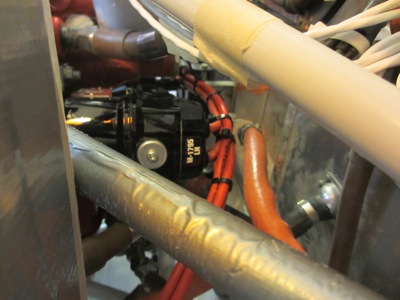
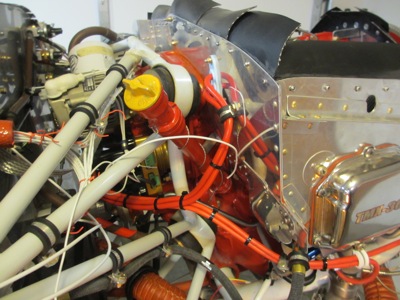
Moving back to the rear of the engine, here's another view of the "highway of ignition wires" that runs horizontally across. The P-Mag uses automotive style push-on ignition leads; the firing order is fixed but well-documented.
The wire bundle that goes to the #1/#3 cylinders snakes through the engine mount before splitting to go to the top and bottom plugs. The way this ended up working is kind of clever – the top plug wires are attached to the rear of the #3 cylinder baffle, which helps lift up the whole wire bundle and keep it away from the engine mount.
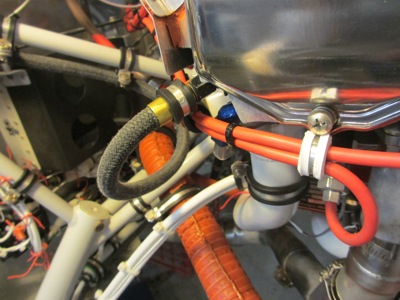
At the rear of the #3 cylinder, I used a pair of adel clamps on the end of the manifold pressure hose to guide the lower plug wires. I will probably put a drop of RTV in between the wires and the blue oil drain fitting in the center of the photo, since they come pretty close to it.
Same setup for the lower plug wires on this side – clamped to the valve covers and looped back onto the spark plugs:

Here's a view of how the upper ignition leads for the #1/#3 cylinders curl around the oil dipstick and penetrate the #3 cylinder baffle. I riveted on a doubler to reinforce the area where the adel clamp attaches; my 4" squeezer yoke was just long enough to do the job with the baffles installed on the engine. I may not have had to do this if I'd located the pass-through grommet a couple inches further outboard, but like a dummy I used the location shown in the plans and assumed it would be correct (ha!). It all worked out in the end, though.

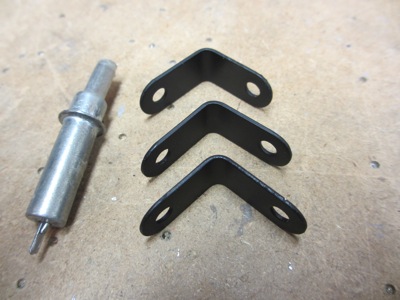
For securing the ignition leads on top of the engine, I made a set of little angle brackets from 4130 steel, painted for rust prevention.
These I attached to the same clamps that brace the fuel injector lines to the pushrod shroud tubes:
Then I used yet more adel clamps to secure the plug wires as they fly over the top of the engine:
Same thing on the other side, although only a single clamp is needed due to the way the cylinders are offset:
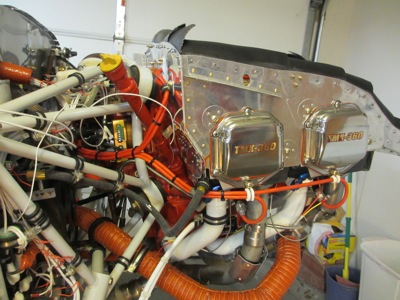
It's all very neat and tidy on top of the engine now:
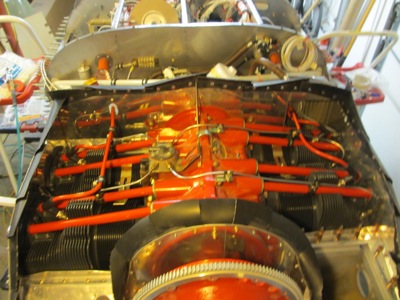
It took a lot of head scratching to get to this point, but in the end I'm happy with how the ignition harness routing worked out. All the wires are securely fastened in place, and nothing is in danger of rubbing on the engine mount, nor any other fixed structure, even when the engine shakes around.