Archive for the ‘Wings’ Category

Fuel system check & calibration

Friday, March 15th, 2024

Today's task was to flush the fuel tanks, test as much of the fuel system as possible, and calibrate the fuel quantity gauges.

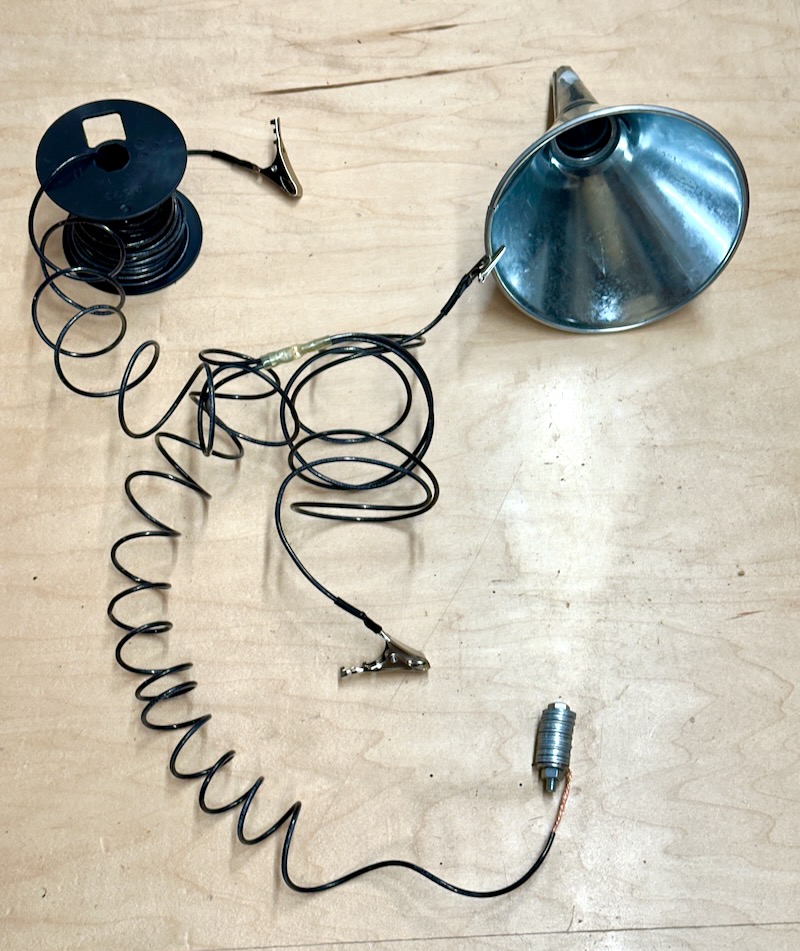
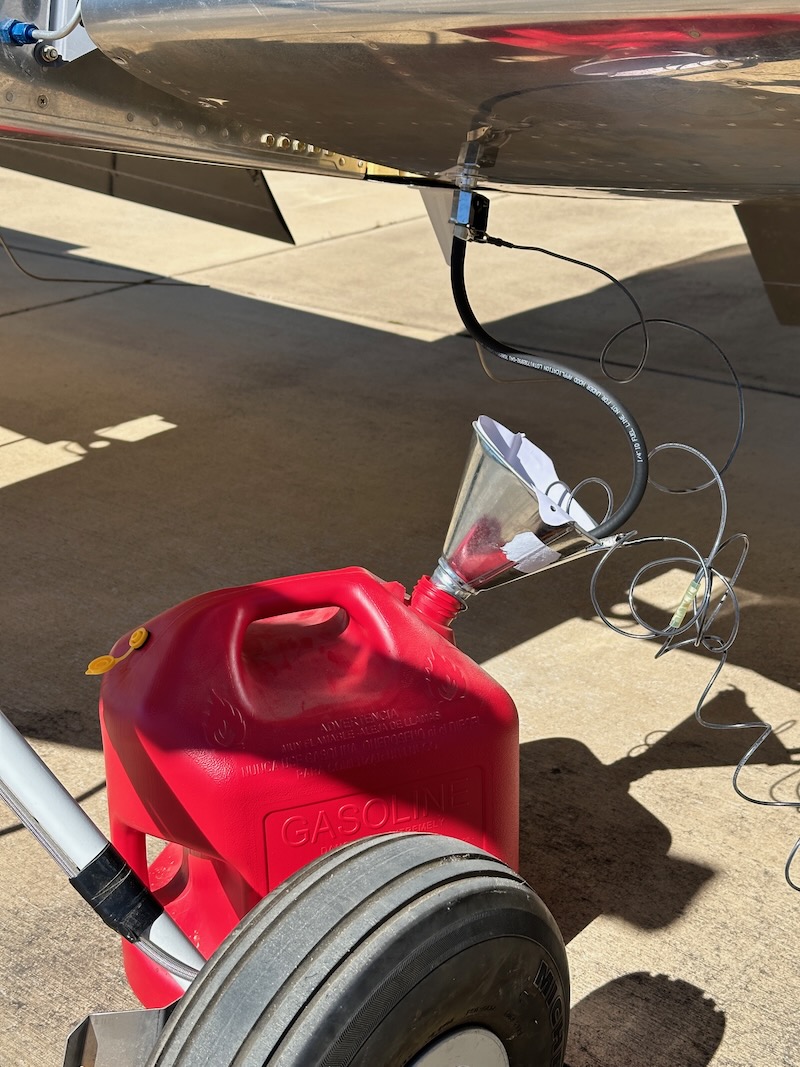
To avoid blowing myself up, I fabricated this simple grounding harness from a spool of hardware-store wire. It has one alligator clip for the airplane, one clip to attach to a metal funnel, and a third clip on the end of a long run of wire that I can connect to a ground rod if needed. There's also a length of wire with a weight on the end (made from a bolt and a stack of washers) which I can drop down the neck of a plastic gas can. The goal here is to prevent a potential difference between the airplane and the fuel container due to the static electricity generated by fuel flowing from a tank being drained, which could otherwise cause a spark. This might be overkill, but fuel flowing through rubber and plastic can do funny things, and I enjoy not being exploded.

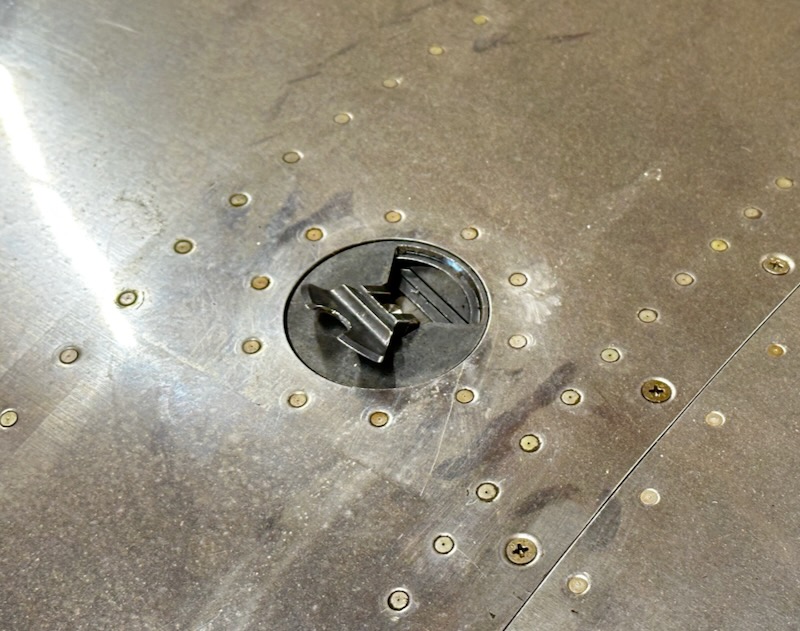
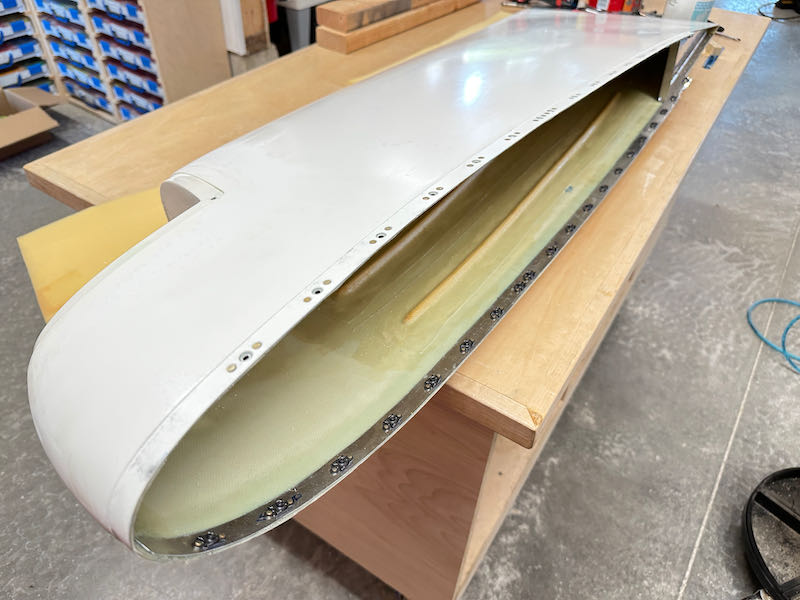
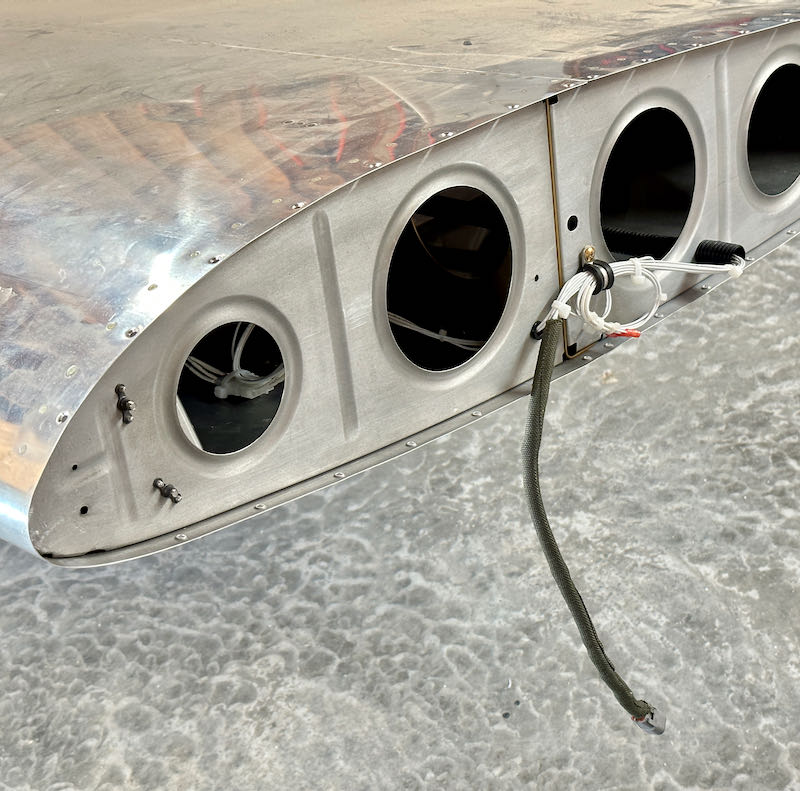
I temporarily removed the fuel tank drains, and installed a pair of ball valves with rubber fuel hose attached. With this setup and the ground rig connected, I flushed about ten gallons of avgas through each tank, draining it back into the gas cans through a clean paint filter:

Happily, I only found a few tiny particles of trash in the filters, and nothing leaked:

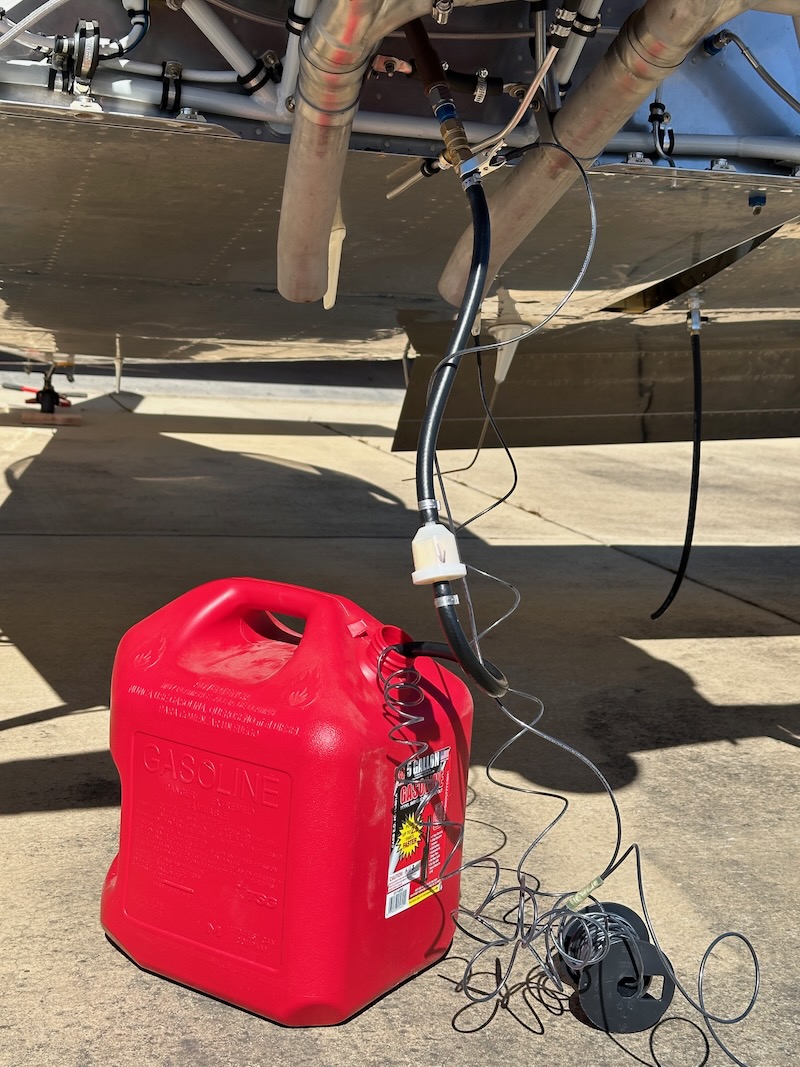
Then I disconnected the fuel hose at the inlet to the mechanical fuel pump, and used the electric boost pump to run several gallons from each tank through the fuselage plumbing and back into gas cans. This allowed me to check most of the plumbing for leaks, verify the operation of the fuel selector, and test the boost pump and fuel flow gauge. I put a lawn-mower fuel filter in the temporary drain hose to avoid putting any trash back in circulation:

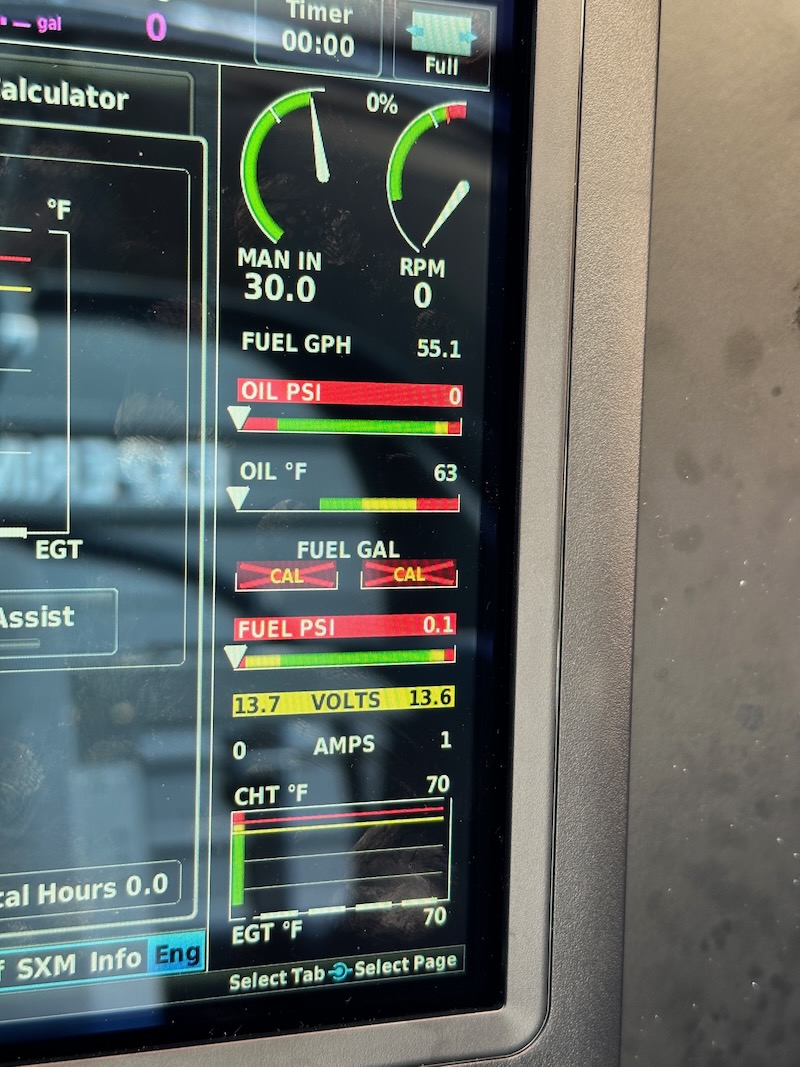
The fuel flow gauge was showing about 55 gallons per hour with the boost pump drawing from either tank. Judging by my watch, it was filling the gas can at the rate of about a gallon every minute, so that number seems believable. No fuel pressure indication here, since the hose is disconnected:

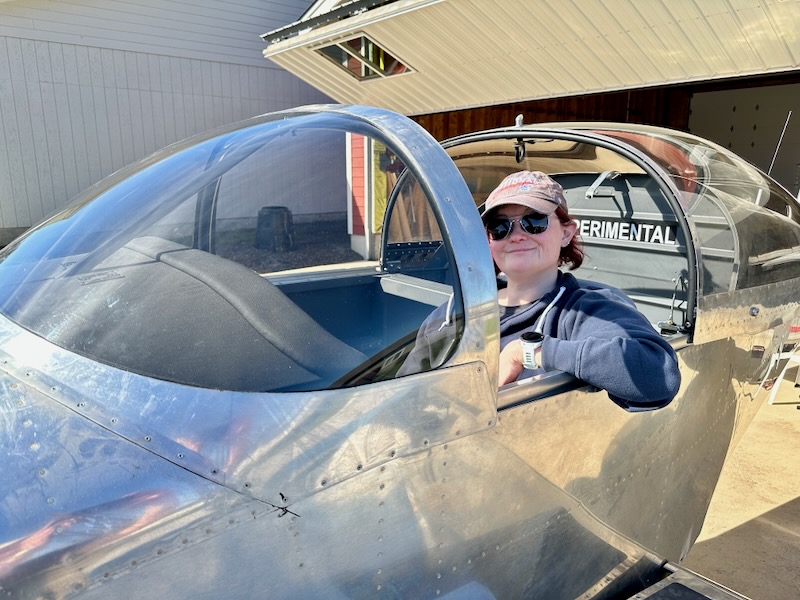
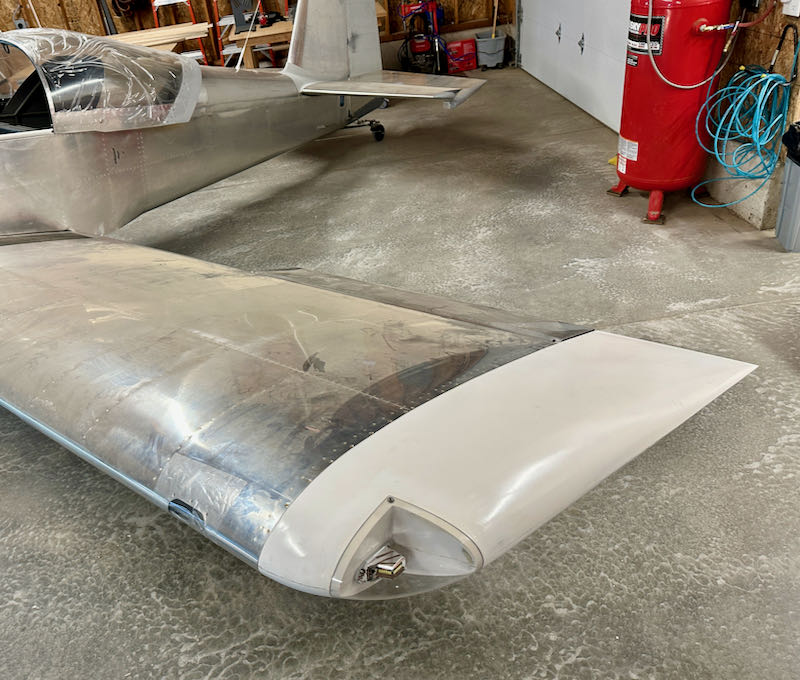
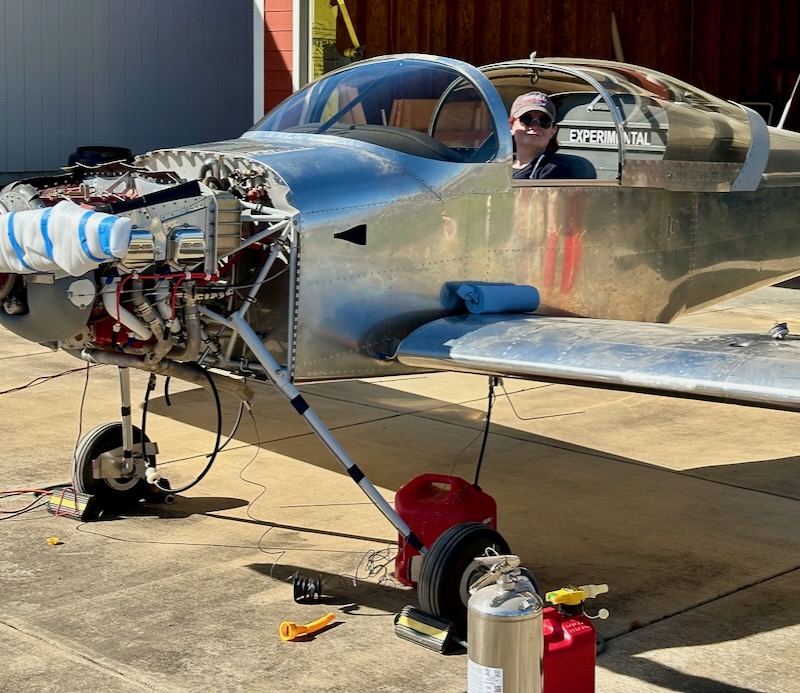
I recruited Mary to push buttons, got her situated in the seat, and then heaved the tail up onto a stand to level the fuselage:

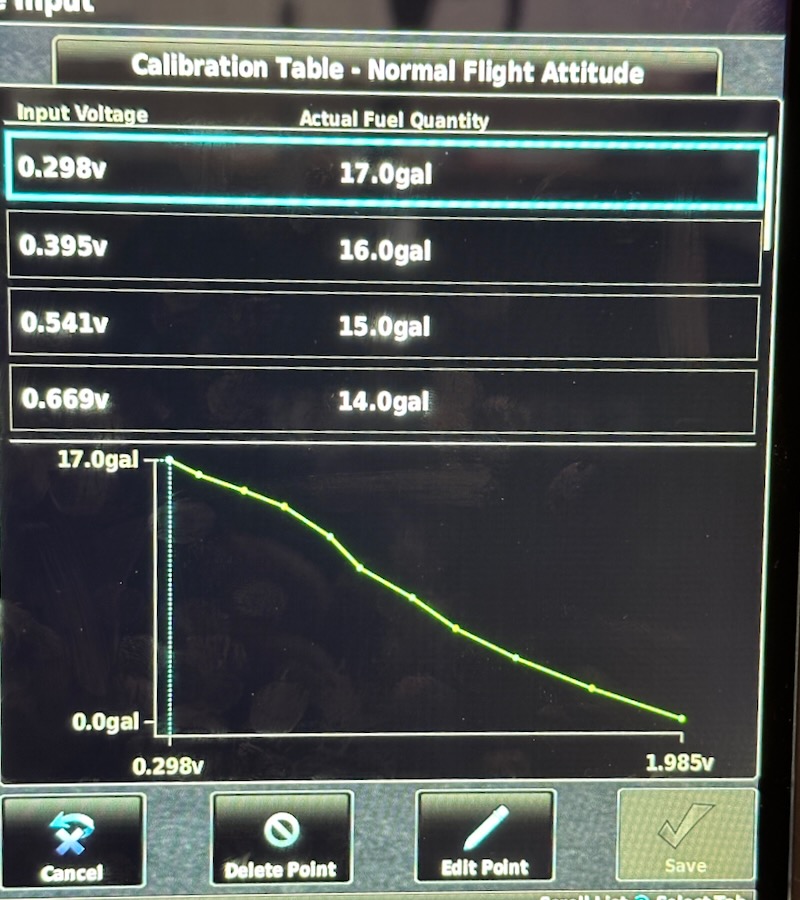
Using a calibrated fuel container, I added two gallons at a time and had Mary record each calibration point until the gauge stopped registering. For the right tank, we had no problems with the calibration process and were able to record points up to 17 gallons. Above that level, the float tops out due to the dihedral of the wing:

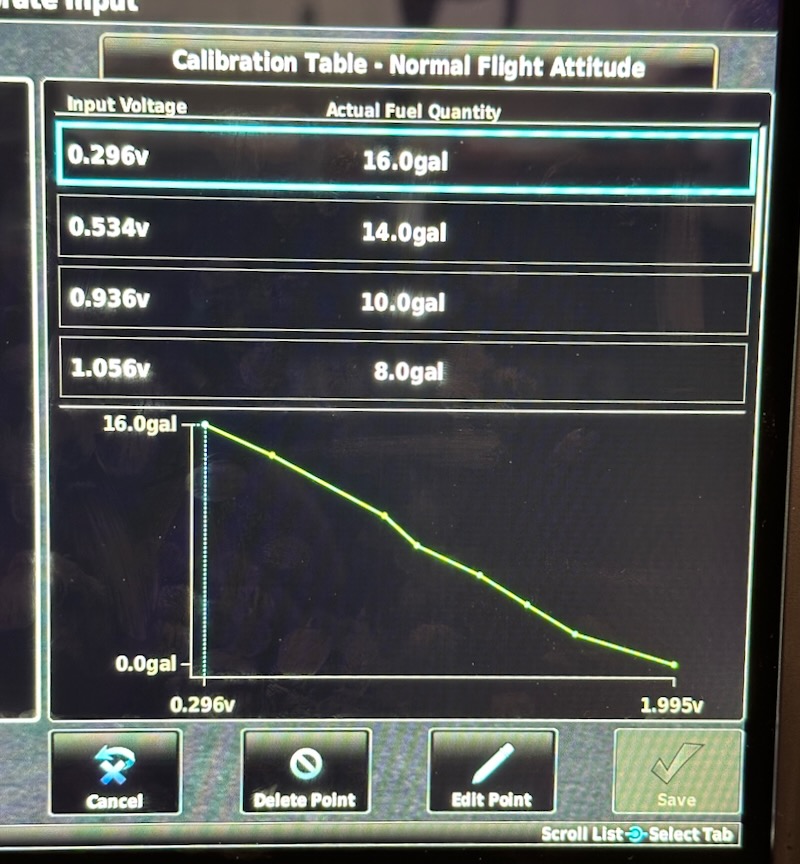
The left tank seemed to have a sticky float, requiring a lot of tapping to get it to register changes in fuel level. We were eventually able to get a believable calibration curve out of it, but I'm not completely convinced. I'll monitor this and see if it frees up with use, and hopefully I won't have to pull the sender to fix it:

After filling and calibrating each tank, we then used the boost pump to drain the fuel back into gas cans again.

Mary the long-suffering assistant rated the Classic Aero Aviator seats as "like the seats in an upscale SUV":

Fuel caps

Sunday, December 24th, 2023

After sitting untouched for too many years, the fuel tank caps didn't want to come off immediately, but I got them loose eventually:

I disassembled the caps so I could clean out the old grease and replace the ancient o-rings:

Since I started this project, Vans has switched to a different style of fuel cap, so information about this type is getting harder to find. Click here for an exploded view.

I decided I wanted to improve the cosmetic appearance before engraving, so I got out my granite surface plate and wet-sanded the caps and levers using a series of progressively-finer grits. The hardest part was flattening the rough castings using 220 grit; each successive grit after that went pretty quickly.

I progressed to 600 grit, not quite a mirror polish, then applied a vertical brushed finish using a grey scotchbrite pad. I didn't worry about making this look perfect, since these will inevitably get scratched up, but I'm happy with the results:

After researching the fuel tank labeling requirements and the fuel type specifications for my engine, I sent the caps off to Aircraft Engravers. A few weeks later, they came back looking like this:

New o-rings installed and lubed, latches adjusted, and caps reinstalled on the (very dusty) tanks:

Wingtip lighting & final installation

Sunday, October 1st, 2023

I spent a couple evenings installing the eighty or so nutplates that will be used to attach the wingtips. Once again I slightly under-squeezed the rivets to avoid cracking the fiberglass, and I was none too picky about achieving countersinking perfection. These holes will all be hidden when in use, so as long as everything fits together and the nutplates are nominally attached, it will be good enough:

The Whelen nav/strobe heads are designed to be screwed to a mounting plate, which is in turn affixed to the wingtip. However, they don't give you much of a hole for the wiring, which is sort of annoying. I passed the wires through the mounting plates, then installed Deutsch DTM connectors, which will have to be de-pinned if I ever want to separate these components:

I have known about Deutsch connectors for a long time, but only recently picked some up to play with. Once you understand the installation process, these connectors are just as easy to use as Molex connectors, and are apparently vastly more reliable. Over time I'll probably replace any problematic Molex connectors with Deutsch, but I can't be bothered to go back and redo any of my old work at the moment.

I cut holes in the wingtips to allow the connector to pass through. Luckily this will be hidden behind the mounting plate, as will the extra hole I previously drilled to help with fitting the lenses:

I attached the mounting plates to the wingtips with large-area washers so the fiberglass won't crack. Since rough fiberglass is abrasive, I used some snake skin on the exposed wires to prevent chafing:

With zip ties, grommets, snake skin, and clamps, I cleaned up and secured the wingtip wiring. Later I realized that these might actually have been the very last wires I needed to finish on the whole airplane:

With nothing left to do to the wingtips, I aligned them to the control surfaces and drove in all the screws, then installed the lenses:

Here's a short video showing the airplane all lit up. The beast is beginning to stir…

Wingtip lenses

Wednesday, September 20th, 2023

The two lenses for the wingtip lights come as one conjoined bubble, which you have to split in half as a first step. I had kept this part packed in bubble wrap, and was pleased to see that it survived the cross-country move with only a few small scratches:

There is enough material here that you don't have to be super precise about the initial cut – just dividing it at the approximate midpoint is sufficient:

The best way I found to cut this material was with a round blade in an oscillating multitool – buzzer saw, shaker saw, or whatever you happen to call it. With this method I was able to make controlled cuts pretty close to the desired line. It is loud and it does produce a lot of dust (or is it fumes?) that seemed inadvisable to breathe, so all the protective gear is a must:

For the initial edge straightening after a cut, I used my handheld belt sander, converted to a sketchy benchtop unit. This is more solid than it looks, as the wood crosspiece is screwed to threaded mounting bosses in the plastic handle. But just in case it managed to get out of control, I used a cheap deadman switch to power it:

Then it's an iterative process of marking, trimming, and sanding. I used a dry-erase marker, which worked well. For removing more than about 3/16" I used the buzz saw and sander, otherwise I just went after it with a sanding block. The material is thin and pretty soft, so it machines quickly. I've even heard of people using tin snips to cut the lens material, which I think would probably also work if done carefully.

Eventually I had the lenses fitting about as well as I figured I was ever going to get, so I sanded the edges to 320 grit, hit them with a scraper, and then polished them with a felt wheel. Then I drilled one mounting hole in each corner:

I don't know what the plans say about mounting the lenses, since I seem to have lost the loose instructions sheet that came with the lens bubble, but usual method is to use nutplates. These are often held in place with pop rivets, due to the geometry of the wingtip and the hazards of driving solid rivets in fiberglass. I decided to take a different approach, still using nutplates, but with their mounting ears twisted roughly 45 degrees:

I simply gooped the nutplates in place with blobs of epoxy/flox, which is inelegant but definitely worked. The purpose of the bent nutplate ears is to give the flox something more solid to grab onto. Now I have the nutplates mounted permanently, and I'll never have to deal with wear issues related to pop rivets in thin fiberglass:

The fit of the lenses at this point was "okay", but if you zoom in on this picture you can see that it could be better. The profile of the lens and wingtip don't match perfectly at the apex, and the edges of the lens don't match the wingtip recess:

I know the latter must be due to the molded recess having a wavy edge, because the lenses themselves are dead-flat if I set them on a table. To improve the fit, I decided to add some filler where necessary.

I applied clear tape around the outside perimeter to keep the epoxy off the plexiglass, but I couldn't get the tape to lay down nicely along the complex curve of the inside surface of the lens. Instead, I brushed on a layer of PVA mold release:

I spread an epoxy/microballoons mixture on the wingtip recesses, screwed the lenses in place, and then added more filler on the outside where there were low spots:

After letting everything dry – while worrying that I had just made a huge mistake – I managed to remove the lenses from the wingtips without damage, but it was a real struggle. I eventually resorted to drilling a small hole in each wingtip so I could blow in compressed air, which helped pop them loose. I'll repair the holes with flox later.

After sanding off the excess filler, I now have perfectly-matched wingtips and lenses:

I still have some smoothing to do in a few spots, but some of that can be left for the painter to worry about. Meanwhile, I'll consider the wingtip lenses finished.

Wingtip reinforcement

Sunday, September 3rd, 2023

As-delivered, the wingtips are fairly flimsy and prone to oil-canning. To rectify this I decided to follow the same trail previously blazed by others, adding stiffeners to the insides to make them less flexible.

With the wingtips clecoed in place, I squeezed various spots to identify the weakest areas, and used masking tape to mark some proposed locations for internal stiffeners:

I bought a bushel of 1/4" dowels – which turned out to be more than I needed, but thank goodness for generous return policies:

I marked out where I wanted the dowels to live, cut them to length, and beveled the edges. Then I temporarily attached them to the fiberglass with CA glue, using weights to keep them in place while the glue dried:

Sort of a whalebone corset effect inside the wingtips – I guess in aviation terms these would be stringers:

I mixed up an epoxy/flox mixture, leavened with a bit of micro, and used it to more permanently glue the stringers to the fiberglass. I tried to incorporate a nice fillet as I went:

Then I laid a strip of glass cloth over each stringer:

It doesn't convey in a photo, but the wingtips are now immeasurably stiffer, and demonstrate much greater resistance to flexing:

I'm totally happy with the outcome of this modification – for the cost of a few work sessons and some inexpensive materials, the wingtips are now much less likely to crack due to aerodynamic forces and ground-handling mishaps.