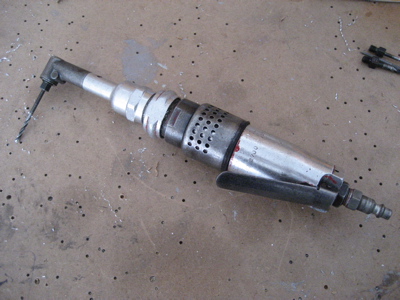
On an impulse, I bought this cool angle drill that was on sale at Brown Tool. I didn't get a chance to use it today though, since I need to replace the air fitting and it's really stuck on there tight. It'll have to wait until I reattach the vice to the bench.
I carefully positioned the F-781 forward spar attach plate so it was lined up vertically and on the centerline of the aircraft, then drilled it to the horizontal stabilizer spar. The vertical stabilizer spar is just floating there in this photo, it's not clamped or attached at the moment. You can also just barely make out the 0.032" shim I made to go between the plate and the spar, since there was a gap there. It's held in place with scotch tape in this picture.

I used a metal straightedge to make sure the aft end of all three rudder hinge points were in line, then I dropped a string down through the bolt holes just to double check. Small movements at the front end of the stabilizer have big effects back here in terms of getting the hinges to line up.
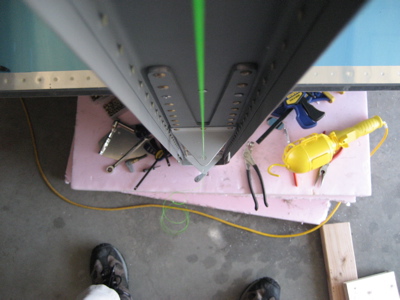
Once everything was good and lined up, I match drilled the holes in the attach plate through the VS spar, or at least as many as I could reach with the angle drill. I also drilled and reamed the pilot holes through the attach plate and HS spar up to 3/16".

I removed the stabilizer from the airplane to finish drilling the remaining rivet holes.

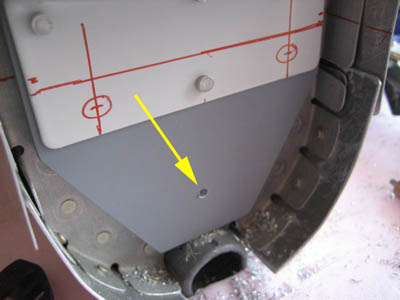
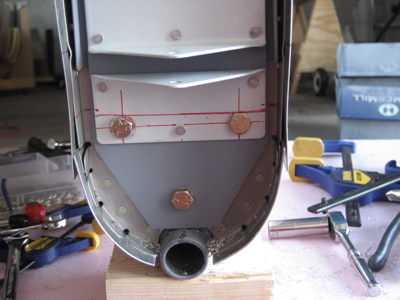
There is a tooling hole in the aft bulkhead exactly where the plans call for you to put the lowest of the three 1/4" bolts that attach the bottom part of the VS rear spar to the aft bulkhead and tailwheel mount. I center punched and drilled a #30 pilot hole right in the middle of that tooling hole, through the tailwheel mount.

Then I put the vertical stabilizer back on, bolted everything down, and back-drilled through the pilot hole into the stabilizer spar. Then I drilled the resulting hole up to 3/16" for temporary fitting.
I unbolted everything and took the stabilizer back off, then marked and drilled the other two bolt holes through the lower hinge bracket, using the dimensions on the plans.
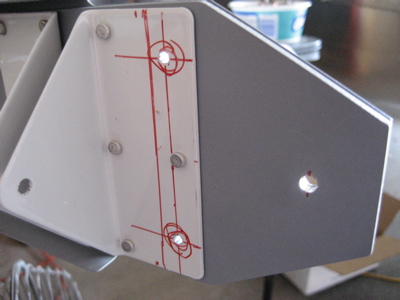
Then I bolted the stabilizer back in place yet again, drilled and reamed all three bolt holes up to 1/4", and put some temporary bolts in.
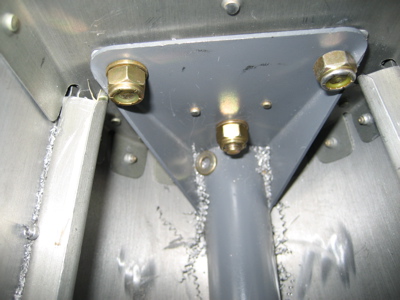
Here's an inside view. There is acceptable edge distance on both of the upper bolts – I was worried about this – but they're a little closer to where the radius of the bent-up edges start than they probably should be. On the left side, I may have to grind down the washer a tiny bit to get it to lay flat. If I'd moved the holes inboard about 1/8" each from where the plans have you put them, it would have been perfect. This is okay though. This entire area has you measuring and drilling blind, so if it comes out halfway decent you've done about as good as you can.
This looks a lot like it did a few days ago, but now all the holes are drilled and the vertical stabilizer is actually bolted in place. This thing is completely solid – you can grab ahold of the end and give it a shake, and it won't budge. I suppose that's a good thing for a 200 mph aircraft.
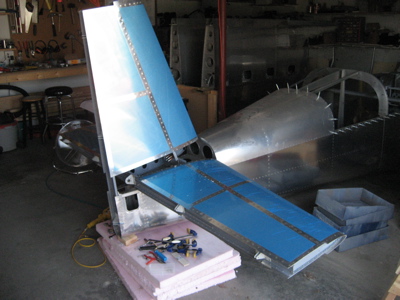
I just have to deburr, prime, and rivet some stuff, then it can be bolted in place for good. Actually though, I will probably take it off again and just put some smaller bolts through the tailwheel mount instead. That way I can roll the fuselage around without the tail, to save space in the workshop.
But first, off to Colorado for a mini vacation.