Continuing to accomplish everything I can do inside the wings while they're still in the jig, since working on the wings while lying on the ground will be worse in the future…
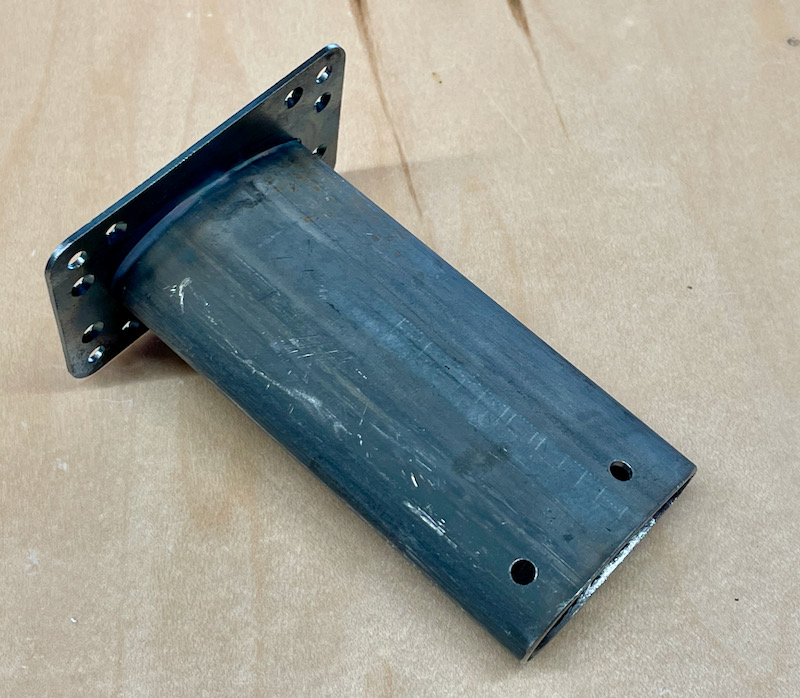
The chrome finish on my old Gretz pitot mast was peeling and the underlying steel was rusting, so I threw it away and ordered a new one. It seems you can no longer order these in chrome, just bare steel. Here's the new one as-received:
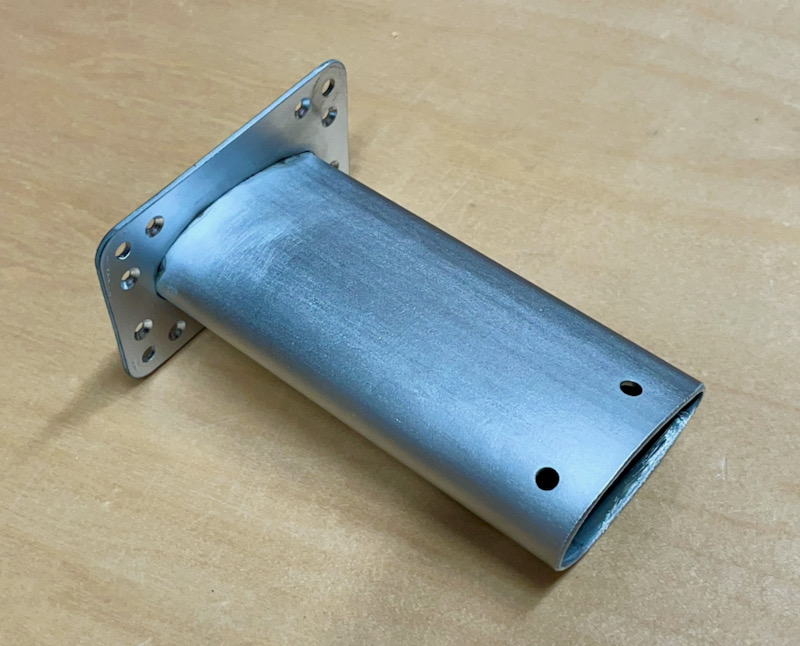
I still wanted a chrome pitot mast, so I took the unfinished piece to a local metal plating shop. A few weeks later, it came back with a reasonably nice satin-chrome finish on it. This actually matches the satin finish on the GAP 26 pitot tube fairly well, so I'm happy with it.
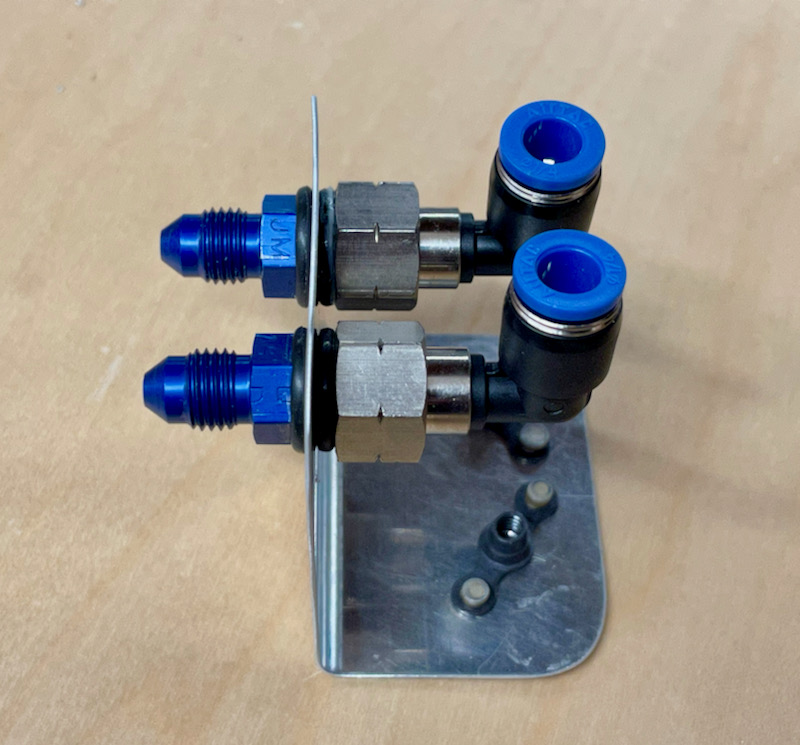
I made this little plumbing bracket out of scrap aluminum:
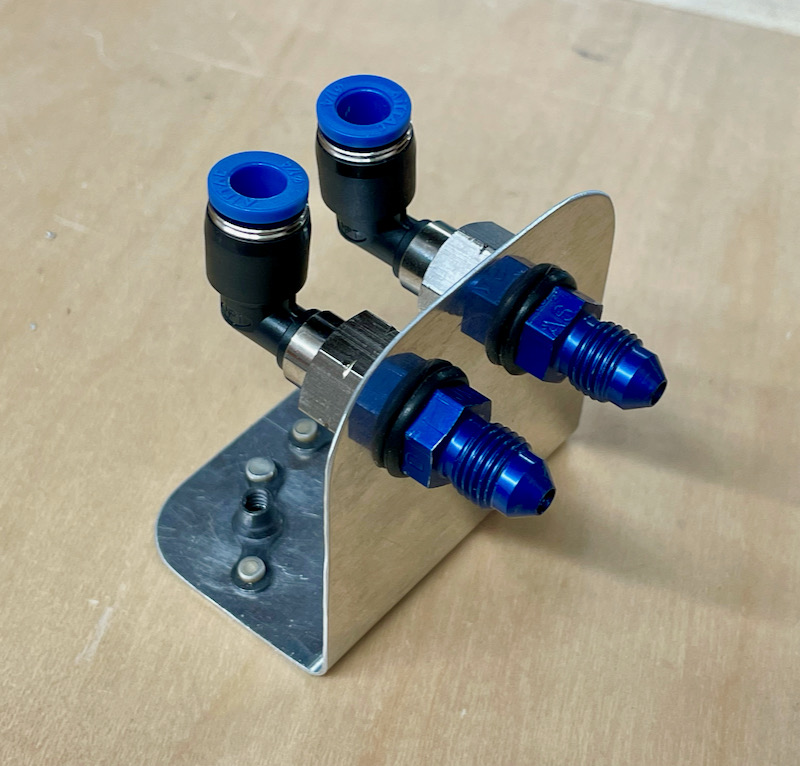
This is a pair of AN816-3D nipples connected to 90-degree air fittings, which is my solution for adapting the 3/16" aluminum tubing coming off the pitot tube to 1/4" nylon tube that I could run through the wings. I couldn't find any satisfactory bulkhead fittings for this application, so I just captured the bracket between the blue AN fittings and the female NPT portion of the air fittings, using some O-rings to make it all secure.
This is mounted to the top of a wing rib directly over the pitot mast:
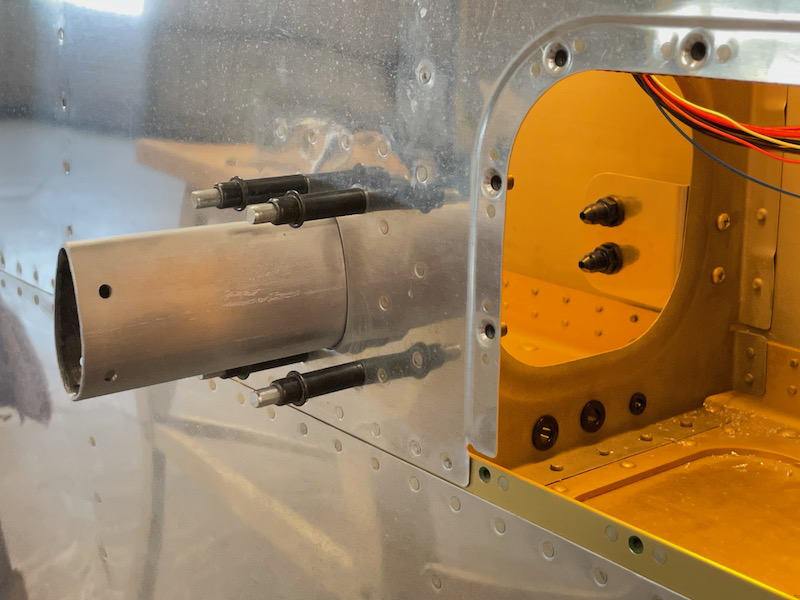
The aluminum pitot plumbing is a straight shot through the mast to the fittings above, no complicated bending required. The nylon tubing will go outboard from the 90-degree fittings (to the left in this photo), do a gentle 180, come back inboard through the plastic snap bushings at the forward end of the rib, and then run down through the wing to the fuselage.

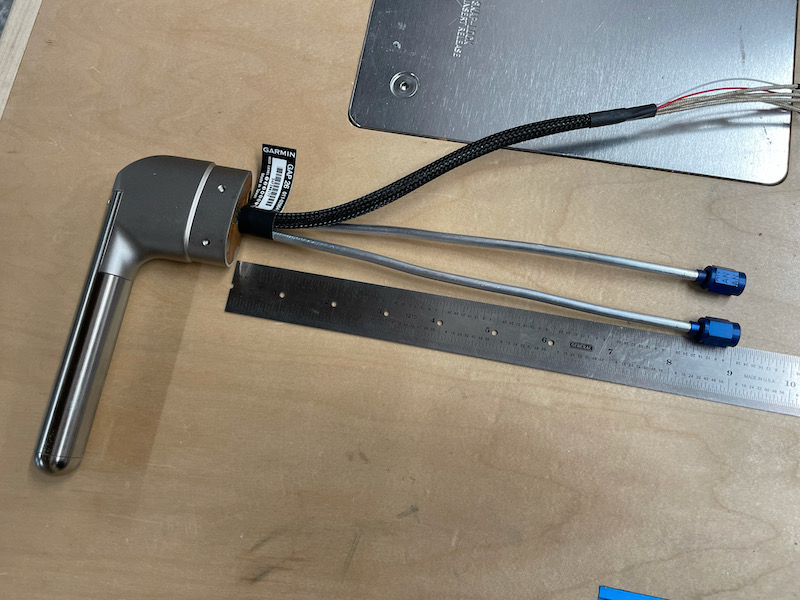
The pitot's aluminum tubing has a minimum length of 8" for heat dissipation reasons… mine ended up being almost 9", so no problem there: