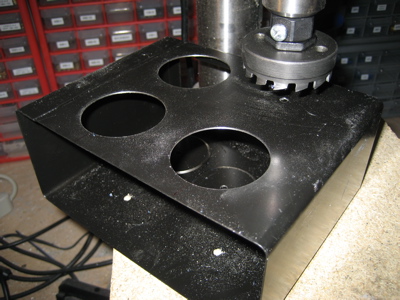
The battery in the RV-7 lives in a steel box on the forward side of the firewall. The basic box itself comes already formed, spot welded, and powder coated black. You can optionally cut some lightening holes in it, which I chose to do. The combined weight of all the material I removed with my Rotabroach cutter was something like a quarter pound – that's one more cheeseburger I can eat without putting the airplane over its maximum gross weight.
The battery box bolts to the firewall stiffeners through three holes that you have to drill the rivets out of.
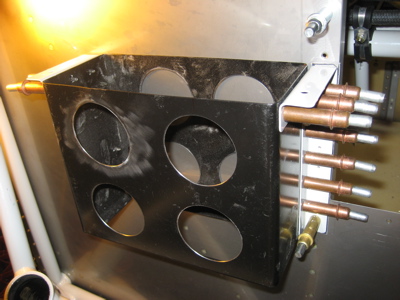
Here's the battery box and its steel support angles being fitted to each other and to the firewall. (once again the angle drill was put to work for this task) If you look closely you can just barely see the 0.020" alclad spacer between the firewall and the bracket on the port side of the airplane (right side of this photo) that simulates the thickness of the stainless firewall recess that will eventually be sandwiched between the firewall and the bracket.
Did you notice in the previous photos that the powder coating on the battery box got pretty scratched up while I was cutting the lightening holes? That plus the exposed steel edges inside the holes themselves was enough to make me decide to repaint it. I scuffed it up and sprayed it with a coat of some black high temperature barbeque grill paint that I had in the garage. It seems like it will be fairly durable.
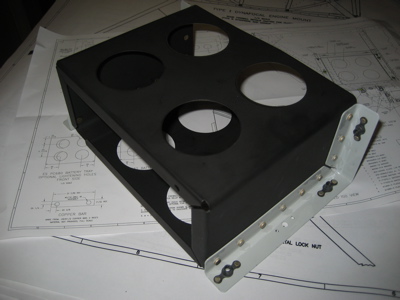
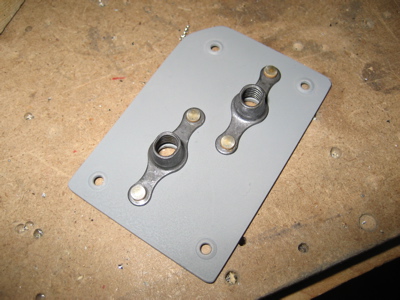
Then I riveted on the support angles and nutplates – in that order, since the nutplates block access to some of the other rivets. You also have to remember to dimple the box and angles from the inside out, so the flush heads will let the battery slide in and out without getting hung up.
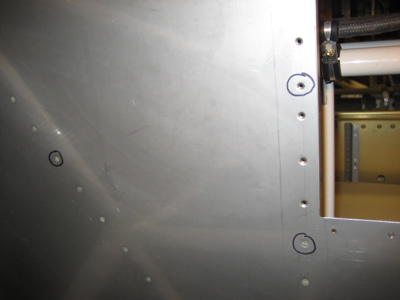
Lots of careful measuring is required to properly position the holes for mounting the master and starter relays. The outer two holes go through the firewall stiffeners, and the inner two holes go through this little 0.063" doubler. Also, the two circled rivets have to be drilled out so the two outer nutplates can be attached to the stiffeners.
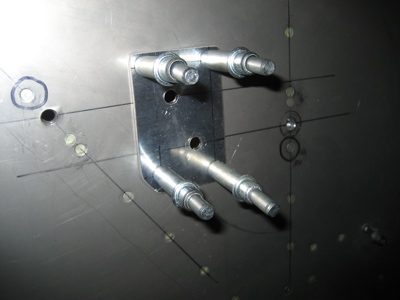
Here's the doubler, primed and with the 1/4" nutplates attached. This gets riveted to the aft side of the firewall.
Here's the battery box, master relay (silver), and starter relay (black) bolted in place. What's interesting is that the heavy battery (14 pounds or thereabouts) is held to the firewall with three 3/16" bolts, and the comparatively lightweight relays (about a pound each) are held in place with a pair of 1/4" bolts apiece. I hope that battery doesn't go anywhere or I shall be sorely put out.
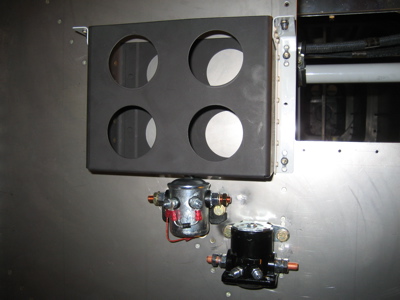
Also worth recording is the fact that I bought my master relay from B&C instead of Van's, since it's an important component and Van's is known for carrying cheap stuff (IMHO). It was almost twice as expensive, and it actually may not be any more reliable, but it makes me feel better to have it. The mounting holes are identical to the one Van's sells so no problem there.
The starter relay, on the other hand, is Van's stock item. The one that B&C sells appears to have totally different mounting lugs, so it would have been a pain to install, and I'm a lot less worried about safety implications of my starter relay conking out.