Happy Boxing Day, whatever the heck that is. I celebrated the halfway decent weather by going flying.
I also did a few small chores on the airplane, or tried to. First I thought I'd install the ELT. My first location – directly behind the seat – turned out not to be so hot after all for a couple different reasons. For one thing, the downward angle of the floor behind the seatbacks is about 15-20 degrees off the waterline of the aircraft, more than the maxinum 10 degrees allowed by the ELT installation manual. Furthermore, if the seatback was installed in its aftmost position, the upholstery would tear itself up on the ELT and its bracket – not so good.
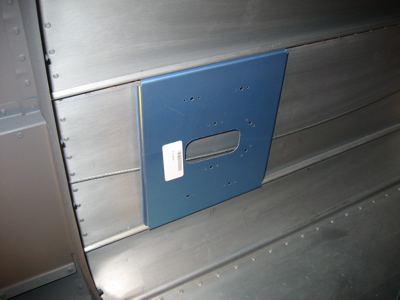
So, after playing with various ideas for a while, I finally decided that using Van's bracket kit (which I already have) to mount the ELT on the fuselage sidewall, right behind the baggage bulkhead, would be about as simple as anything. Unfortunately I discovered that I need a shorter #30 threaded drill bit and a smaller pop riveter to get back in there and install the thing, so all I was able to do with the ELT bracket today was look at it.
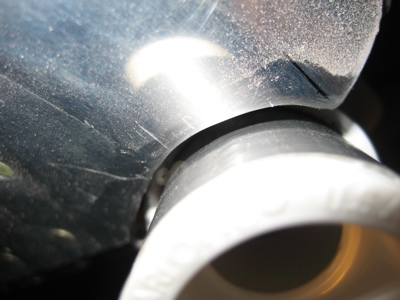
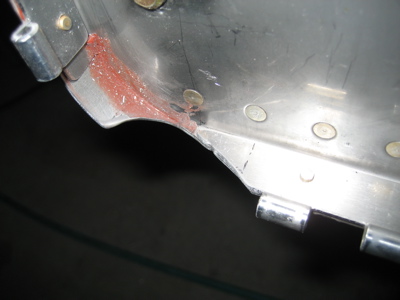
Then I decided to finish the cutouts in the lower firewall flange so the gear legs can eventually be installed in the engine mount. Since the fuselage is currently too low to the ground to get the actual gear legs under there, I had to improvise a fake gear leg tube out of a PVC pipe coupler and some duct tape to help it stay inserted in the socket. That made it very easy to eyeball the fit and mark out the areas that needed to be trimmed.
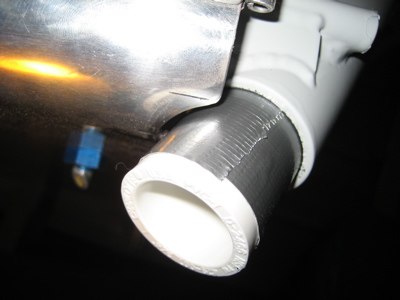
After three or four iterations with the Dremel tool and various forms of scotchbrite, I was able to get a nice uniform clearance all the way around. I should add that since I had to lay on my back underneath the airplane while I was doing this, I got aluminum and steel "snow" all over me in the process. Yuck. I wore safety gear and took a shower right afterwards so it wouldn't get into my eyes.
Here's the shape of the finished cutout. You can see that the outermost rivet hole is entirely obliterated. If I had waited to install the lower cowl hinges until after I'd finished these cutouts I could have saved myself an extra inch of hinge material, but oh well. I suppose I should be grateful that the amount you're required to cut isn't another 1/8" deeper, or else it would start chewing into the firewall itself.
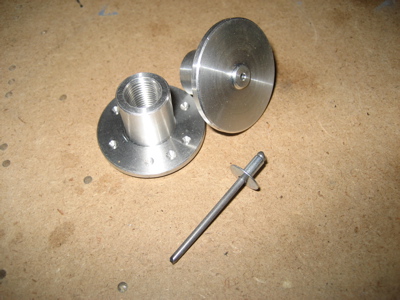
Another small puzzle I spent some time looking at tonight is the location and nature of the static ports. The plans would have you put a pop rivet into the fuselage skin on each side of the airplane, then pound out the mandrels and glue the ends of the plastic static tubing over the resulting hollow rivet shafts. Uh, no thanks. I had that setup on my last RV, and it gave me terrible static leaks until I replaced the cheesy rivets with a pair of Cleaveland static ports. I have a pair of nice looking machined static fittings (see photo below) that I picked up from Safeair in a moment of weakness, but I've heard of people having problems with them because they don't stick out far enough into the slipstream. It turns out that a static port that's too close to being flush with the skin doesn't do a very good job, and the Cleaveland ports stick out further than the Safeair ones. I may end up scrapping these and getting another pair of the Cleaveland ones instead.
I got as far as marking the static port locations and drilling a #40 pilot hole – one on either side of the fuselage, positioned as described in the plans. They'll be tee'd together to cancel out errors induced by side slips.
It's a loooong way back there into the tailcone where the static ports are. I can forsee this particular bit of plumbing is going to be a real joy to install.