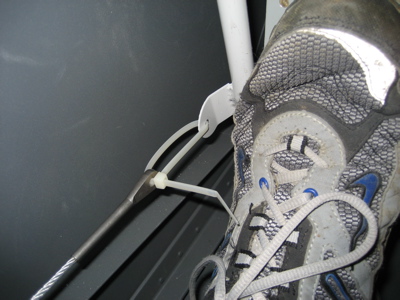
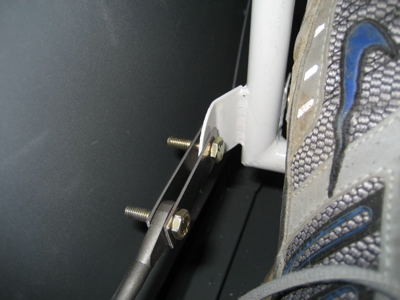
I had previously put the rudder back on the airplane to demonstrate something to another builder, so while I had it on I decided to work on the forward ends of the rudder cables. They're connected to the pedals via small 4130 steel links that you make from raw stock, and since I'm the one building this contraption I get to size them in such a way that the pedals' neutral position is set up just for me. I put the seat cushions in and spent a fair amount of time playing with pedal positions and angles until I was happy. Using tie wraps as temporary stand-ins for the F-6119 links was a good way to quickly experiment with different link sizes.
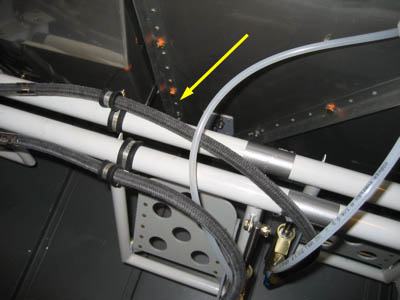
In a rare example of intelligence and foresight on my part, I drilled out this rivet on both sides of the firewall. I'll put an eye bolt in each hole to provide a place to anchor some pedal return springs, should I need them. It's much easier to plan for this now while I still have decent access to the back side of the firewall. The springs will go between the eye bolts and the pivot bolts on the two innermost pedals, to keep the rudder from flopping around on a windy ramp. I should also be able to size them appropriately to dial in a bit of rudder trim if I need it.
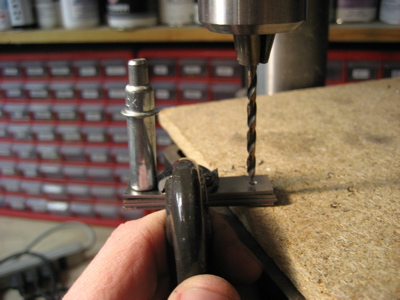
Because they're installed in pairs, I wanted to ensure that the hole-to-hole spacing was the same for all four links. I drilled them together so they're all identically sized.
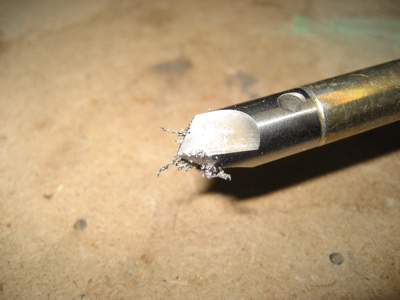
Deburring ferrous material makes little magnetic whiskers. Science is fun!
One more test to make sure these are the right length. The pedal angle is good and I have to point my toes slightly to get up on the brakes, which should help prevent inadvertent braking (especially unwelcome in a taildragger!).
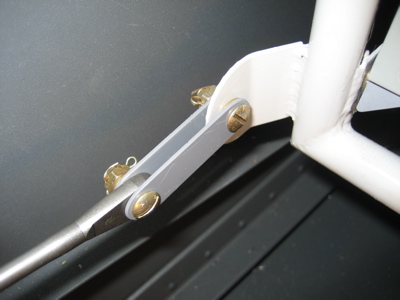
I rounded off the corners all nice-like, and then because these are steel pieces I primed them and gave them a coat of enamel to protect against rust.
Here's the finished product, with cotter pins installed. Note that they have you use AN23 clevis bolts here, presumably because the low profile head has less of a chance of catching on your shoe.
It took a surprisingly long time to make these four little pieces. I spent a lot of time fooling around with different rudder pedal positions, which involved repeatedly unbolting, repositioning, and re-fastening the pedal mounting blocks. In the end I wound up using the middle of the three available positions, which was where the pedals were mounted before I began this exercise. Oh well.
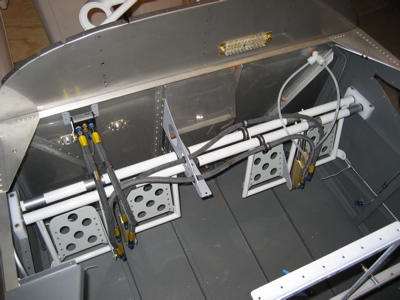
For reference, I'm about 6'1" and I made the pedal angle fit me well by using the middle pedal attach position and using a hole-to-hole distance on F-6119 of 1.5 inches.
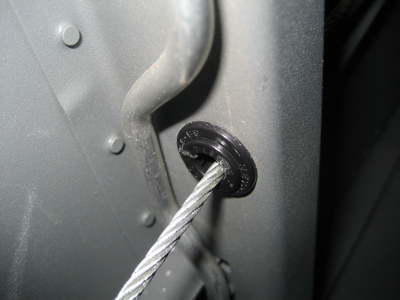
The last thing I did on the rudder cables today was to pay some attention to the bushings through which they pass as they head from the pedals to the tail. All RV's make a kind of sawing noise as you work the rudder pedals – that's the sound of the cables sliding through the plastic bushings. Other aircraft use pulleys for this, and the bushings Van's uses are a little cheesy but they work. A recent issue of the RVator suggested cutting a slot in a smaller bushing, slipping it over the cable, and inserting it into the bigger bushing – the idea being to provide more material for the cable to saw through before it starts eating into the bulkheads. Of course, you inspect these every year during the annual condition inspection, and they last for years, but I thought it seemed like a good idea anyway. I used an Xacto razor saw to slit a dozen or so bushings and popped one into every bushing from the pedals to the tail.