After much examining and head-scratching, I decided to lower the entire radio stack by 3/4" – you'll see why in a minute. This in turn necessitated removing another chunk from the subpanel, cutting it almost in two. Ouch.
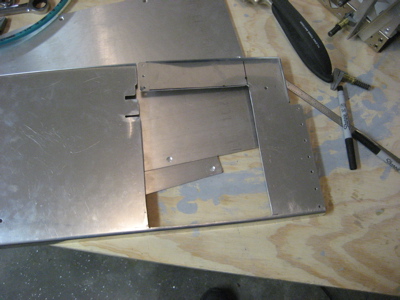
Here are the trays in the new position. I'm planning to fill the extra 3/4" of space above the audio panel with annunciator lights.
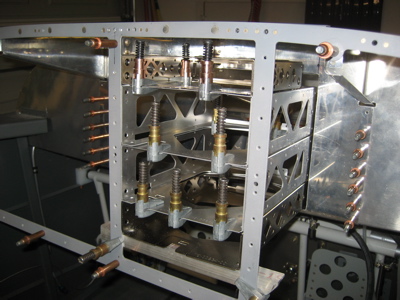
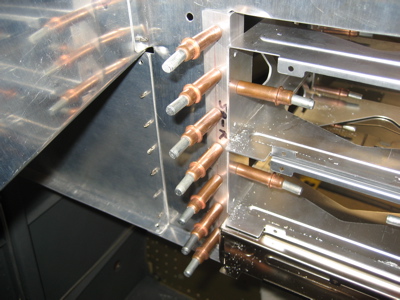
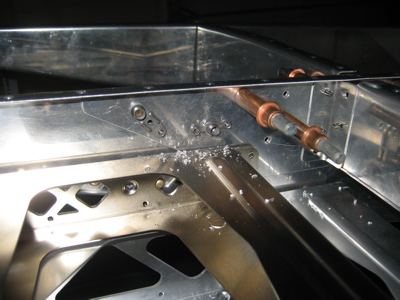
And here's why I decided to lower the radio stack… notice the two big holes in the center subpanel rib, roughly in the center of this photo? Those are where the bolts go to attach the roll bar brace to the subpanel structure. With the radio stack all the way at the top of the panel, the tray for the audio panel would have interfered with these bolts in a big way. Dropping the radios creates a clear area for the bolts, although with the top skin riveted on and the radio trays installed, I'm still not going to be able to get a wrench on this side of the bolt holes.
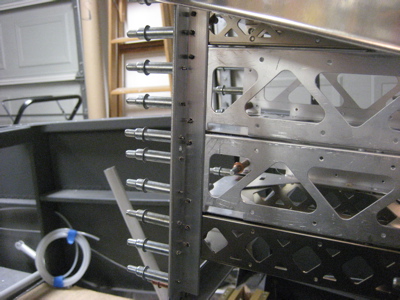
After a lot of measuring, clamping, and adjusting, I started fitting the radio tray attach angles. There's a piece of 0.063" angle running vertically at each of the four corners of the radio stack, through which the trays will attach to the panel frame and subpanel.
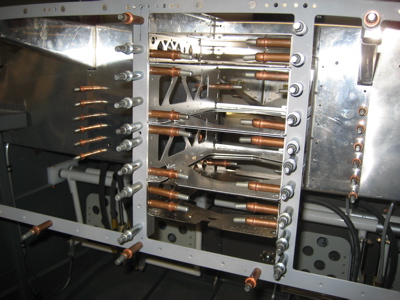
Here's a view of the back side of one of the aftmost (cabin-side) angles. The angles will be riveted to the panel frame, and the trays will attach to the angles with countersunk screws inserted from inside.
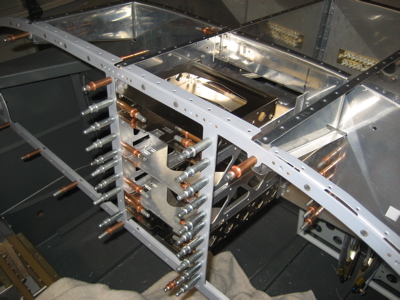
Happily, the nav/com and transponder trays have pre-drilled mounting holes located at exactly the right place to attach to the subpanel in an RV-7, if you orient the attach angle this way (flange on the forward side of the subpanel). With the trays attached to the subpanel in this way, they effectively become part of the structure, making up for some of the stiffness lost by cutting big chunks out of the subpanel.
I may yet decide to rivet another piece of angle to the bottom of the subpanel to stiffen it up, but it seems pretty strong already. You can actually grab a radio tray and use it to move the whole fuselage around the garage floor.
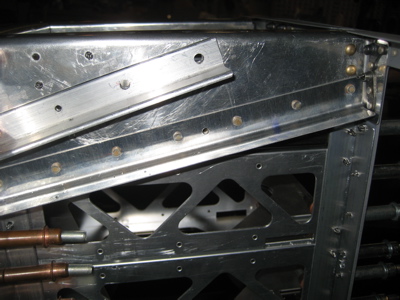
The exterior surfaces of the radio trays are lined up flush with the cabin side of the panel frame. The faces of the radios will stick out about a tenth of an inch further, and with the panel itself being made of 0.080" material I should end up with very little gap between the radios and the panel. A little too much clearance is better than not enough, since that would prevent the radios from being inserted all the way into their trays.
In this photo you can just barely see a hole near the lower flange of the (modified) subpanel rib. A screw will go through there and provide another attach point for the audio panel tray – the audio panel is shorter than the other radios, and doesn't extend far forward enough to be attached to the subpanel. I made a little spacer out of 1/8" aluminum to go between the right side of the rib and the left side of the audio panel tray.
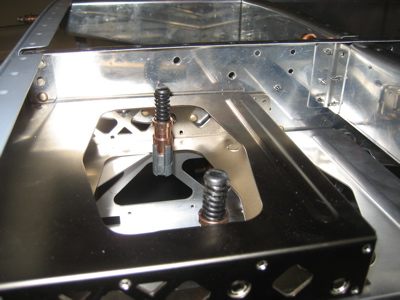
I fitted nutplates to the two aforementioned bolt holes, so that I'll be able to insert the bolts from the relatively unobstructed left side of the center subpanel rib:
I didn't get as much done this weekend, as I'd planned, but I'm still glad I got the radio trays fitted. The next step is to rivet the subpanel structure into the fuselage for good, but there's a short list of related minor chores that have to be taken care of first.
Also: I think I will enjoy having the traffic features of the GTX 330 transponder, but if I knew then what I know now, I would probably have chosen the much smaller GTX 327 instead. Then I wouldn't have had to do nearly as much chopping up of the subpanel, even with the two 430s in the radio stack. Or, I could have kept the 330 and gotten rid of one of the 430's, making the radio stack much shorter. But anyway, I'll make it work and it will be pretty nifty when it's done.