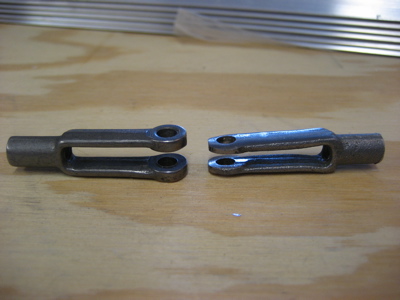
The clevises I am using inside the throttle quadrant are AN481's – actually a special variant threaded for a 10-32 cable end, available from Aircraft Spruce under part number 05-01437. I'm using these because they have sufficient throat depth to avoid getting hung up on the quadrant levers, which is a problem with the AN665's recommended by Van's. But, the AN481's are quite a bit wider, which is a problem when using the closely-spaced DJM throttle quadrant. I fixed this by grinding down the clevis that will be used for the center lever (the prop control) and bending the ears slightly inward to narrow it. With this modification, the AN481 will take the 11/32" clevis pin used by the AN665, instead of the 15/32" pin it comes with. That means it will fit in the same space as the factory-recommended clevis, and won't hang up on its neighbors as it moves. There's still plenty of material left, so I'm not worried about the strength of the modified part.
As I did with the throttle and mixture levers, I decided to drill a new hole in the prop lever in order to get a little more travel. I had to measure this carefully to keep the clevises in the throttle quadrant from ending up too close together and getting tangled up.
I re-safety-wired the throttle cable bracket in its new orientation on the bottom of the engine sump. As is often the case when I try to use safety wire, it took about eight tries before I managed to get it right. Sometimes it sucks to be a perfectionist cursed with limited motor skills.
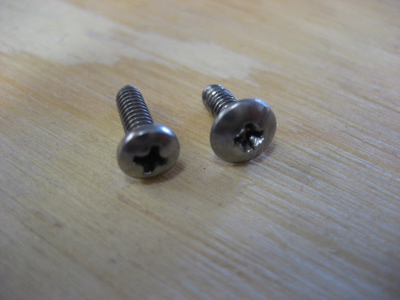
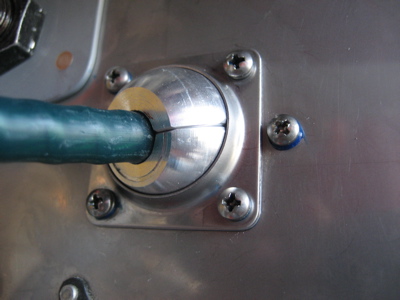
The little machine screws that come with the firewall eyeballs I'm using are so easy to strip out that you can almost ruin one just by pointing a screwdriver in its general direction. I went to the hardware store and picked up some different screws (on the left in this photo) that have a more substantial head and can actually be tightened by humans.
In addition to the split lockwashers under the screw heads, I used a dab of blue Loctite on the theads of each screw as I installed the firewall eyeballs for good.
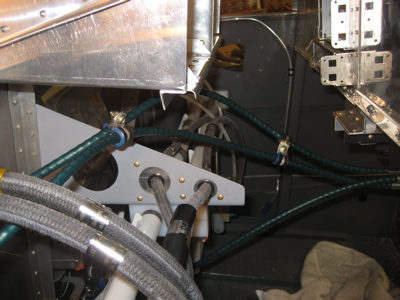
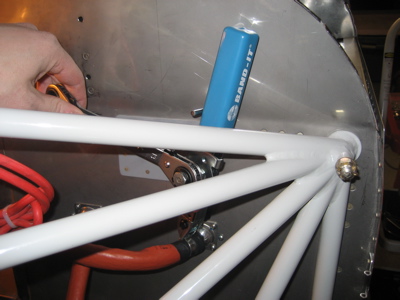
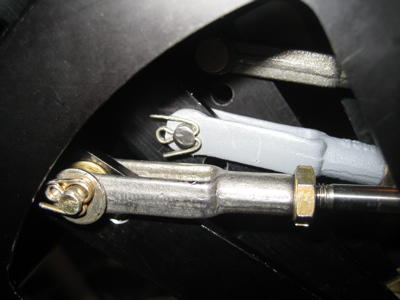
Behind the panel, I lashed the prop cable to the mixture cable with adel clamps to keep it from getting tangled up in the rudder pedals:
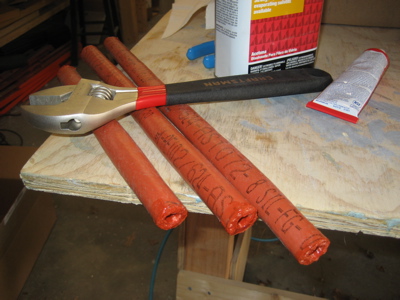
I cut lengths of firesleeve for the engine control cables and treated the ends with RTV. Technically, the prop control cable doesn't need firesleeve since it's not that close to the exhaust, but it would bother my OCD not to do them all the same way.
I slipped the firesleeve over the control cables and tightened the bulkhead nuts for good:
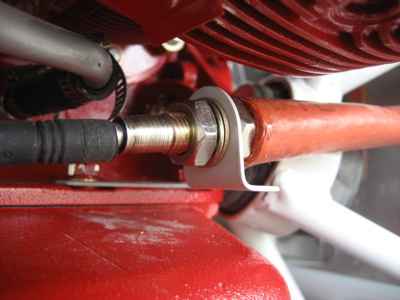
Then I finished off the ends with heatshrink tubing (a purely cosmetic touch) and firesleeve band clamps. The plans call for a simple loop of safety wire here, but I like the look of a good firesleeve clamp.
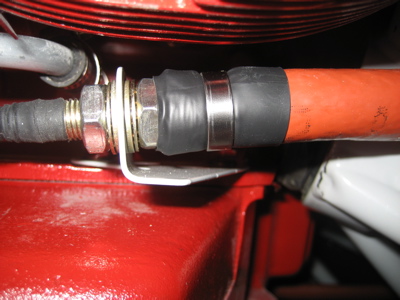
Normally you firesleeve a hose on your workbench, where you have plenty of room to use the band clamp tool. It was challenging to get all the clamps tightened, what with the engine and its various associated parts in the way, but I managed.
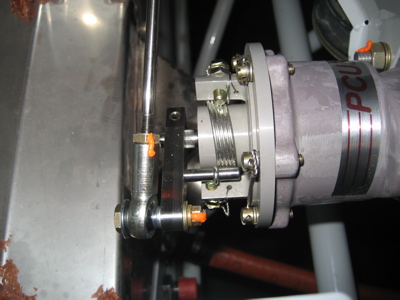
I tightened all the hardware in the throttle linkage for the final time and installed the required cotter pins:
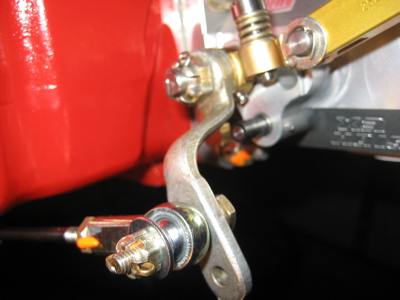
Ditto for the mixture linkage. Lots of cotter pins here. Cut my hand on at least one of them, which is pretty typical when installing cotter pins. Interestingly, the throttle side of the fuel servo uses a castellated nut and cotter pin to hold the control arm on, but the mixture shaft on the opposite side is not drilled. I used the nyloc nut that came with it (lower left corner of this image) although as a matter of principle I don't like using nylon locknuts forward of the firewall. I may eventually change it out for an all-metal locknut.
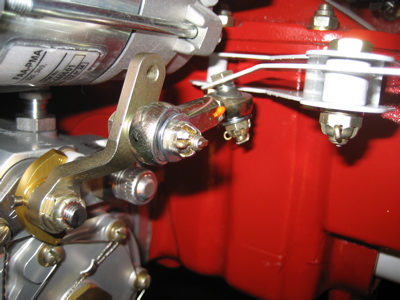
Ditto again for the prop linkage. I ended up getting about 60 degrees of travel here, which according to the manufacturer of the prop governor is plenty.
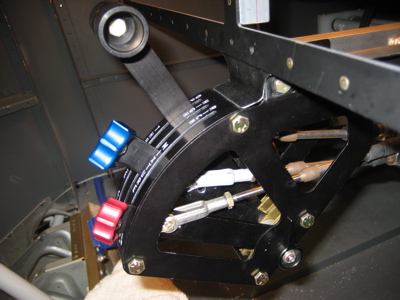
In this photo you can see a few different details of how I installed the clevises inside the throttle quadrant. First, I painted the clevis that I'd previously ground down, since I sanded off all the corrosion protection. The pins for the throttle and mixture levers are installed with their heads pointing inward, to give more clearance for the prop clevis. The outer two clevises have a 1/16" brass washer inside the fork, and a 1/32" steel washer under the cotter pin, to make sure they can't accidentally migrate inwards and foul the center lever. And finally, let me tell you that these cotter pins were a pain to install. Seriously.
The engine controls are finished! All the way from the throttle quadrant…
…to the cables:
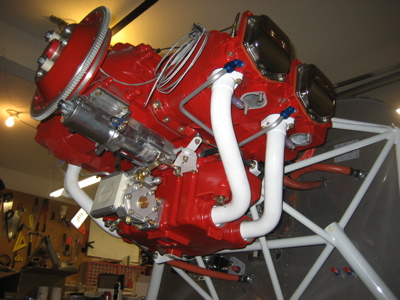
…to the engine. Awesome.
I also managed to go flying and shoot six approaches under the hood this weekend, which was fun. Now I'm legal to fly instruments for another six months.