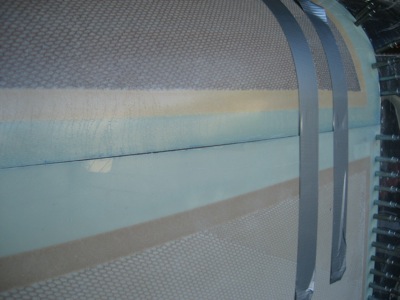
I trimmed the upper edge of the bottom cowl along the lines I prevously marked. Then I spent about two hours sanding the cut edges straight and progressively taking off more material. You can't tell how it's going to fit until you have it on the airplane, fastened and/or taped into place, so it takes many repetitions of cowl-on, cowl-off, each time removing a few thousands with the long sanding block. The other thing that makes this frustrating is that the fit will change later once you fasten the top and bottom halves together, due to the way the cowl gets pulled inward along the horizontal split line. At this point, you're just shooting for a straight edge and a consistent gap, knowing that the spacing will change and need to be fixed again later.
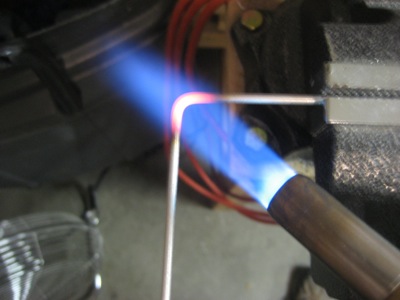
At some point during this process, the aluminum pins that came with the side hinge material started to get kinked, as I knew they eventually would. The plans call for you to replace them with stainless steel wires, so I got out the torch and bent some new hinge pins.
Eventually I got to the point where I couldn't improve the fit any further, so I moved on to actually joining the top and bottom cowl halves. The plans specify more hinge material here, but I had that on my previous airplane and I had no end of trouble getting the long curved pins in and out. Instead, I intend to use quarter-turn fasteners and screws/nutplates just like I did along the firewall.
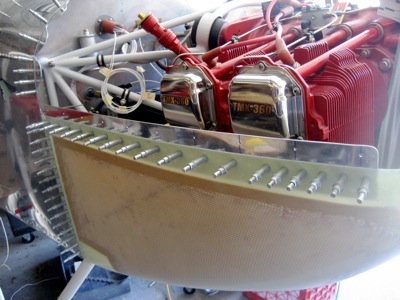
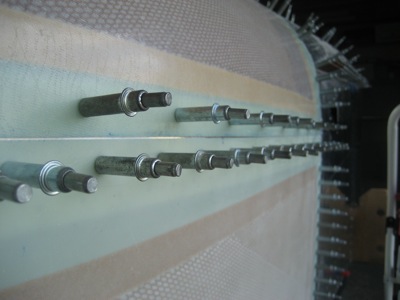
Since there is not a joggled flange molded into the lower cowl, I need to make my own. I gave serious thought to the idea of laying up some fiberglass flanges, but since it was a three-day weekend and I didn't have any of the glass tape I'd have wanted to use laying around, I decided to make aluminum flanges instead. These started out as 3"x30" pieces of 0.063" alclad, drilled for a double row of rivets and shaped to the proper contour with a rubber mallet.

After getting the shape right – another whole set of iterations – I drilled enough holes to let me cleco the flange plates securely to the bottom cowl. The upper fastener holes are spaced about 3 1/8" apart, starting 3/4" from each end of the flange.
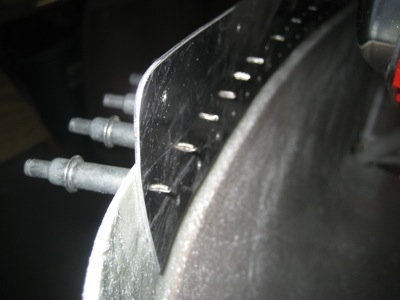
Here you can see the cross section of the flanges. Compound curves in 2024-T3 aluminum are interesting.
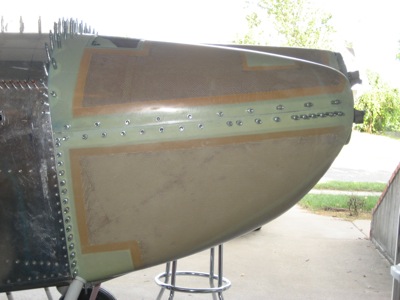
After quadruple-checking that everything was fastened correctly, and with duct tape in strategic places to hold the cowl in alignment at the nose, I used the shop-light trick to drill through the upper cowl into the pilot holes in the flange.
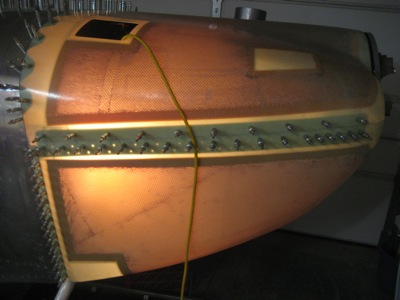
The edges of the top cowl get pulled in once they're clecoed to the bottom cowl flange, so the gap between the top and bottom shrinks after you drill the fastener holes. So, it was another hour of try-and-fit work to get to the point where I ended up… a fairly straight seam, with a pretty consistent 0.020" gap for paint.
Big milestone… the two halves of the cowl are properly fitted and attached for the first time, even if it is just with clecoes:
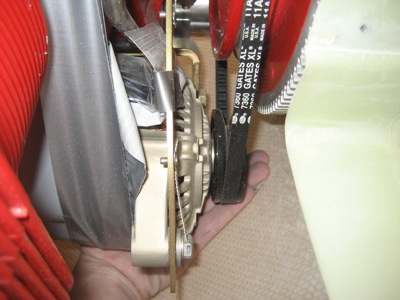
Somewhere during all this, I noticed that there is only a finger-width of clearance between the alternator pulley and the inside of the bottom cowl. This is pretty typical for RV's… I will keep an eye on this, and maybe think about switching to a slightly smaller belt to let the pulley move inward.
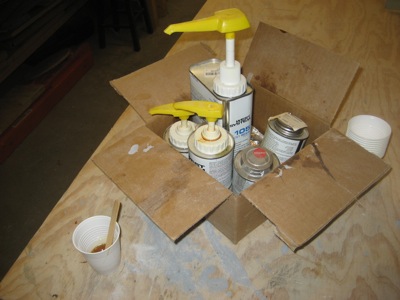
I don't intend to undertake all the glass-finishing work at this stage, but I do need to carry out a few tasks with the gooey stuff. Since I haven't used the epoxy for a few years (!!!) I mixed up a test batch just to see if it's still good.
If this hardens by tomorrow, there will be more to report soon. If not, well, it's nice outside and I have the day off from work!