The firewall forward kit came with a pair of hoses for the oil cooler, but they were the wrong length and I wanted to use a different type of hose anyway. I wish I would have thought to delete them from the order and save some money, but oh well. Anyway, to figure out the correct length to order a set of replacement hoses, I used some plastic ice maker tubing of a convenient diameter. I played with different hose routing and fittings, and decided that a 45-degree fitting was needed on the bottom, and a right-angle fitting worked best on top.
Once I had the lengths, I called up Precision Hose in Tulsa and ordered two Stratoflex 124J hoses with integral firesleeve, with #8 fittings, 13" flare to flare. They cost darn near a hundred dollars each, but they are just as nicely made as everything else I've ordered from PHT.
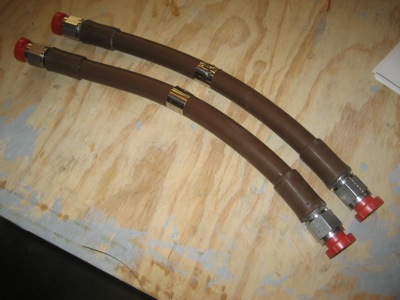
Notice how much longer the ones from the FWF kit are. Even if they'd been the right size, I'd have also had to buy and install a separate firesleeve on each of the factory hoses anyway. My rule is to always use firesleeve on important hoses forward of the firewall that carry flammable fluids.
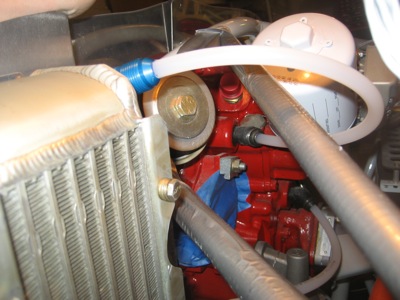
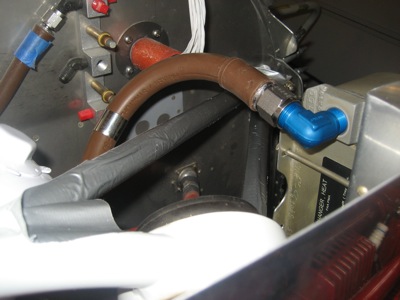
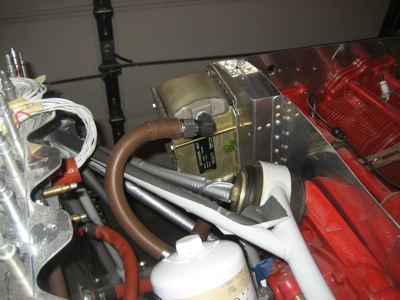
The top hose returns oil to a 45-degree fitting on the engine (necessary to clear the oil filter adapter) from from a 90-degree fitting on the oil cooler:
There's over an inch of clearance between the hose and engine mount all the way around. The bend is a little tighter than I'd like, but it seems like it will work.
It's hard to photograph the bottom hose, which supplies oil from the engine to the cooler:
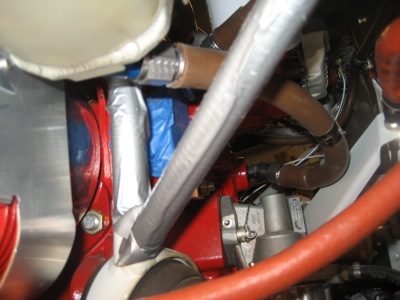
From certain angles it looks like the hose rubs against the prop governor bracket, but if you look at it from the starboard side you can see that there's enough clearance. These parts don't move relative to one another, so anything over a quarter inch is plenty.
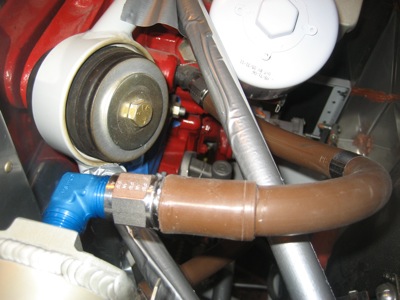
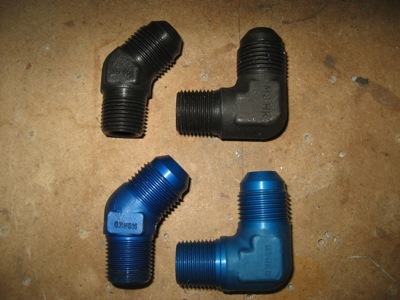
The blue aluminum fittings shown in the photos above were installed hand-tight, and only for fitting purposes. For the real deal I wanted to use steel fittings (black) since best practice favors the use of steel over aluminum here.
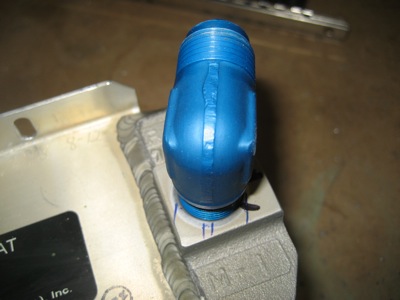
I drew some temporary guide lines on the oil cooler to help me figure out how to clock the fittings when I tightened them for good. Trying to clock pipe fittings to the right angle can be a frustrating challenge sometimes.
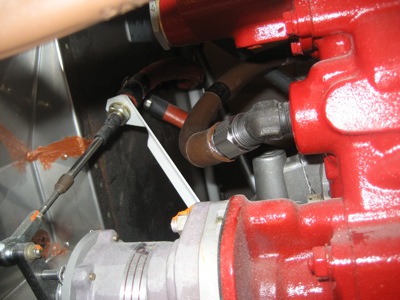
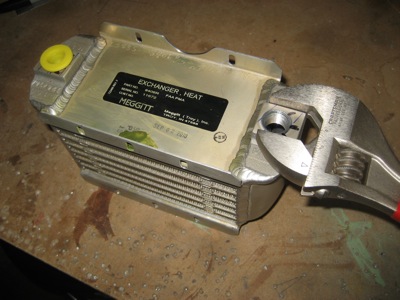
When tightening the oil cooler fittings, it's important to use a wrench on the boss that surrounds the fitting, rather than torquing away on the fragile oil cooler body:
I installed the steel fittings with Loctite 567 thread sealant, and tightened them two full turns past hand-tight:

One more test fit to make sure the fittings were clocked at the right angle, and then I put the oil cooler and hoses on the shelf for later. The next time I install them on the airplane, it will hopefully be for all time!
While I was at it, I riveted the missing nutplate to the angle on the rear baffle where the oil cooler brace attaches. Go ahead, try to guess how I squeezed the rivets on that nutplate in the foreground:
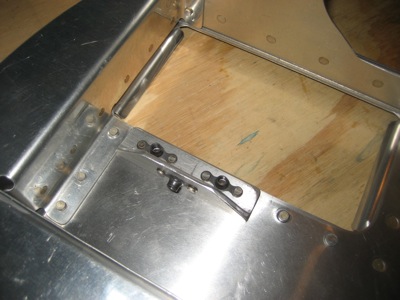
Just kidding, I totally drilled out the rivets holding the angle to the baffle, attached the nutplate on the bench, and then riveted it all back together. Doh, should have done a little more planning ahead.