If you are building a taildragger, you want to wait to fit the bottom rudder fairing until you can test-fit the rudder to the fuselage to make sure the fairing is not rubbing on the tailwheel. I dug my untouched rudder bottom fairing out of storage and iteratively trimmed away at it until I had it fitting pretty well. I used a Norton cutting disc and a variety of Perma-Grit tools, which made it go fairly quickly:
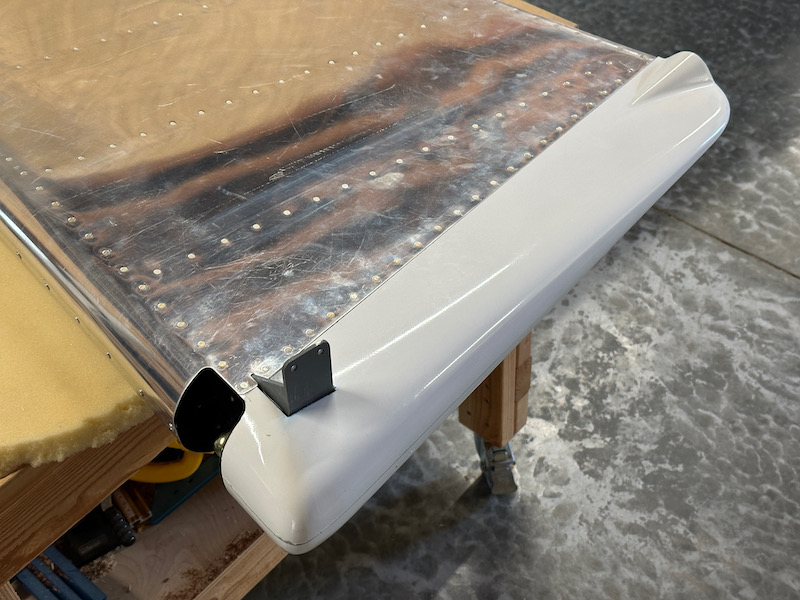
The fit around the rudder horn is not completely perfect, but you need a little extra room in the cutout to get the fairing installed anyway, so I'm acceptably happy with it. I taped the fairing to the rudder and drilled the mounting holes, stepping up to #27 and countersinking for Tinnerman washers:

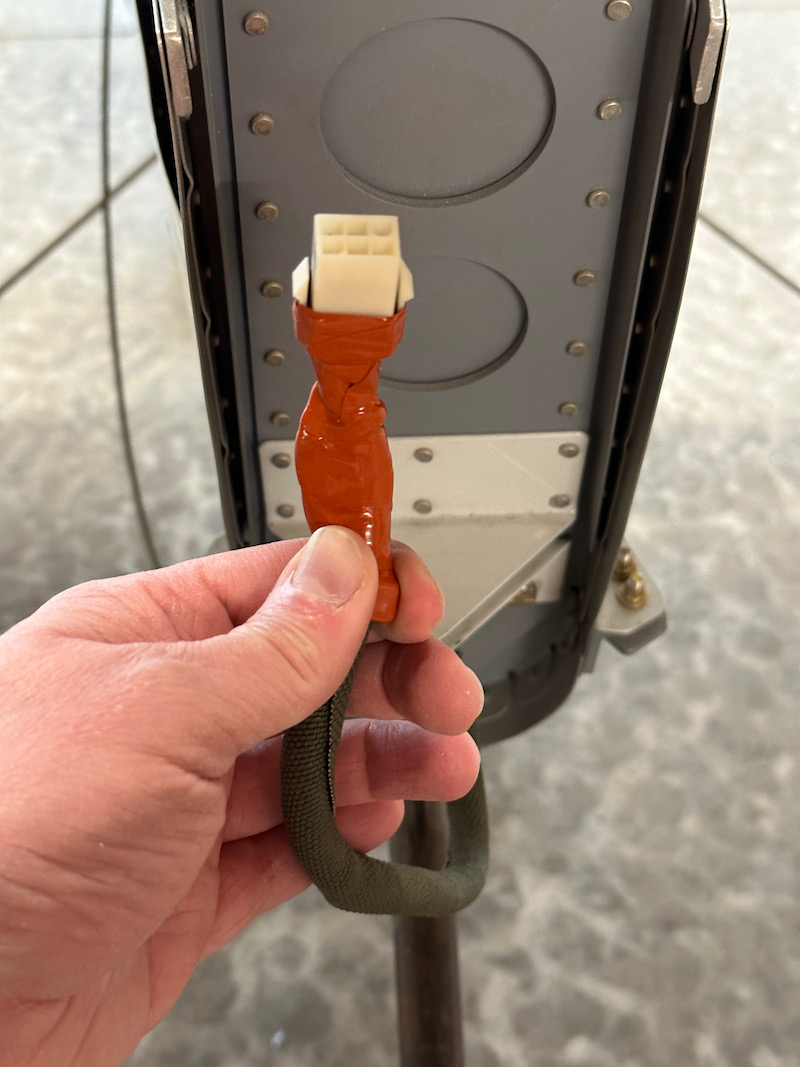
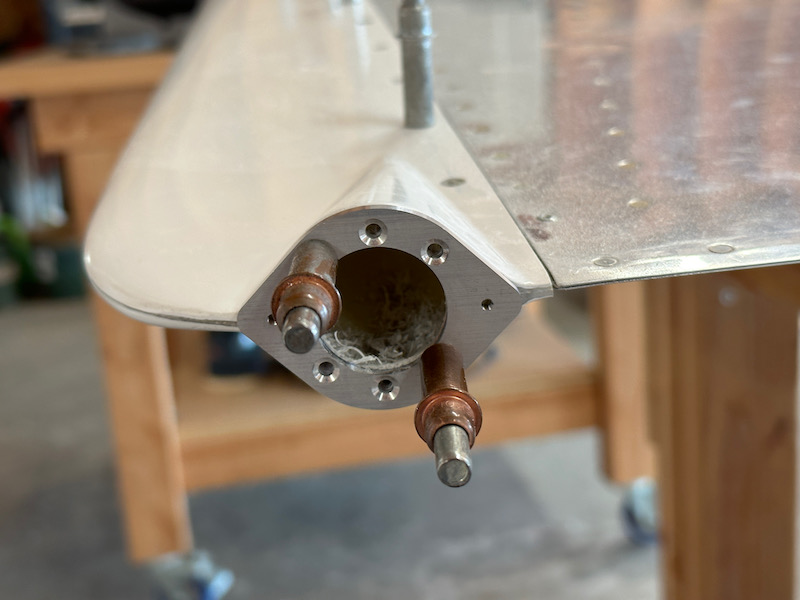
I added a connector to the wire bundle that emerges from the vertical stabilizer spar, and added a layer of snake skin to hopefully protect it from chafing as the rudder moves:
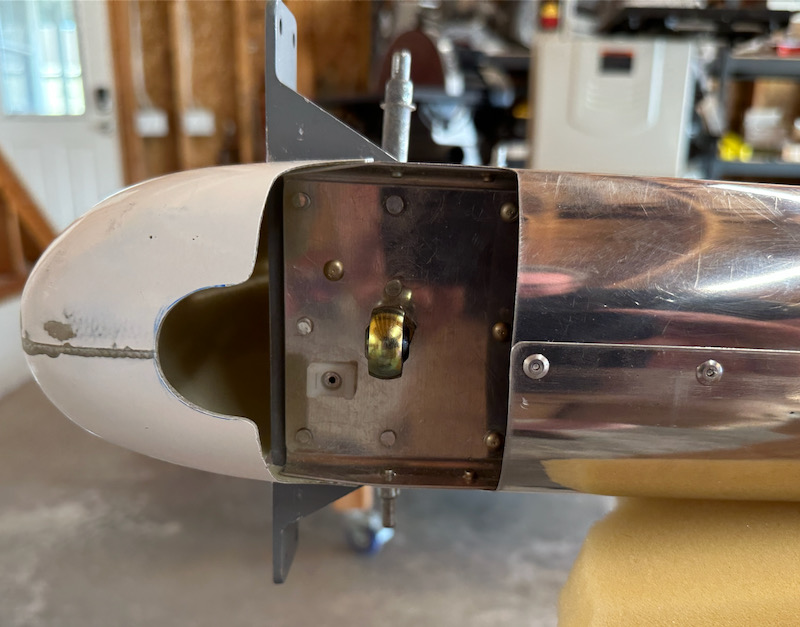
After fiddling with the wiring bundle, I went back and removed more material from the forward end of the bottom fairing, including a semicircular cutout to keep it from sawing its way through the cable bundle:
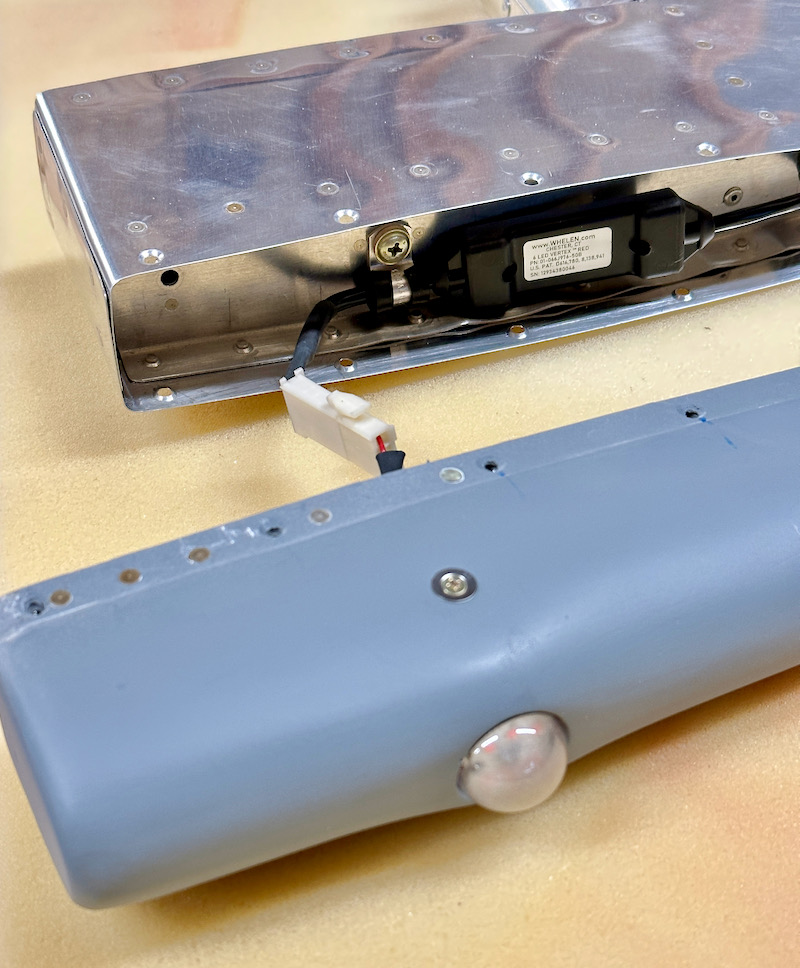
Rather than try to install nuts for the nav/strobe light inside the narrow confines of the fairing, I bought a mounting adapter which simply pop-rivets in place:
I somehow misplaced my old Whelen beacon light unit, so I had to order a new one. In the intervening years they have greatly reduced the thickness of these little lights, so I had to make a new mounting bracket out of stuff I had laying around. You can also just barely see the O-ring I added to hopefully keep rain from running down around the light and getting into the rudder:
The new beacon light also comes with a small LED driver as part of the cable assembly. I added a connector so I can remove the top fairing, and attached the LED driver to the rudder using an adel clamp and one of the nutplates I had fortuitously decided to install in the top rib tooling holes:
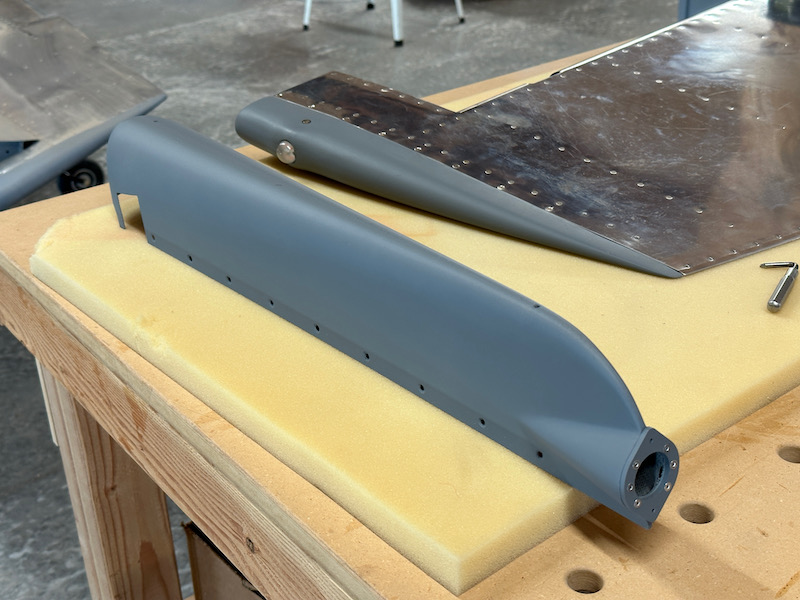
I did a very minor amount of surface work on the bottom fairing – I'll let the painter take care of the rest – and shot a coat of grey primer just to make it look nicer and to make it match the top fairing:
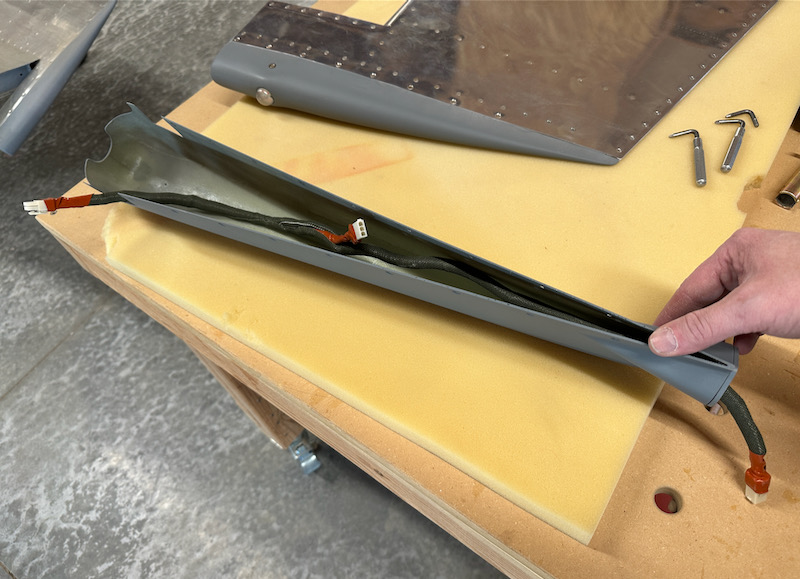
I made a little wiring harness that lives inside the bottom of the rudder, connecting the fuselage to the beacon light and the nav/strobe light. Although this shouldn't move around much, I used snake skin here too since unfinished fiberglass is very abrasive:
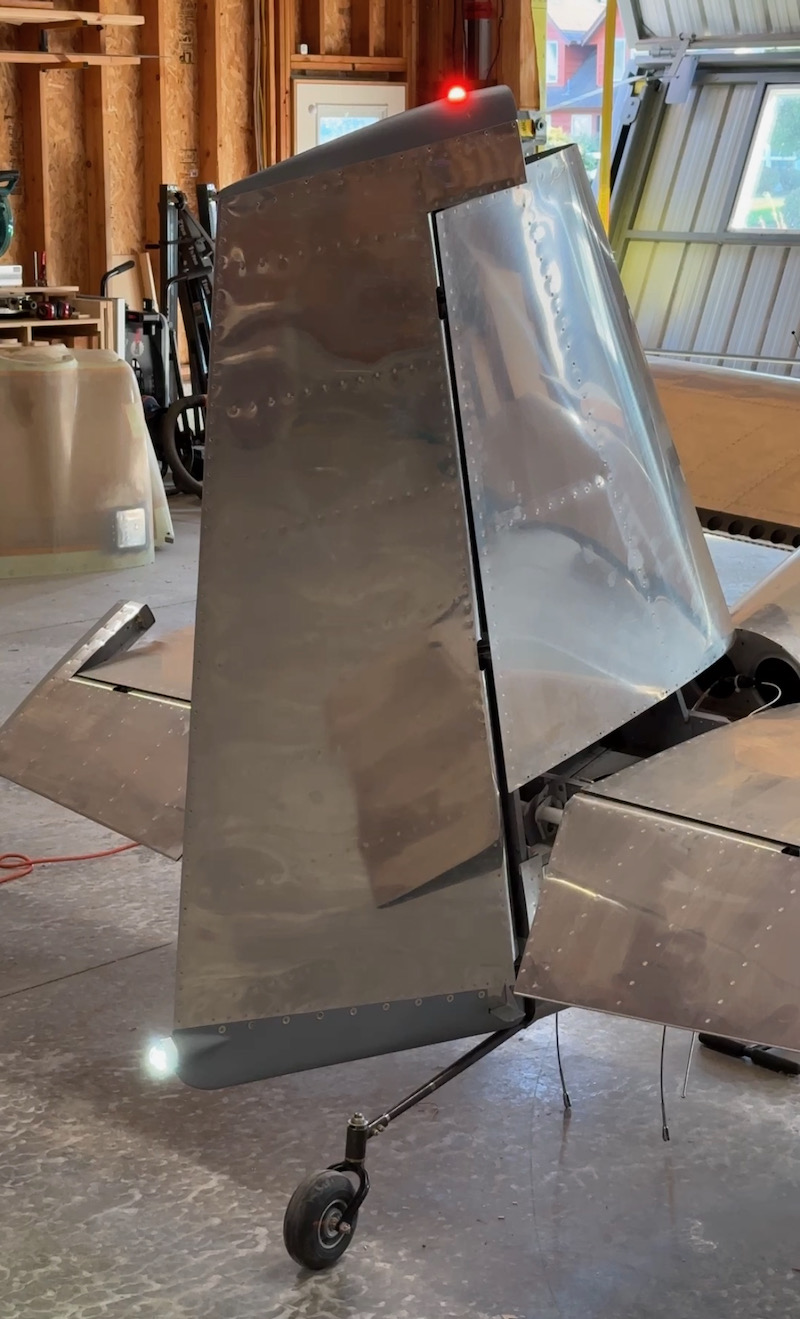
I installed both fairings and mounted the rudder on the airplane with the proper hardware, after struggling to avoid dropping any fasteners down into the bottom of the rudder. The final full-up test confirmed that all the lights are working, which was gratifying to see:
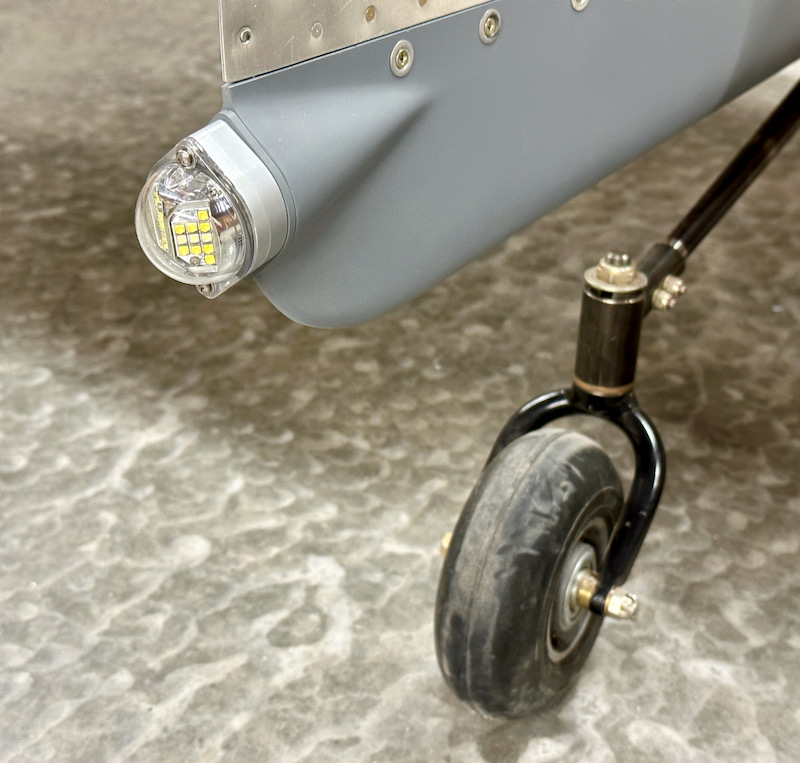
The nav/strobe light is a Whelen 550 unit, which fits great into an RV rudder. I attached it to the mounting plate with some stainless screws from the hardware store:
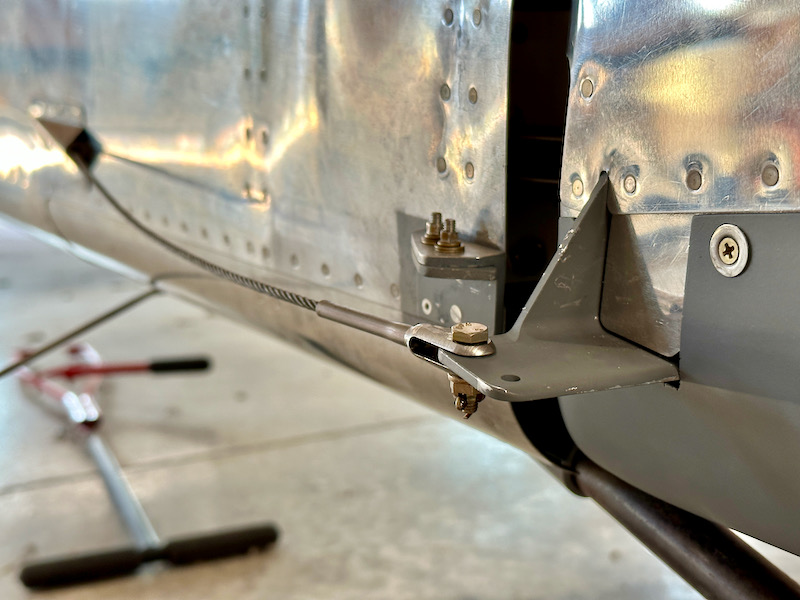
I got the rudder cables hooked up, with cotter pins installed, before I ran out of steam and out of weekend: