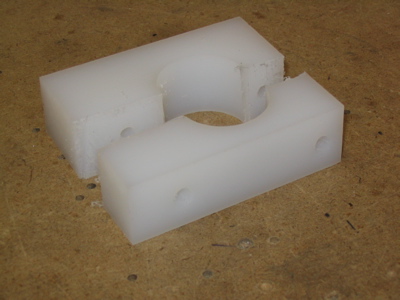
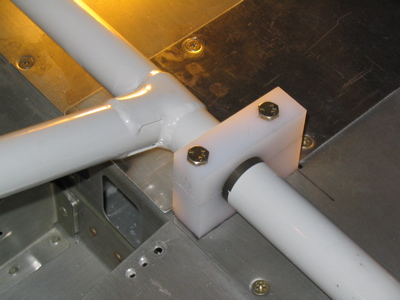
This afternoon's mission: install the flap torque tube. The clevis ends of the weldment got drilled and reamed up to 1/4" for the bolts, and then I drilled and split the center bearing block. My block as supplied was about 1/2" longer than the plans call for, which made where to locate the aft bolt hole a head-scratcher. I decided to put it in the same place it would be if the block was the size called out in the plans, instead of putting it 1/4" from the edge. This turned out to be a good idea (see below).
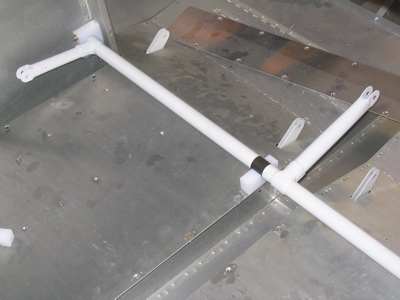
The weldment is inserted into the end bearing blocks, and the whole mess is put in the baggage bay. It's a tight squeeze but it can be wiggled into place. The center bearing block goes over the left-center subfloor rib. I've heard that some people have trouble with the non-powder-coated part of the weldment ending up in the wrong place, but you can see that mine lined up okay.
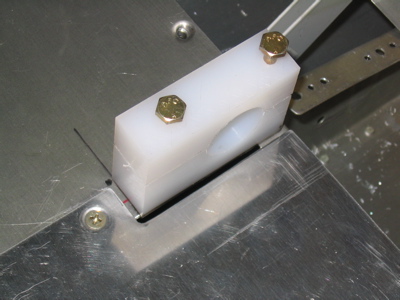
After making sure the center bearing block is centered over the rib, I drilled down through the block into the floor and rib, then removed the whole mess and put in nutplates to capture the bolts. Good thing I decided to move the aft hole away from the edge of the block, or the #10 hole would have been uncomfortably close to one of the #8 nutplates that holds the tunnel cover to the ribs.
I notched the tunnel cover so it can be removed without unbolting the flap bearing block. The left side baggage floor is captured by the flap block, so it will be a little harder to remove easily. That means I'll put the strobe power supplies under the right-side baggage floor, which I was planning on doing anyway for lateral balance purposes.
The whole collection of parts is now bolted in place yet again, although it will certainly be removed and replaced several times later on.
So, the flap torque tube is fitted and installed. Next up is the motor and its housing, probably not until next weekend when I have some time to work.