Today was tank sealing day! Even us quickbuilders have to go through the rite of passage that is Proseal. Imagine poisonous peanut butter that's dark grey and sticks tenaciously to everything it comes in contact with, and you've got the general idea. I had to remove and replace the tank cover plates on my other RV to make some plumbing changes, and I didn't like it much, but at least I already know I can do it.
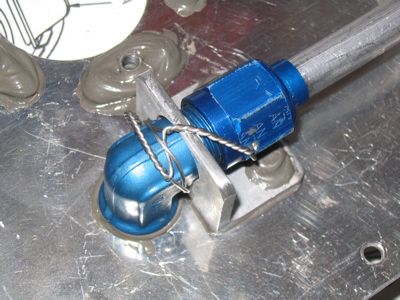
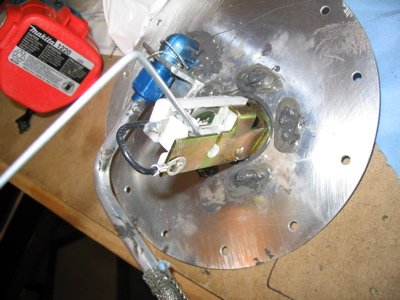
The first step was to attach the fuel pickup tube to the bulkhead fitting that was already installed in the tank cover plate. I sprung for the fancy prefab pickup tubes with the filter screen on them to keep bits of trash out of the fuel lines.
I also complied with the recent service bulletin that mandates safety wiring the flare nut in place. A couple of 1/16" holes through the nut, some safety wire, and done. Now I'm glad I waited a bit to seal up the tanks – it would have been a pain in the butt to remove the cover plate in order to make this fix.
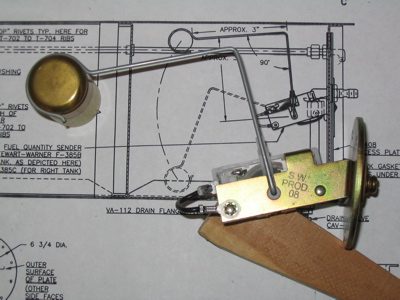
I bent the float arm for the fuel level sender as laid out in the plans, which turned out to be dead on this time. I clecoed the sender to the cover plate and temporarily put it on the tank, in order to verify (with the help of some tape to hold the arm in various positions) that the float arm travels freely from stop to stop and that the length is correct. The float almost touches the top tank skin at the "full" position, and almost touches the bottom skin at the "empty" positon.
I cleaned and scuffed all the mating surfaces so the proseal would stick:

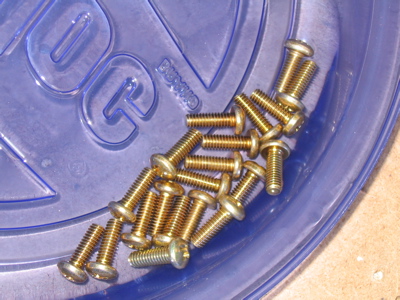
I also washed all the screws in acetone and air-dried them, to make sure the proseal would stick to them too.
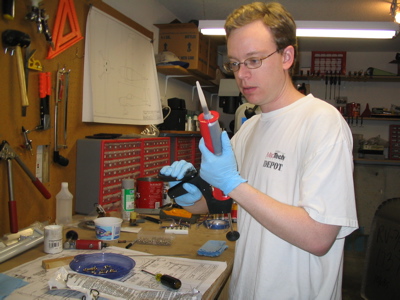
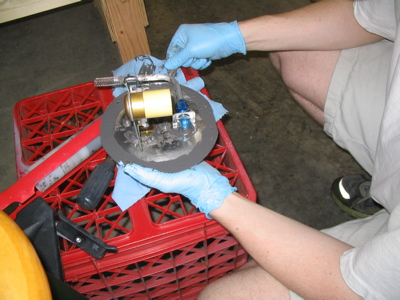
After the parts were all prepared, the tools laid out, grungy clothing donned, and plenty of rags and gloves placed at the ready, it was glue time. I used one of the pre-measured proseal cartridges that Van's sells. It's a bit pricey at fifteen bucks, but it makes mixing and cleanup a snap.
This photo also indirectly demonstrates one of the other important requirements of doing this job – a helper with clean hands who can take pictures, fetch fresh gloves and tools, and so forth. Once again Mary was drafted to perform airplane duties. She was a huge help, since this stuff doesn't give you a lot of extra working time and it gets absolutely everywhere.
First under the glue gun was the fuel level sender. It came with a rubber gasket but I decided to just use a ring of proseal instead, since I was worried about the gasket drying up and cracking or otherwise letting a leak happen. I think they're designed for top-mounting in an automotive application, in which instance you could remove and replace the gasket a lot more easily than you could with an aircraft wing tank.
I buttered up the mating surfaces and screwed them together, first putting some proseal on the screw threads to prevent fuel wicking out. You can see below that I got a nice fillet of proseal all the way around the hole, which is a good sign. I also blobbed some proseal on the ends of the nutplates and around the bulkhead fitting. It already had a bit of sealant on it from the quickbuild factory, but I figured why not add a little more? Then I snapped the float arm into place in preparation for attaching the cover plate to the tank.
As an aside, I wish Van's would use closed-end nutplates on the fuel tanks instead of generic K1000's. Something like a NAS1473 would do the trick, and would definitely reduce the chances of fuel seeping out along the screw threads. I'm not so dogmatic about it that I want to build my own fuel tanks, however! No thank you.
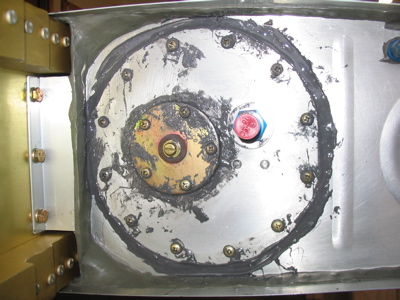
Then I buttered up the mating surfaces of the cover plate and fuel tank rib with delicious toxic sludge (it's low-carb too) and screwed it into place, again with extra proseal dabbed onto the screw threads. Popsicle sticks are useful for spreading the goop around.
See, it really does get everywhere you touch. I made sure to get a nice fillet all the way around the edge of the cover plate, along with a nice "proseal washer" gooping out underneath each screw head. I used MEK to clean off the bulkhead fitting and the screw terminal for the fuel sender, but I didn't bother cleaning up anywhere else. The last thing I wanted was to get solvent into the joints I was trying to stick together!
Experienced builders may notice that I didn't use the cork gasket supplied in the kit. I remembered how dried out the cork gaskets were when I unsealed the tanks on my last RV, so I decided to just proseal the cover plate directly to the tank, as many builders also do. Less chance of an eventual leak that way, if you ask me.
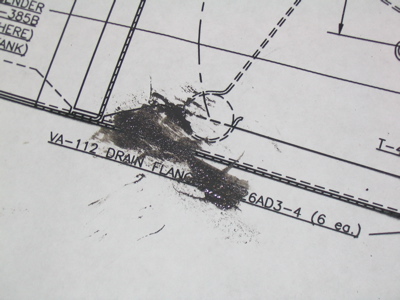
Mary was laughing at me for getting proseal smeared on the fuel tank plans sheet. I guess she took this photo to document it for posterity.
The last step when working with proseal is always to clean the black goo off all your tools. We went through a lot of gloves and shop towels today. My lawnmowing clothes are a little grungier now as well.
I'll let the tank cure for several days before leak testing it. Only then will I know if I got it sealed up successfully. After that, I'll put the left wing back in the rack and do this job over again for the other wing.
Meanwhile, my garage smells like a meth lab. I hope the neighbors don't notice.