Back from Sun-n-Fun… I got to look at a bunch of RVs up close and personal, which was a great boost for my building morale. I figure as long as at least one airplane with worse workmanship than mine manages to make it to a major flyin, I am still doing fine. Anyway, I looked a lots of slider canopies, got a few ideas, and generally came away with a better idea of what need to do to get the canopy started. Oh, and I did a bunch of actual work work too.
Luckily today, the first day back from the trip, the temperature finally was high enough to work with plexiglass:
I didn't take a lot of photos because it's kind of a two-handed job. I wore a dust mask, eye goggles, and long sleeves to protect myself from flying plastic bits. After not too much cutting I put on a pair of shooting muffs after I realized I was getting plastic in my ears – not cool. To make the cut, I used a Norton cutting wheel in my air drill, which seemed to work pretty well. I experimented with the technique of making many shallow cuts, but in the end it seemed to be easier to just cut all the way through the first time, going through the material really slowly.
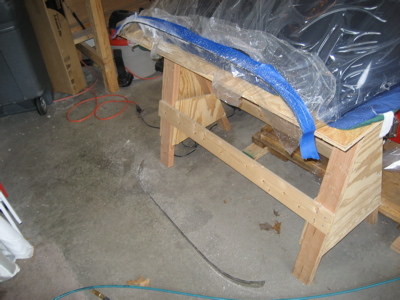
I cut the mold flanges off the front and rear of the canopy, but haven't figured out how to support it while cutting off the bottom flanges just yet. That'll be a puzzle for another day.
I also drilled the hole for the latch tube at the previously marked location. The plans call for this hole to be 5/8", but I made it 11/16" because the steel tube was really tight in the hole and I didn't want it to crack. This area will be sealed with goop and covered with a trim strip, so a slightly oversized hole is no big deal.
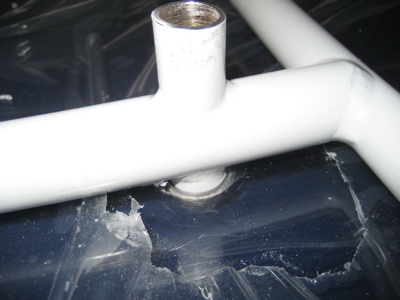
You can't see it because I was lax about taking pictures, but once the latch tube was able to go down into the hole, the canopy frame spine ended up sitting very nicely inside the contour of the canopy bubble. Things seem to be going well so far.