It's relatively easy to remove and replace the engine baffles when they're still individual pieces clecoed together; it's tougher to do it when the various pieces are assembled into big unwieldy shapes. I am trying to design for future maintenance as much as possible, so I am trying to ensure that the baffles can all be removed without drilling out any rivets. In certain places this might require using screws where rivets are specified – we shall see. I know that the finished baffles are all going to have come off at least once before the airplane flies, since there is already at least one airworthiness directive on the cylinders that will need to be addressed.
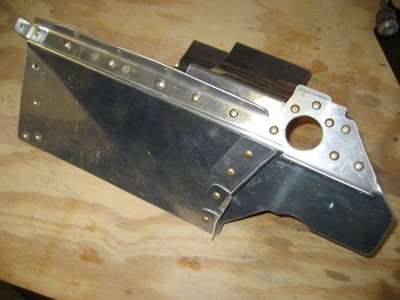
With that in mind, I tested my ability to remove the baffles attached to the #1 cylinder as a complete unit – cylinder head baffle, inlet ramp, and crankcase baffle all clecoed together. With the flywheel removed, it's just possible to twist and turn it enough to get it off the engine and put it back on. So, all the parts you see here will eventually be riveted together as a single assembly.

I riveted the stiffener angle and the various brackets to the inlet ramp. Some rivets could be squeezed, and some had to be driven. Surprisingly, considering I haven't used the rivet gun in ages, none of them look too bad. Note the use of flush rivets between the three screws that will eventually attach an air dam in front of the #1 cylinder.
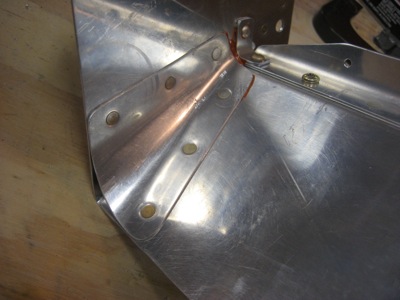
Then I riveted the cylinder baffle and corner gusset to the inlet ramp With careful planning, these rivets can all be squeezed if you do it in the right order. You can see where I used some red RTV between the mating parts to fill some gaps that would otherwise be air leaks.
I'll wait to rivet the crankcase baffle until I finish fitting the baffles for good, since not having it permanently attached makes it a lot easier to remove and reinstall the baffles… and unfortunately there's still a lot more of that to come.