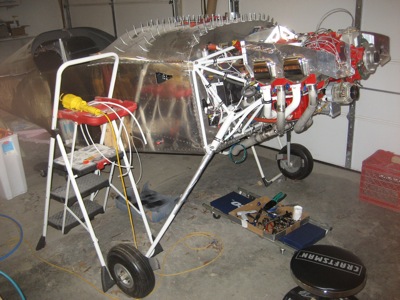
I got the big cables run for the starter and primary alternator. Here's an overview shot, and I'll walk you through the details below:
I played around with several different variations of cable routing before I found a configuration I liked, which took several hours. Then I had to take it all apart, cut the cables to the proper length, and install the terminal ends with my crimping tool in the vise. This is 4 AWG wire in this photo.
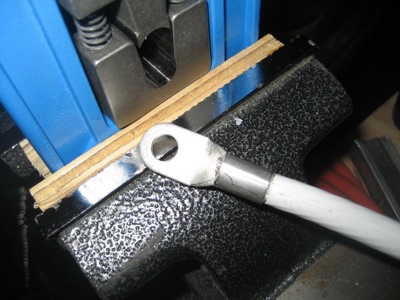
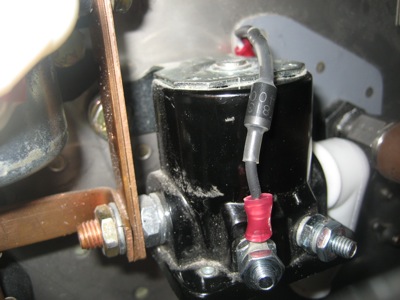
Good thing I didn't forget to install the current sensor on the alternator cable before I crimped on the ends. Proper clocking of the terminals is important here too.
Young Ryan from work stopped by for a visit, and I put him right to work. An extra set of hands is… handy!

We made a spike catcher diode for the starter contactor out of a 1N5400 I had laying around. The anode connects to ground through one of the mounting bolts, and heatshrink insulates it all.
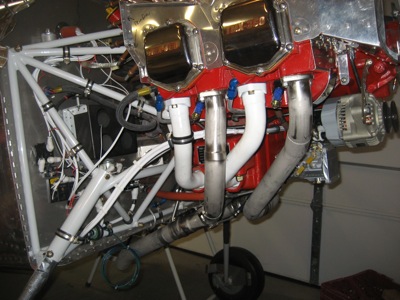
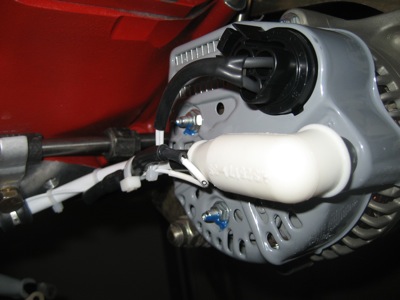
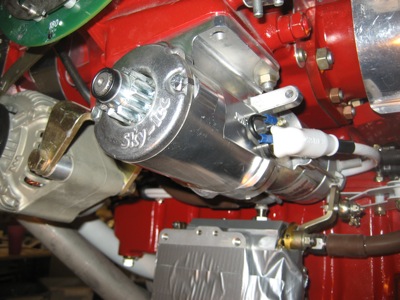
Here begins the tour. The starter cable leaves its contactor and heads towards the right side of the firewall (left in this picture). The alternator cable comes off the big current limiter, goes through the current sensor, and continues on in the same direction. You can also see the much smaller alternator field wire, which comes in from the top and parallels the whole works. Adel clamps are everywhere, holding the big cables securely.

This may be my crowning achievement in adel-clampery. Three clamps on the same bolt hold both the starter and alternator cables to the engine mount, and another adjacent pair holds the alternator current sensor. If you've ever dealt with adel clamps, you can imagine how fun it was to install all of this.
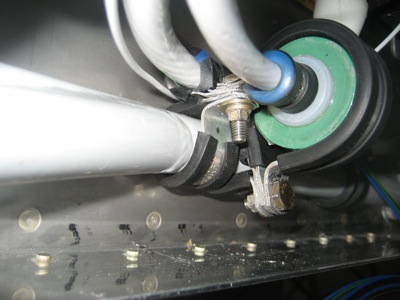
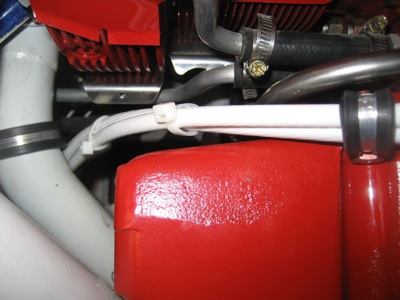
The two cables meet up at another set of clamps on the starboard gear socket:
Then they turn the corner and run in parallel through space up to the engine. I left a bit of slack to accommodate relative movement between the engine and the fixed components.

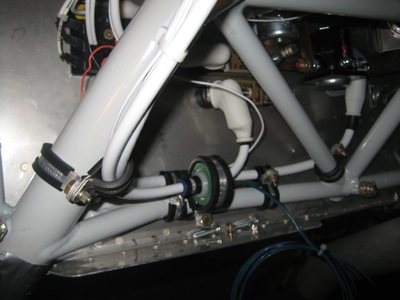
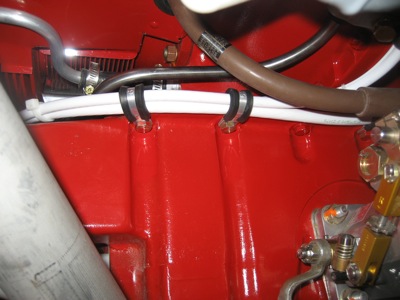
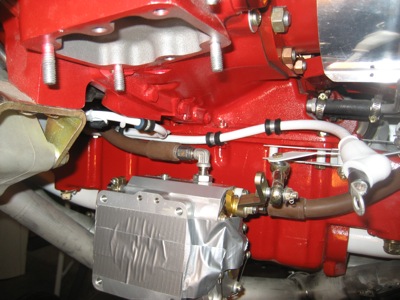
The wire bundle is clamped to the #3 cylinder induction tube and then runs forward from there.
The wiring runs along the top of the oil sump towards the front of the engine. It's hard to see, or even to photograph properly, but the exhaust pipes are nowhere near the wires – the pipes are at least three inches outboard, not visible in this photo.
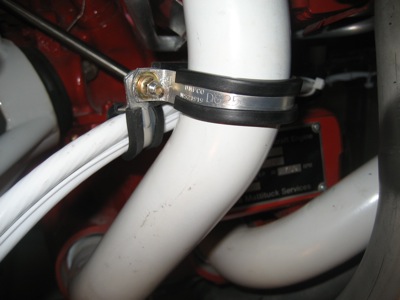
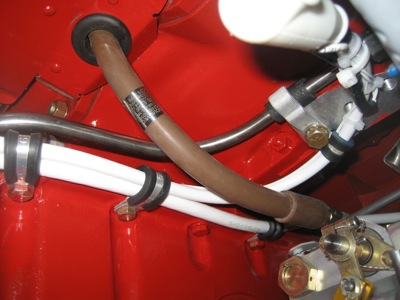
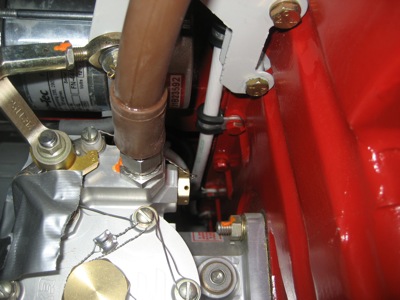
Adel clamps attached to convenient sump bolts bring the wires around the corner and back around towards centerline. There's adequate clearance between the wires, oil sump, and prop governor line, and the wires are secure enough to avoid chafing.
The alternator cable then splits off and does a 180 back towards the alternator. A clamp on the bolt that holds the prop governor line in place keeps the cable from flopping around and rubbing against the nearby fuel hose.
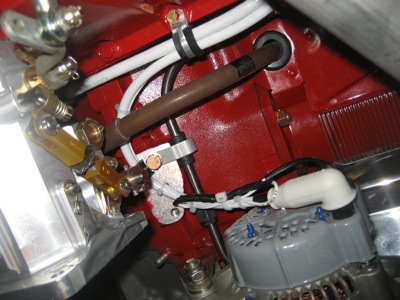
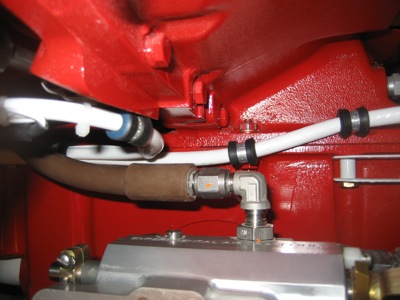
This is a view of the same area, looking upward from below:
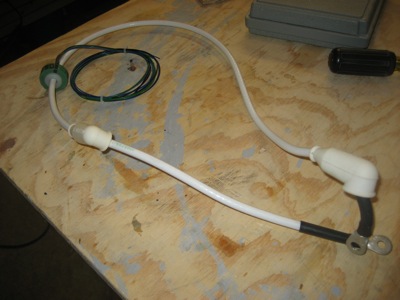
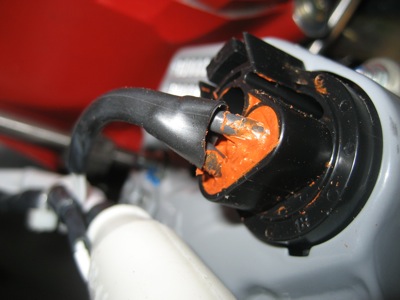
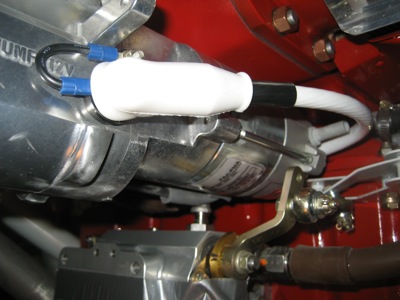
I put a knife splice joint and a service loop in the alternator field wire, and used plenty of heatshrink to support the wire where it goes into the (needlessly huge) plastic field connector. This seems like a prime location for a wire to fatigue and break, so I tried to secure things as well as I could.
Later on, I potted the connector with RTV to further secure the wires:
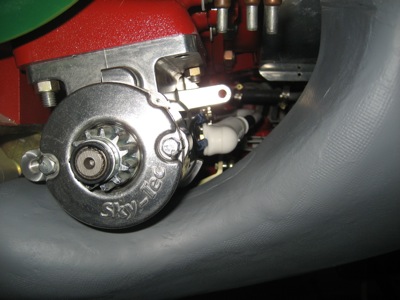
Meanwhile, the starter cable continues across to the port side of the engine, behind the starter itself (removed for this photo).
Note the clamping arrangement needed to bring the starter cable around the spine of the engine and then back up to clear the mixture bellcrank assembly. This is heavy 2 AWG wire, so you can't just bend it out of the way and hope it stays there, you have to bolt it down.
Around the back of the starter it goes, then bends forward to the starter terminal post:
From the front it looks like the starter cable must surely be rubbing on something back there, but from below you can see there's plenty of clearance between the wire and the starter housing:
No conflicts here:
I also had a rare burst of foresight, and brought out the air duct to check for interference with the starter cable. No problem here either:
It's good to have the two heaviest wires on the airplane installed for good. Just one of a million details left to do before this thing is finished…