Archive for July, 2006

More plumbing

Sunday, July 16th, 2006

I got the other fuel vent line made up and installed the other day, but I forgot to take a picture of it. This morning I put all the adel clamps on both vent lines, so you get a picture of the second vent line now.

Then I installed the brake reservoir on the firewall, in the location called out in the plans. I used the unibit to enlarge the pilot holes I drilled in the stainless. It took a bit of measuring to figure out exactly where to drill, but it turned out great. For those of you playing along at home, the bolt holes are exactly 2" apart, and the pass-through hole for the fluid fitting is 1/2" diameter, 1 3/8" down from the centerline of the bolt holes.

I started playing around with the brake lines, but I am really having doubts about the use of plastic tubing here. Even though it worked fine on my other RV, it just seems cheesy. I may wind up using more robust braided steel lines (example here) rather than the plastic. Not quite sure what lengths of hose I'd need to do that, though.

Fuel plumbing

Saturday, July 15th, 2006

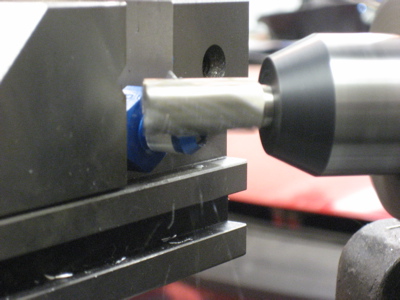
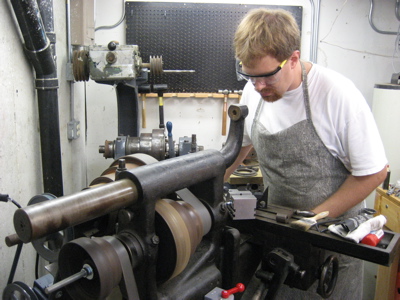
I took a couple of AN832-4D bulkhead fittings over to my friend Scott's house, where he used his garage full of machine tools to turn them into RV-7 vent exit fittings. Here's an action shot of one of them having a 45-degree cut milled into it, after the threads had already been turned down in one of his three lathes.

Scott's garage is completely full of huge machine tools and half-assembled motor vehicles. I can only imagine what it will look like in there when he's an old guy and he's had time to really collect stuff.

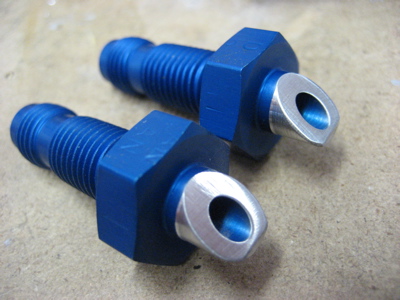
After I got home I polished the ends a bit with the roloc wheel. They came out great. Thanks Scott!

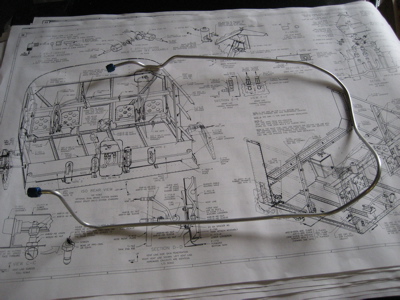
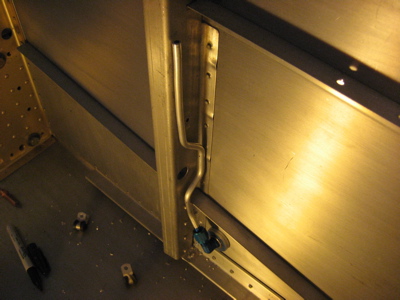
Then I started playing with the plumbing that brings fuel from the tanks to the selector valve. I had already decided to make the run from the valve to the wings in two sections, with a bulkhead union fitting in the middle somewhere. I did something similar on my last RV and it worked out great – it's much easier to bend a perfect fuel line if you can make the two ends independently.

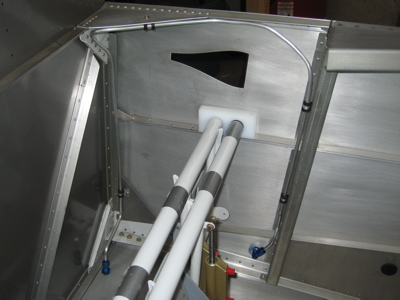
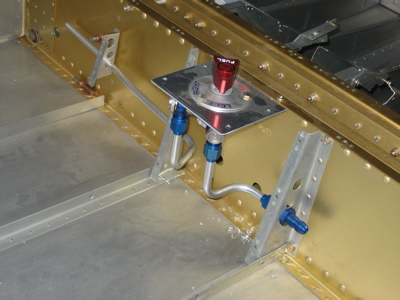
Here's my first idea, which was to put grommets in the inner cover support ribs and locate the unions in the outer ones:

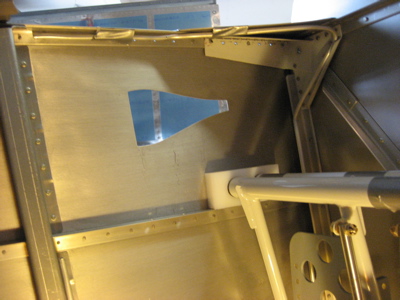
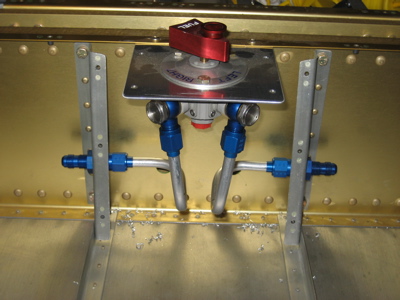
That was relatively easy to make and would have worked well. The problem, though, is that since only the outer cover support ribs are removable (the inner ones are permanently riveted in place) the fuel line would have been held captive once both ends were flared. That would have made maintenance and interior painting a little more troublesome. So, I started playing with the idea of putting the unions in the inner cover support ribs, like so:

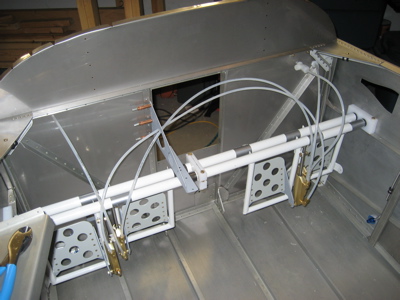
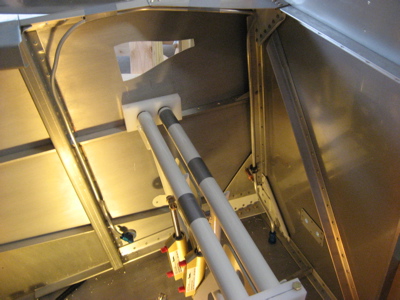
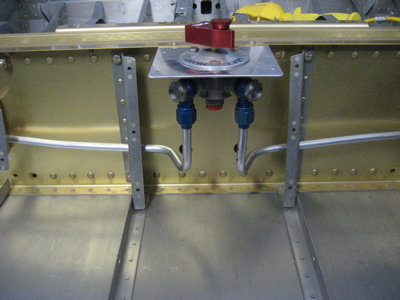
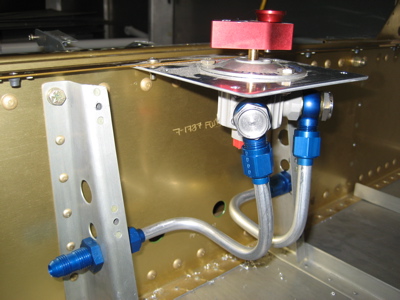
Here's both lines in place. I like this arrangement a lot better.

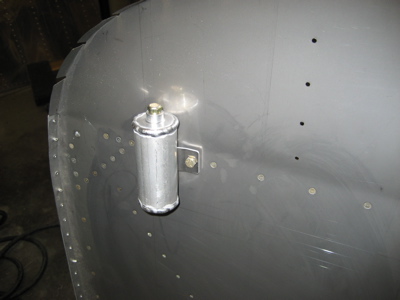
Another shot for posterity. Banjo fittings make life a lot easier.

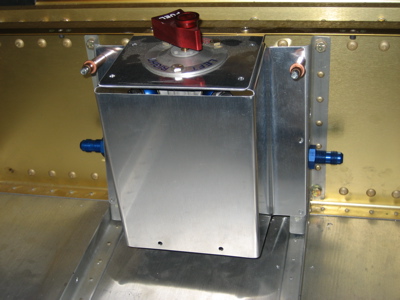
And it all fits within the selector valve cover. Ignore the gap you can see in this photo – this is not an angle from which you'll ever be able to look at the selector valve once the airplane is finished.

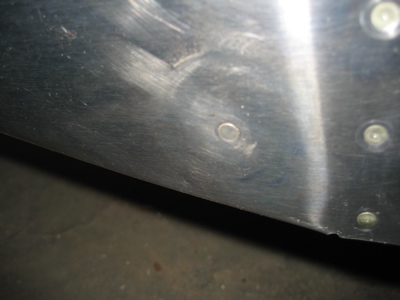
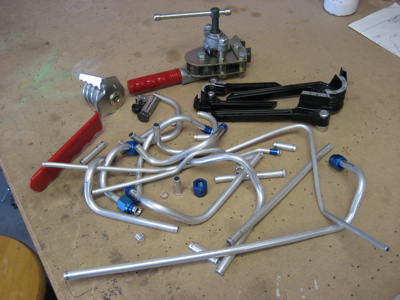
Of course, the photos above make it all seem very easy, but in reality I went through many many iterations before arriving at the final product. Here are some of the previous test pieces that didn't make the cut:

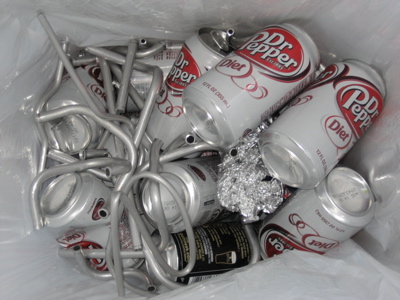
Remember kids, always recycle!

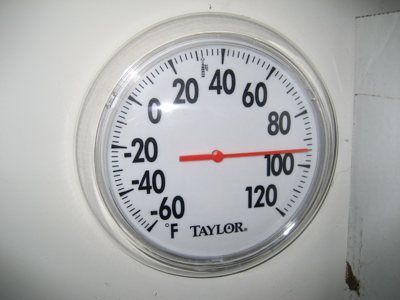
94 degrees inside the shaded garage? No wonder I was feeling parched. Time to knock off for the day and wait for the girl to come home from work.

Made one fuel vent line

Tuesday, July 11th, 2006

I got the left fuel vent line fabricated successfully tonight. Since I'd already practiced making the more complicated bends, it was relatively easy. I used a spring bender, which helped.

Here's the finished product outside the airplane. I would've made up the other vent line tonight too, but I'm out of tubing. I should receive my latest ACS order later this week and then I'll be good to go.

While I was working on this stuff, it suddenly started raining really hard, which lasted for about two minutes and then quit just as suddenly. Kansas weather.

Playing with fuel vent line

Sunday, July 9th, 2006

I drilled the holes in the fuselage side skins for the fuel vent and feed lines. The vent line gets a 90-degree bulkhead fitting, and the feed line gets a big 1" hole and a rubber grommet. I hope the prepunched guide holes were in the right place, 'cuz I just put some big honking holes in the side of my airplane.

I used some scrap pieces of 1/4" tubing I had laying around to experiment with the bends needed to form the fuel line. This is the lower forward part, down under the rudder pedals. Not too difficult:

This is the lower rear part, where the tube has to come off the elbow fitting and then zigzag around the rudder cable. Tricky.

Here's the upper forward part, where it makes an odd bend underneath the weldment in order to clear the engine mounting bolt:

None of this is too hard, although doing all of the above with one continuous piece of tubing will be interesting.

While I was messing around, I finally got around to filling in the prepunched pilot holes for the steps with some AN426AD3 "rivets to nowhere", as the plans call them. We don't need no stinking steps on this tail-dragging airplane!

My parents were in town, so my dad came down to the garage to check out the RV. He seemed pleased, as you can tell:

(Really)

Prosealed new rudder trailing edge

Friday, July 7th, 2006

Today I prosealed the trailing edge on the new rudder. I first squirted some blobs of proseal into the trailing edge of each pair of stiffeners, to guard against future cracking.

Then I buttered up the AEX wedge with a very thin layer of sealant…

…and inserted it into the rudder. The clecoes squeezed out a bead of proseal, which I wiped off.

Now to let it cure for a while. Upon reviewing these photos, it appears that the proseal I used here is a little lighter in color than the stuff I used on the fuel tank covers. Maybe I didn't get it mixed quite enough? It will probably take a bit longer to cure, but that's okay as long as it eventually does.