Mary left me this message on my whiteboard. This is probably good advice for someone working on an RV canopy.

When the plexiglass canopy bubble is clamped to the steel frame, it pulls the sides of the frame outward a surprisingly large amount. If you have previously bent the frame so it rolls perfectly in the tracks, this screws up your alignment and makes the canopy almost impossible to roll. Needless to say, this is undesirable on the finished aircraft. The plans make a big deal about not bending the canopy frame once the plexiglass is drilled to the frame… then they turn around and say to drill the canopy to the frame, then bend the frame so it fits the fuselage again. Don't do this! It's a trap! Once you drill the holes, you are locked in forever. The first statement from the plans is correct – any bending of the frame after the holes are drilled will put stress on the canopy and it will eventually crack.
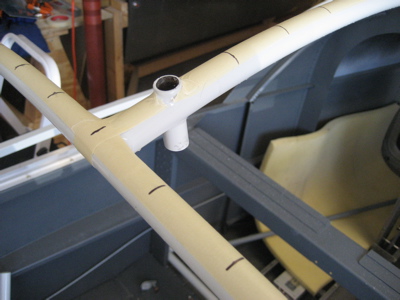
What you really need to do is first bend the right amount of preload into the frame, so the canopy rolls smoothly with the plexiglass clamped to the frame. Only after the canopy rolls properly with the plexiglass in place should you drill the holes. I re-bent the canopy frame to make its resting size about 1/2" narrower than it was previously, which makes it squeal horribly and resist mightily if you try to roll the frame by itself. However, when the canopy is clamped on it gets wider and the friction on the rollers goes away again.
After doing the above, I put two layers of masking tape on all surfaces where the plexiglass comes in contact with the canopy frame, and marked hole locations every 2" per the plans.
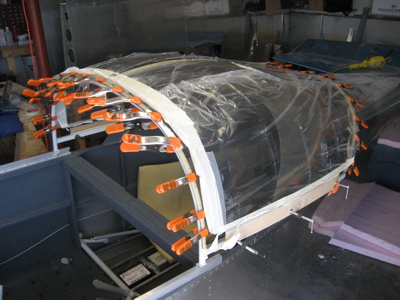
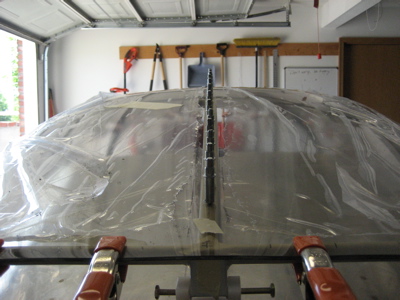
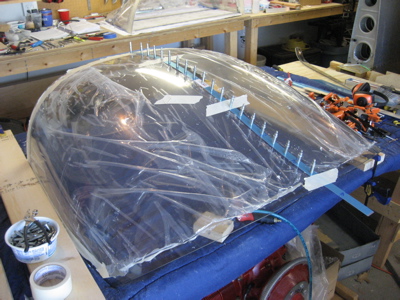
Back on the frame goes the canopy, secured by eleventy billion clamps.
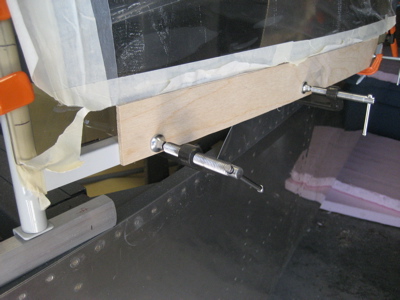
Along the sides where the plexiglass will be secured by the side skirts, I clamped some strips of wood to the frame to keep the bubble from bulging outward.
There are a two conflicting schools of thought on what kind of drill bit to use for the initial holes in the canopy and frame. The plans state that in general you should use special plexiglass bits for enlarging existing holes in plexiglass (because a regular split point bit can grab and crack the material) but they don't specifically say what kind of bit to use to make the pilot holes in the first place. Since a plexiglass bit basically works by melting the material you're drilling, it obviously won't make a hole in steel, which is problematic. I emalled Van's to ask for clarification and was told:
You can drill through the plexi with the plastic drill far enough that it starts a hole in the frame, then remove the plexi and finish the hole with a regular drill.
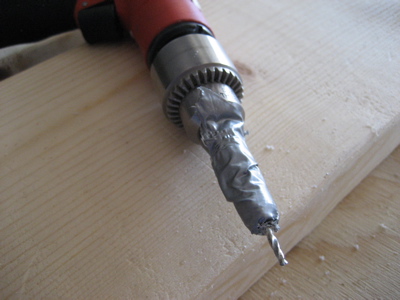
That sounds like it would involve a lot of removing and replacing the canopy, which doesn't seem very fun. A second method advocated by some folks is to make the first holes with a regular #40 bit, which is what ended up doing. I used a pretty dull old bit just for luck, and turned it fast with almost no pressure so it would sort of melt its way through. I also put a bunch of duct tape over the drill stop to avoid marking the glass when the drill broke through the steel.
Oh boy, we're committed now:
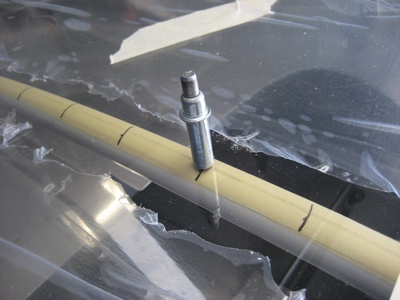
Note in the above photo how a centerline magically appears where the canopy compresses the tape. You still need to mark an X on the outside of the glass before drilling each hole, because there's a pronounced parallax effect that could ruin your day if you're not careful.
I drilled all the holes in the center spine, starting in the middle and alternating forwards and aft. The tape trick made it pretty easy to put all the holes exactly on the point where the glass is tangent to the frame.
At the most forward and aft holes, the shape of the canopy and frame were different enough to require some small shims. I used some nylon washers I had laying around. It's important to shim every hole if/as required, rather than trying to force the plexiglass to follow a shape it doesn't want to. Less stress on the canopy equals less chance of cracking.
![]()
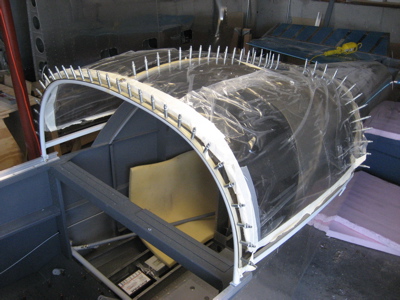
Here's the canopy with all the holes drilled and clecoed to the frame. You can roll it open and closed with one finger – victory!
Once the position of the canopy on the frame was locked in, I used the belt sander to even up the forward lip. It's now a fairly uniform 1/16" forward of the front bow across the entire length. I smoothed this up again with 400 grit later.
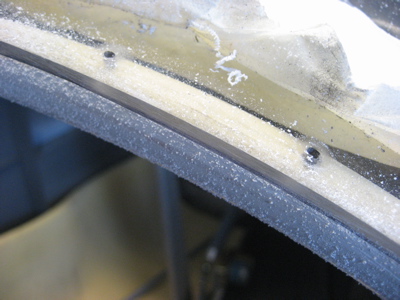
Then I took the canopy off the frame, and back-drilled the C-653 cover strip through the holes in the plexiglass:
Finally, I enlarged all the holes in the plexiglass to 1/8" with the plexiglass drill bit, and deburred everything. The holes in the frame I left at #40 for now, so I can leave the canopy clecoed to the frame without worrying about the clecoes putting stress on the holes in the plexiglass. Eventually the frame holes will be drilled up to #30 for blind rivets, and the holes in the canopy will go up to 5/32". The idea is to leave room in the holes for thermal expansion all around the fasteners, again with an eye to preventing cracks.