Archive for the ‘Canopy’ Category

Put the canopy to bed

Sunday, September 16th, 2007

To keep the canopy from having to sit on its own side skirts when it's not on the airplane, I threw together this very simple storage rack out of scrap lumber:

To capture the rollers, I knocked a 1" hole in a chunk of scrap 2×2 with a spade bit, then cut it half to make these little cup thingies. A wood screw from beneath holds each one in place.

In the back, the rear pins rest on wood blocks that are screwed to the bottom piece:

I carried the canopy upstairs and stored it carefully on its rack, on the guest bed. The exterior handle in the back makes it a snap to carry the canopy around solo – I think you'd need a helper if you didn't have the handle to grab.

And now I have a canopy bed again! I swear, that joke never gets old.

Canopy finishing touches

Saturday, September 15th, 2007

A while ago I ordered a nice machined aluminum handle for the exterior part of the canopy latch from Rivethead Aero. They took my payment and then disappeared for a couple months, but after repeated badgering I finally received my latch handle. It's really a work of art, which makes their disappointing customer service even more of a shame.

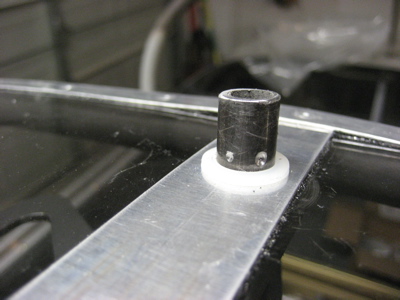
Anyway, I cut the latch shaft to the proper length after some fiddling and measuring. The handle is secured with a couple of setscrews, and for safety's sake I used a drill to put a couple of little dimples in the steel shaft for the setscrews to bite into. I just didn't feel right about the handle being attached solely by friction. Speaking of which, I used Vibratite on the setscrews, which should hopefully keep them from departing the aircraft.

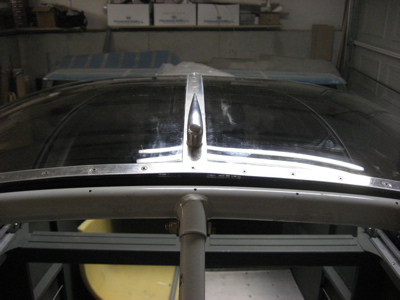
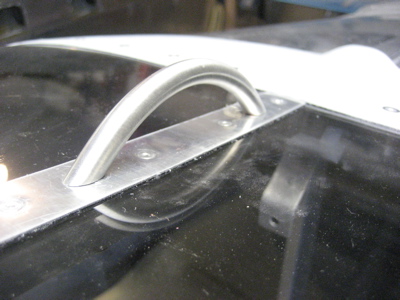
The handle looks awesome:

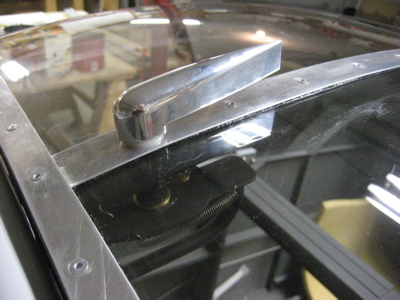
And of course, me being me, I spent a bunch of time fiddling with the alignment of the handle to get it perfectly parallel to the centerline of the fuselage when the canopy is closed and latched.

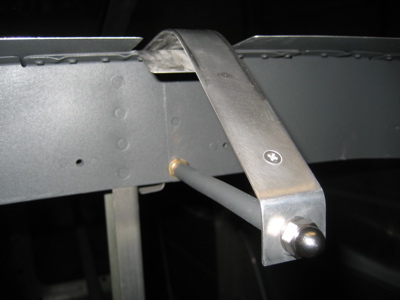
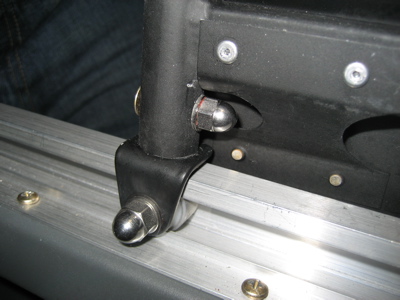
At the forward end of the canopy slide rail, there's a brace that stiffens the overhanging portion against the F-706 bulkhead. The plans show this brace being constructed from a piece of threaded rod and some jam nuts, with a big ugly nylock nut on the end. I have a thing about wanting the interior of my airplane to not look like I built it in my garage, so I decided to dress this area up a bit. I used a piece of aluminum tubing, painted to match the rest of the interior, to cover the threaded rod and make it look a little nicer. At the forward end, I replaced the nylock nut with a swanky looking self-locking stainless steel acorn nut, which is a bit more professional looking.

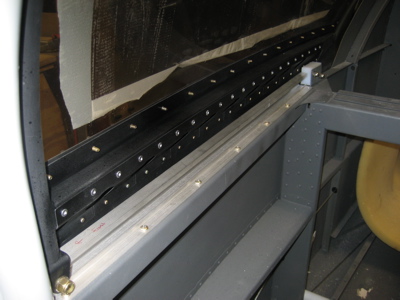
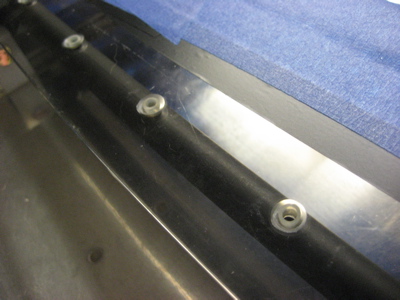
I decided to keep going with the acorn nuts, using them in place of nylock nuts to attach the rollers to the canopy frame, as well as on the screws that act as the axles for the roller wheels.

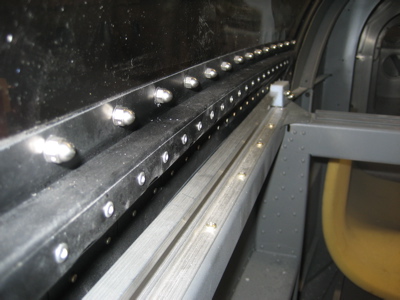
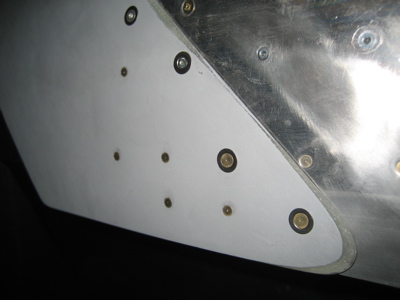
Along the sides, I replaced all the #6 nylock nuts with more acorn nuts. I also used acorn nuts on the interior faces of the C-677 rear pin mounts, although it's hard to see in this photo. Now there are no exposed fastener threads visible on the inside of the canopy whatsoever. This is a purely cosmetic modification, but I really like the way it dresses up the interior.

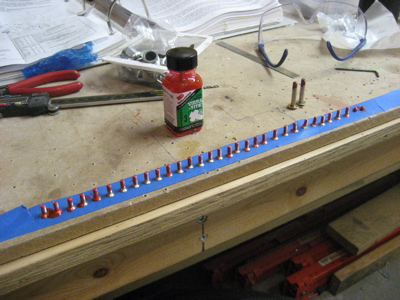
I used Vibratite on all the screws and bolts in the canopy. At one point I had a regular assembly line going:

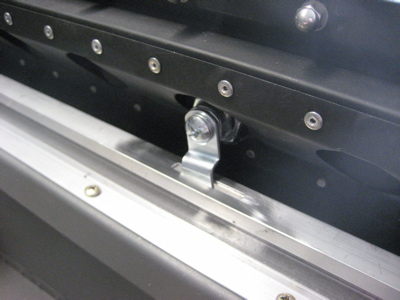
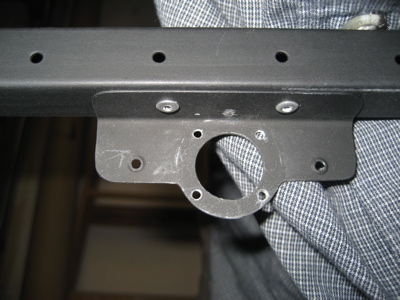
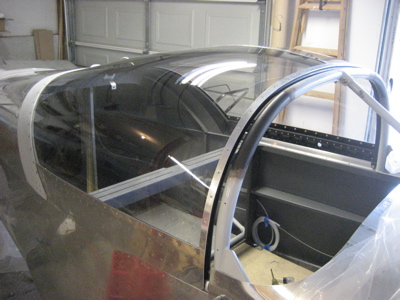
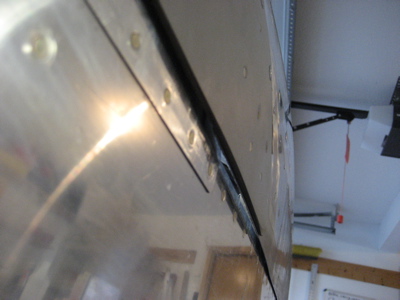
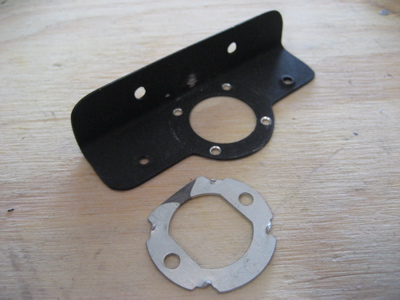
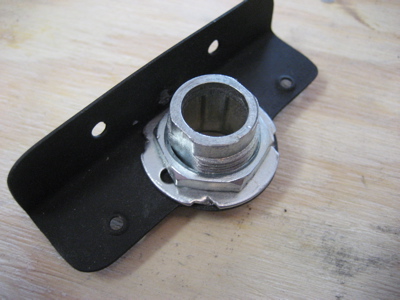
Next, I installed the canopy lock for good:

I cut a slot for the lock arm into the canopy track. In its normal unlocked position, the arm points forward, parallel to the track.

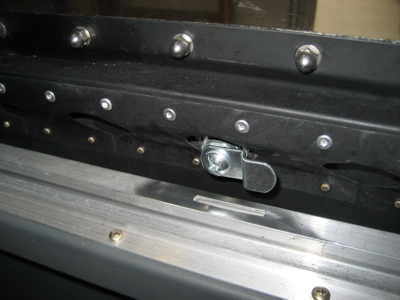
When it's locked, the arm swings down into the slot and prevents the canopy from being slid open more than a small fraction of an inch. Well, unless you were to beat on it hard enough – it's not particularly sturdy.

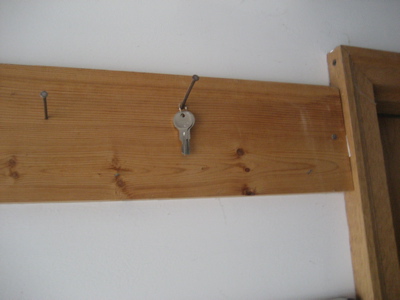
This is a photographic record to remind myself where I stashed the keys:

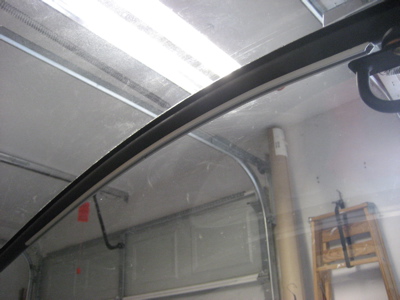
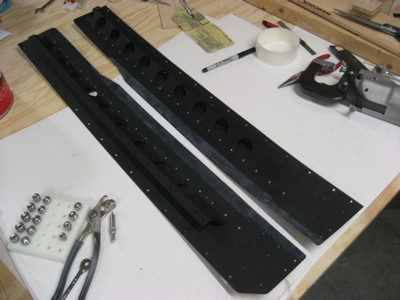
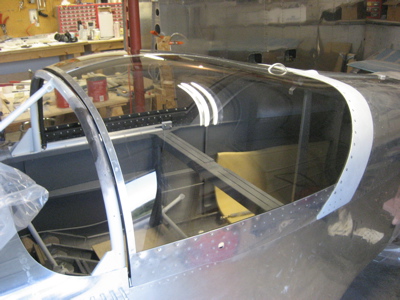
In the spirit of checking off the remaining items on my canopy to-do list, I installed the little track for the canopy shade:

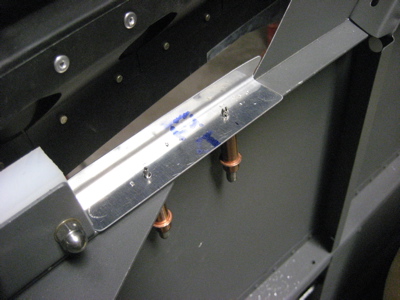
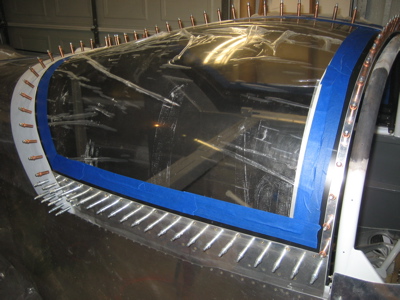
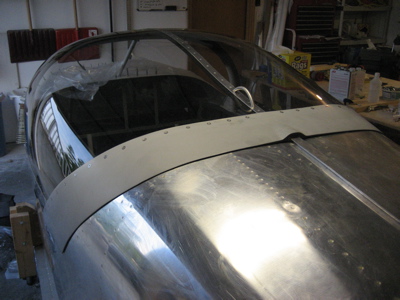
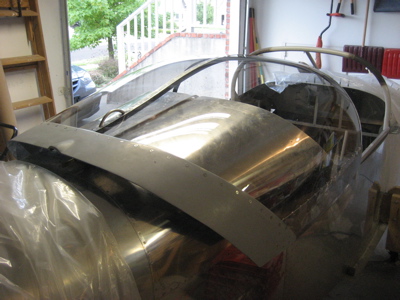
Then I whipped up these little air baffles out of some leftover angle stock, and fitted them to the fuselage and canopy. They'll eventually be painted to match the interior, and will be attached to the longerons with a couple rivets. They butt up against the inside of the side skirts at the rear of the canopy, and will serve to seal up the small gap back there.

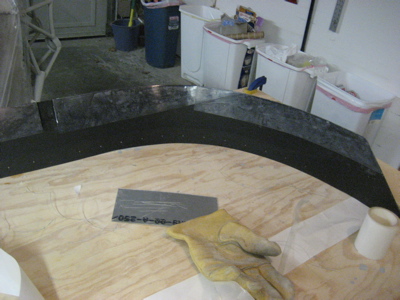
After thinking about it for a few days, I decided to drill out the front two rivets on each side of the canopy, where the leading edge of the fiberglass aft skirt attaches to the side skirts. I replaced the previous 3/32" rivets with 1/8" rivets sitting inside tinnerman washers, which makes me feel better about the rivets not puling through the fiberglass. The airflow is going to try to peel the fiberglass skirt back in this area, so I wanted to beef up the attachment a bit.

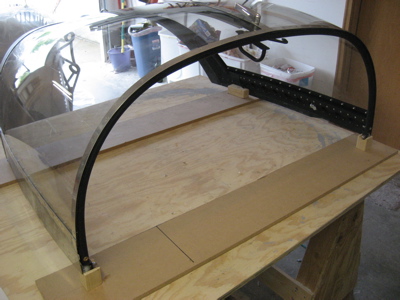
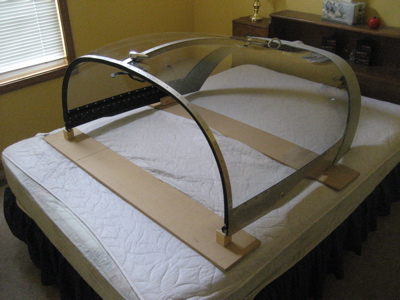
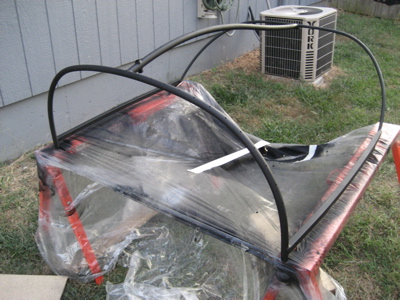
Well, that about does it for the canopy. Next I'll build some kind of a frame or platform to set it on, and stash it in the house so it will stay out of the way and not get scratched.

Assembled the canopy

Sunday, September 9th, 2007

I started the day by riveting the C-791 skirt braces to the side skirts. I also applied a strip of UHMW tape along the bottom edges, to keep the skirts from scuffing the paint on the fuselage.

I also put some UHMW tape at the trailing edge of the aft skirt, for the same purpose.

The first part of the canopy to get permanently riveted to the frame was the little lock bracket, which I attached with a couple of LP4-3 blind rivets.

Then I clecoed the whole canopy together, inserting screws along the sides, and checked the fit one last time. Finding everything to be satisfactory, I used more LP4-3 rivets to attach the tops of the skirt braces to the inside of the canopy frame.

Here's a little trick I picked up from somebody's website: by drilling the fastener holes 1/16" oversize and making tiny little bushings out of 1/32"-wall surgical silicone tubing, you can keep the fasteners from ever contacting the insides of the holes. Theoretically this should help prevent cracking, but it ought to also have the side benefits of preventing rattles and making the canopy more watertight. Anyway, it wasn't a big deal to make these little bushings, and I'm all for anything that will help keep my canopy in one piece.

With everything clecoed in place, I applied electrical tape to the plexiglass along the edges of all the various skirts and cover strips, and followed up with blue masking tape to cover any remaining exposed plexiglass. I prefer this combination when I need to very precisely mask around objects with irregular contours, and just about everything on the canopy is curved in some way.

Here's where the construction photos stop, because for the rest of the afternoon I had sticky fingers, the clock was ticking down the working time of some glue, and Mary wasn't home to help with camera duties. So, here's a textual description of the next four hours' worth of work:

  • The weather outside was unseasonably cool today, so I had to keep the garage door closed so the temperature would stay up in the 80's and make the plexiglass happy. Because of the solvents and glue I was using, I had my VOC respirator on the whole time to keep from gassing myself.
  • I began by removing the aft skirt and the center and forward cover strips and putting down a bead of Lexel on the exposed plexiglass. The side skirts were non-removable at this point, but I was able to remove all the clecoes and force Lexel down into the gap between the side skirts and canopy. If you're interested, a toothpaste-tube-sized container turns out to be enough to do one canopy.
  • I made a special effort to goop a bunch of Lexel into the cavities formed by the 7/16" holes in the plexiglass where the stacks of washers go to support the exterior handle. It wouldn't do to have water leak in along that path. Some masking tape on the interior side formed a temporary dam to keep the sealant from dripping down into the fuselage.
  • After all the sealant was dispensed, I tightened the nuts on the #6 screws that attach the plexiglass to the side skirts, and then put the aft skirt and cover strips back on and clecoed the canopy back together.
  • After tightening the screws and reinstalling the clecoes, there was a tremendous amount of sealant squeeze-out to deal with. I cleaned up the biggest blobs with popsicle sticks, and then removed the masking tape, but there was still a bunch of sealant oozing out from under the exterior pieces. The surfaces of the skirts and cover strips were also heavily contaminated with Lexel. I dealt with this by removing one cleco at a time, cleaning the affected area with naphtha, and replacing the cleco. Naphtha was the only thing I'd found that would remove Lexel without damaging plexiglass, and I bet I used a half-gallon of the stuff. Plus a bunch of shop rags and elbow grease.
  • Then I started replacing clecoes with rivets, using the cool pneumatic puller I bought at Oshkosh to pull the blind rivets. This tool was totally worth the investment, as it almost completely eliminates the risk of gouging the surface of the part with the broken-off mandrel that you get when you pull pop rivets with a hand tool. To me it was a no-brainer to buy this tool in order to protect my canopy from damage. Plus it was on sale.
  • Installing the rivets caused more Lexel to squeeze out, so I revisited each area with naphtha as I pulled the rivets. Ideally I'd like the sealant to be minimally visible – the canopy will still be watertight if the sealant is out of sight underneath the skirts, and it will look better that way.

    I kept repeating the last two steps until I ran out of holes, and then suddenly the canopy was done. I pulled off the remaining protective plastic, and there it was in all its glory:

    Same view from the other side:

    The aft skirt (held in place with tinnermans under the rivet heads as planned) fits as perfectly as can be:

    There is very little resistance in the rollers – the canopy can be opened and closed with one finger.

    The exterior handle looks like it was made to go on an airplane:

    The only perceptible gap between the side skirts and the fuselage is towards the very back, just in front of the fiberglass aft skirt. This is a pretty typical place for an RV to have a gap, and mine is a lot smaller than most other airplanes I've seen. Later on, I will seal this by riveting pieces of angle inside the fuselage to close up the gap.

    Mary eventually came home and took the requisite triumphant photo of me enjoying the view from inside my newly completed canopy:

    All in all, I'm extremely pleased with how the canopy turned out. There are a couple more little details to finish up, but the hard part is over. This has been, without a doubt, the most difficult and frustrating phase of the project to date, but I have emerged victorious. And now, for the celebratory libations!

  • Canopy lock improvement

    Saturday, September 8th, 2007

    I realized that I could improve the security of my canopy lock by using the little anti-rotation ring that comes with the lockset. I ground off one side so it would fit inside the lock bracket, and drilled four small holes to accommodate the little bent tabs that are supposed to bite into the wood surface of a cabinet or drawer.

    This should slightly decrease the chances of anyone being able to force the lock open, although it is still mostly a courtesy device to keep honest people out.

    Later on I primed and painted the retaining ring to match the rest of the canopy interior.

    I also picked up a new toy this week – a mini random orbital sander. To try it out, I polished the center canopy slide rail, using progressively finer sanding discs and followed by buffing with Flitz. The results weren't too bad – I will probably polish the side rails the same way, when I eventually remove them in order to touch up the paint on the canopy decks.

    Further canopy painting

    Wednesday, September 5th, 2007

    Unless there are any runs, drips, or errors to sand out and repaint, this should be the final coat on the canopy frame: