Archive for the ‘Empennage’ Category

Empennage fairing fitting

Sunday, August 24th, 2008

This morning I woke up early and flew a rental spamcan up to Falls City in Nebraska, taking advantage of the unseasonably cool (for August) morning to get a little daylight between me and the ground. Falls City has always held a certain special fascination for me; the first airplane I owned came with a Falls City Aero Service keychain, and though I never got around to making the short flight, I always wondered just what sort of a place it was. Turns out it's exactly like you'd think: a medium-sized runway, some old tin hangars, and a flock of agplanes. Nice morning though.

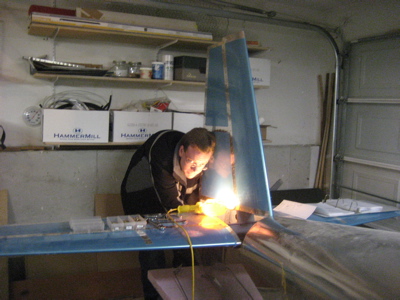
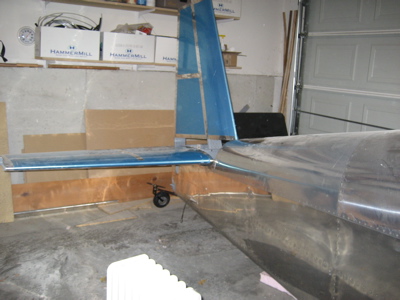
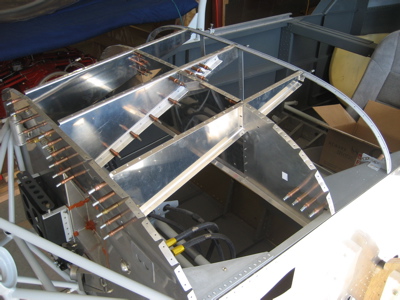
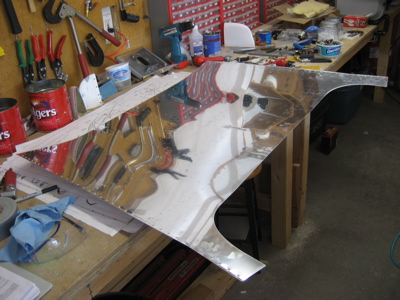
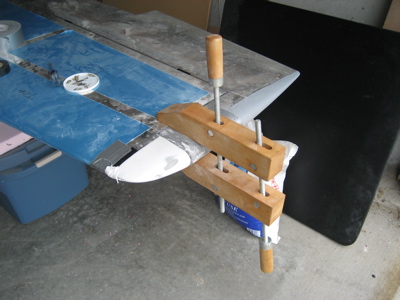
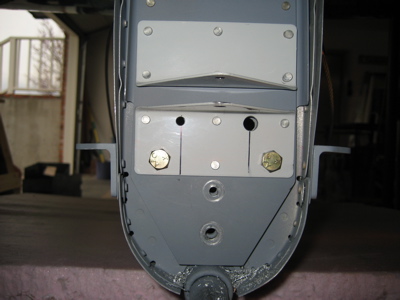
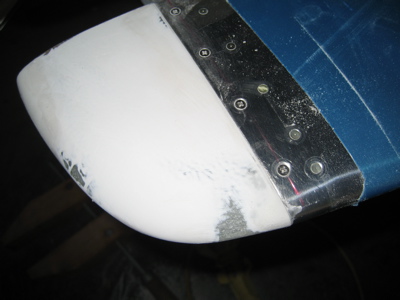
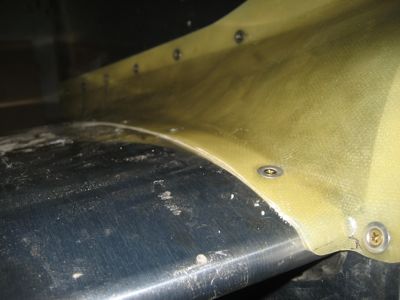
Later on, I got out the empennage fairing and spent some time cleaning it up. I used heat and pressure to reshape the areas that didn't fit so great – by clamping down a small section of fiberglass with wood blocks and duct tape, heating up the surrounding area with my heat gun, then letting it cool down, I iteratively got it to fit pretty well. Then I trimmed back the edges, countersunk the holes for tinnerman washers, and installed it with #6 screws to see how it looked.

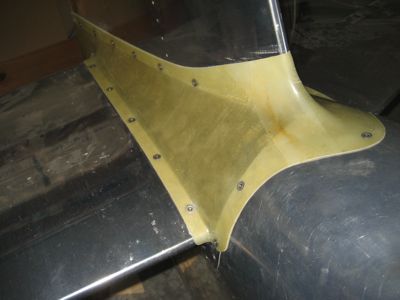
Not bad really. I may have some additional shaping to do along the top edge, but that's all cosmetic. Overall, I'm pretty happy with how it turned out. There are some gaps of a 32nd or two here and there, but at Oshkosh this year I saw some that looked like they'd been put on with a hammer… quarter inch gaps, even. So, I think mine looks pretty good.

Since I was already sweaty and gross from cutting and sanding fiberglass, I decided to make it a trifecta by mowing the lawn and then going for a nine mile bike ride. Now it is, as they say in the old country, die Miller-Zeit.

Installed empennage for good

Saturday, January 26th, 2008

The tailwheel mount shares several bolts with the vertical stabilizer spar, so before you can put any substantial weight on the back wheel you have to install the vertical fin first. I've had the tail propped up on a pile of styrofoam insulation for a long time, but now it's time to get this thing standing on its own feet, or wheels as the case may be.

To provide the proper amount of vertical stabilizer offset, there is a single AN960-10 washer between the spar and the up-elevator stop, on the left side bolt only. This photo confirms that I did remember to install that pesky washer:

I torqued and marked all the bolts that attach the horizontal and vertical stabilizers:

I couldn't get a socket onto some of these, so I just tightened them using a wrench and German torque.

More bolts:

I couldn't get enough access to the nuts on these bolts to apply the orange torque seal goop, so I just marked the bolt heads to remind myself that I did actually torque the bolts.

The horizontal and vertical stabilizers are now mounted permanently, and the tailwheel is capable of supporting real weight. You can't really tell from this photo, but the tail is now resting on the tailwheel instead of sitting on a pile of foam.

Extended elevator stop

Saturday, April 14th, 2007

I wrote to Van's to ask their opinion of my elevator travel situation, and their reply was:

Matt,

You can either make a new elevator up stop or add a piece to the existing stop. The horns hitting the aft bulkhead is not a bad thing, but that will not happen when you fix the up stop.

Bruce Reynolds

Okay, I can do that. Since the existing elevator stop is already drilled for the bolts that attach the vertical stabilizer, I decided to leave it alone to avoid causing further problems. Instead, I created this little elevator stop extension out of some 1/8" angle:

It's riveted to the underside of the existing stop, using the existing three rivet holes through the stop and aft deck. It effectively moves the face of the stop forward about 3/32".

I also added three flush rivets to attach the other leg of the stop extension to the aft bulkhead. Probably overkill, but it makes me feel good.

Now to test the new elevator travel. Here's neutral:

Here's the new up position:

I now have 29.4 degrees of up elevator travel, which puts me in the allowable range of 25-30 degrees. I probably could have made my stop extension even a little bit longer, but as long as the elevator travel is within the okay zone I'm happy.

Canopy work aborted

Saturday, March 31st, 2007

After putting some protective tape over the end of the slider frame latch tube, I flipped the canopy over and laid the frame inside.

The goal is to get the frame aligned on the previously marked centerline, in the fore-aft location that results in the best fit along the center spine tube. Then you mark the location of the latch tube and drill a 5/8" hole. I got as far as marking the hole location, but the temperature didn't get up nearly as high as I thought it would, so I had to give up on drilling/trimming the canopy for another day. Bah.

In an effort to find something else to do, I dug up the subpanel pieces, dimpled the top rib flanges, and clecoed the whole works into the fuselage.

Then I deburred the forward top skin, which I hadn't yet bothered to do. I dimpled where I could reach along the edges, leaving the holes along the firewall undimpled for now – the cowling attach hinges still need to be match-drilled there, much further down the road. Then I packed up the skin and drove over to John's to use my DRDT to dimple the rest of the skin. Not a very efficient use of building time, but it felt like a good day to spend a couple hours driving.

Somewhere in there I did some more filler work on the left horizontal stabilizer tip fairing. I've had this clamp for at least ten years and I'm pretty sure this is the first time I've ever used it.

Also, I stopped at Lowe's and tried to buy a new belt sander, but they were out. Bah.

Misc stuff

Sunday, March 25th, 2007

I spent the whole day in the garage but didn't take many pictures. I guess I didn't actually get all that much accomplished – mostly I puttered and cleaned up the garage. It was great to be outside in the nice weather though.

One of the pre-tail-mounting chores I've been meaning to do is drilling the holes for the strobe and nav light wires that will go through the vertical stabilizer spar into the rudder. I picked the same location as Dan for much the same reasons – with the taildragger there aren't many other good choices for where to run these wires. I drilled a 5/16" hole for the strobe cable and a 3/16" hole for the nav light wires. Both holes are a little oversized so I can use a few layers of shrink tubing and some RTV to protect the wires from chafing.

Another day, another round of filling and sanding empennage fairings. I'm just doing a little bit every work session, fitting the glass work in between other tasks that are more fun.

I rearranged the garage a bit, and made a little table out of a sheet of plywood and a couple sawhorses. This is where the canopy is going to sit while I work on it. Yes, I've decided to work on the canopy some more before I put the airplane on the gear and mount the engine. Matthew convinced me that it'll be easier to get to it while it's down low and not high up on the wheels. Plus it seems to be warm enough these days to start thinking about working with plexiglass again.

I got out the canopy frame to make sure it still fits – yep: