Archive for May, 2005

Left stabilizer assembly

Saturday, May 14th, 2005

Here's the obligatory photo of me working on the plane to prove to the feds that I really built it. After getting all the ribs prepared (finally) the left horizontal stabilizer gets clecoed together, skin and all:

Mary couldn't resist putting in some clecoes too:

Along the inboard portion of the front spar (HS-702) and the root ribs (HS-404/405), only the skin is prepunched, so you have to do a bit of layout work to get the rest of the holes drilled. But in the olden days builders had to do this for the whole airplane, so I guess I can handle a couple feet of rivet holes:

Here the root ribs are temporarily clamped in place to mark the approximate rivet locations. The cleco side clamps really lead the way for this part of the project.

Now the root ribs have been removed, fluted, gotten a centerline marked on them, reinstalled, and are being drilled. I got all the holes in the HS-405 rib drilled to the skin and rear spar before I had to put the tools away.

HS deburring

Friday, May 13th, 2005

Nothing worth phtographing tonight, just deburring of the horizontal stabilizer ribs and cleaning up the notches I cut in the HS-404 ribs – lots of tedious work with Scotchbrite wheel, emery cloth, and needle files. Started to mark out the holes in the HS-405 ribs where the forward flanges will attach to the front spar. Not a lot of extra edge distance in that area – I wonder why Van's doesn't pre-punch at least that area of those pieces?

HS ribs/spars work

Wednesday, May 11th, 2005

Hey, where'd this airplane-piece-shaped thing come from? I temporarily clecoed the middle and end ribs and front/rear spars of the horizontal stabilizer together to check the bends in HS-710/714 (front spar reinforcements) and HS-702 (front spar). Everything looked good so I drilled the reinforcements to the spars. Not shown are the steps of trimming the inboard flanges of each half of HS-702 to make room for the reinforcement angles, and deburring/straightening/fluting the ribs.

Actually here is a photo of the rib fluting crew hard at work:

Marked and cut the relief notches in the HS-404 inner nose ribs to make room for the reinforcement angles here as well. Had to stop using the air tools since it was getting late and I didn't want to annoy the neighbors, so these will be deburred tomorrow along with their cousins.

Ordered new VS spar parts

Tuesday, May 10th, 2005

After thinking about it a while, I decided to go ahead and order parts to build a new vertical stabilizer spar. The pieces are relatively cheap and I'll feel better about the airplane. The old spar could probably have been made to work just fine, but I don't want to be lazy and accept work I know isn't as good as it could be.

Also ordered some NAS1097 rivets, which will probably come in handy later on when riveting skins.

Finished VS spar, sort of

Monday, May 9th, 2005

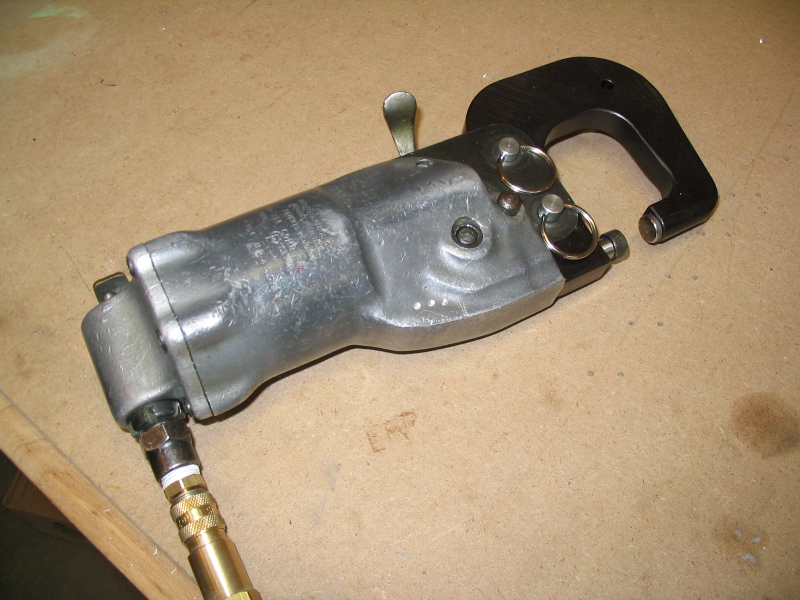
Occasionally, living in Kansas has its advantages – like the way I can order something from the Yard Store in Wichita and it gets here the next business day for like six bucks. Here's the new (rebuilt) rivet squeezer I received today:

It is a clone of the Chicago Pneumatic CP-214, but I don't know who actually made this one. It looks like it was built when FDR was president and has obviously seen a lot of use, but it still works great. Those 1/8" AD4 rivets I was having trouble squeezing by hand are no problem for this guy. In fact, a typical work session with the pneumatic squeezer goes something like this:

Me: Here is a rivet that needs to be squeezed.
CP-214: DESTROY!!!

You get the idea. The folks who say this is the most useful riveting tool they've ever bought are speaking the truth.

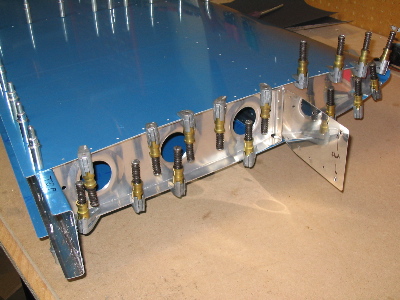
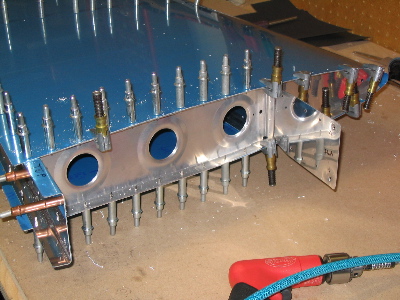
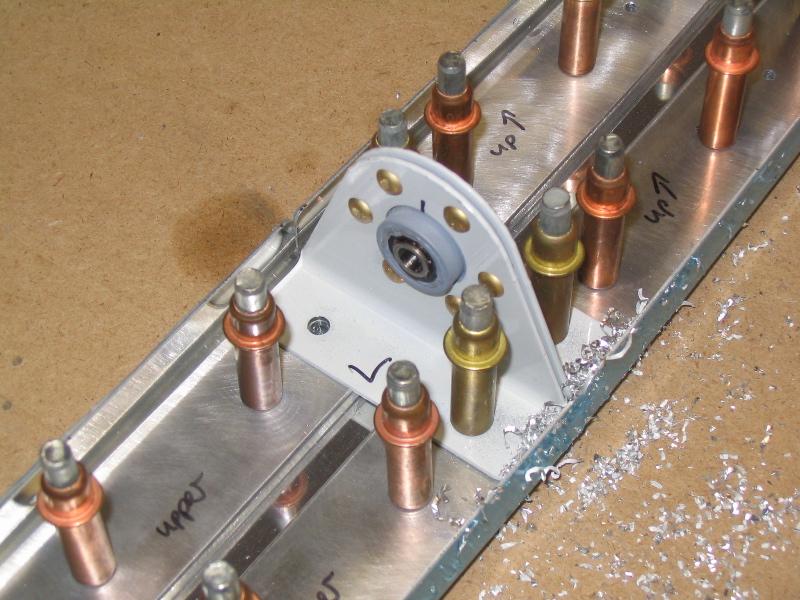
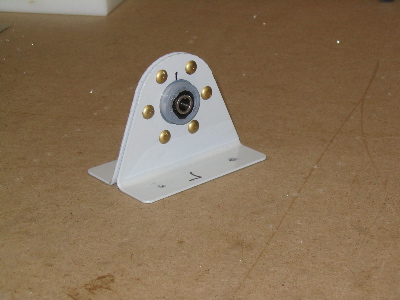
Here I've set the rivets in the center elevator bearing assembly I was working on the other day:

…and then drilled the bolt holes that will attach it to the HS spar:

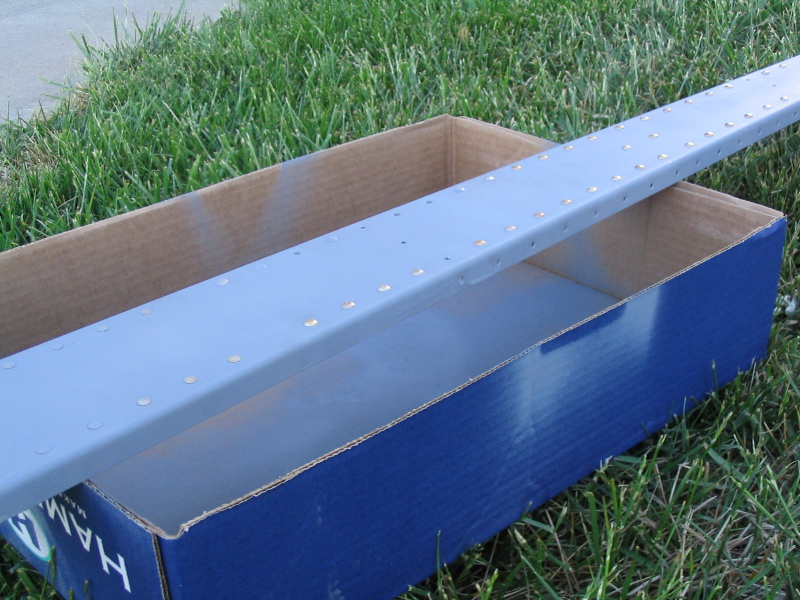
Then I switched back to the vertical stabilizer spar, seen here resting in the grass after receiving a little primer touch-up:

Although it looks okay in the photo, I'm not totally happy with the way it turned out. For one thing, I foolishly damaged some holes by trying to drill out three rivets with the wrong size drill bit. Must double-check drill size next time. Those holes will have to be filled with bolts, probably, so there goes the weight savings I picked up by cutting the optional lightening holes.

The other thing I don't like about the VS spar is that I oriented the rivets so the manufactured head is on the forward (internal) side and the shop head is aft (outside). While this is a purely cosmetic issue, it bothers me that I didn't think about which way I was going to put the rivets in so the pretty side would be out. Yes, this is extremely picky, but I am considering chalking this one up to practice and ordering new parts to build a replacement VS spar with the lessons I learned on this one. Stay tuned…