Archive for December, 2005

Hung the right aileron / Installed roll servo

Sunday, December 18th, 2005

This morning I got the right aileron installed, which took about half the time that I spent on the other aileron yesterday. That's about typical for these sorts of tasks. Just imagine how fast my next RV will go together.

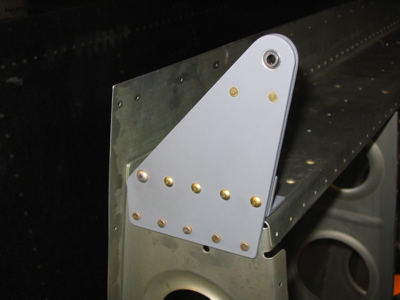
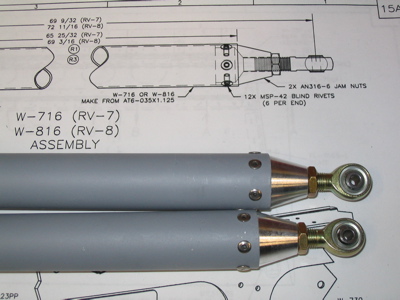
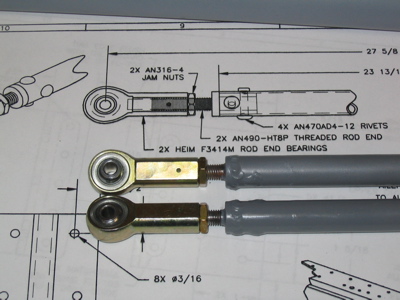
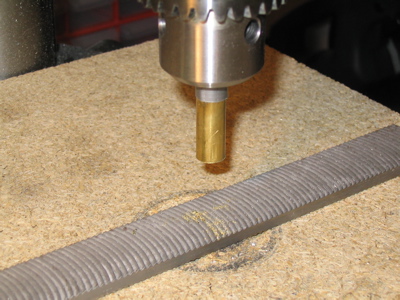
Then I pulled the TruTrak roll servo out of its box and went about installing it in the right wing. The plans included with my servos are specific to the RV-7 install kit, which made it simple to locate the right place to drill the hole for the control arm:

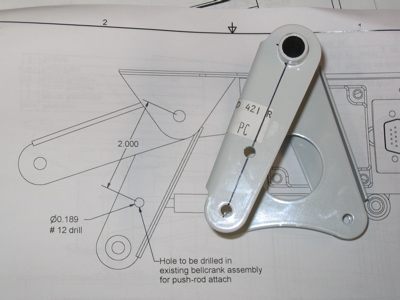
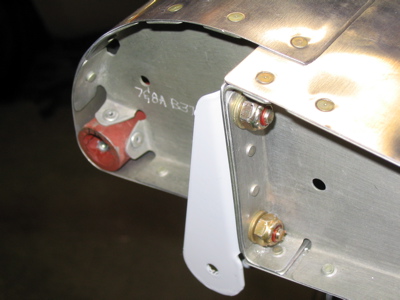
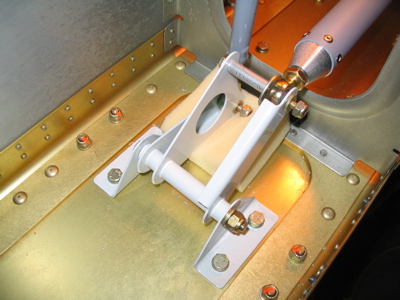
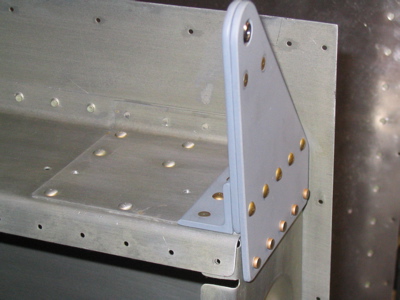
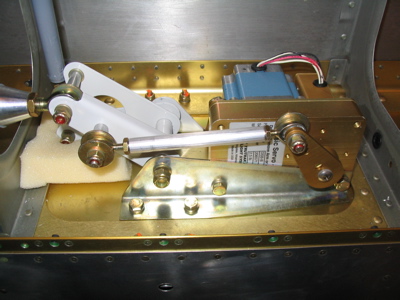
Here's the servo temporarily mounted in its home. The arm on the servo swings the aileron bellcrank by way of a short pushrod. I used AN970 fat washers in more places than is called for in the TruTrak instructions, just to make sure that the autopilot pushrod won't come loose and jam the controls if one of the rod-end bearings comes apart. Preventing jammed controls is a good thing.

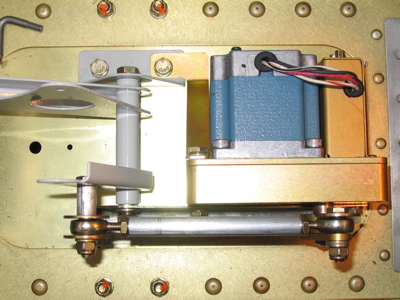
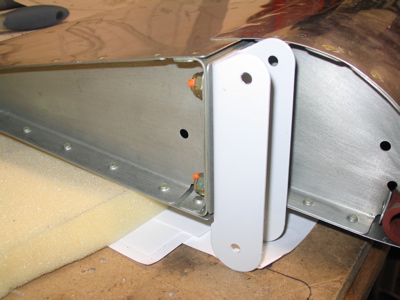
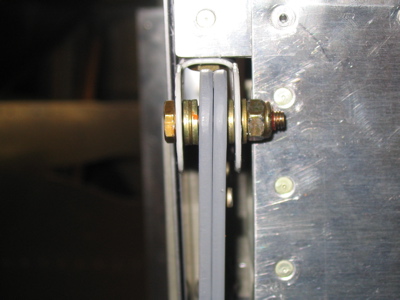
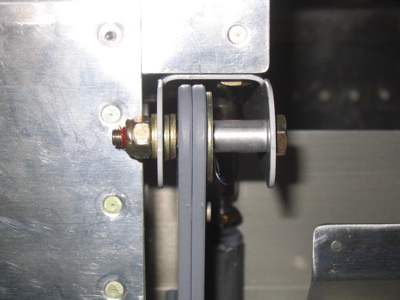
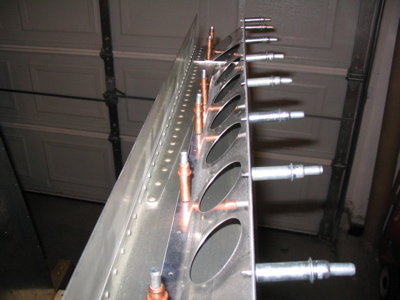
In the photos below, all three pushrods are hooked up. You can see that even at either end of the available range of travel, the servo control arm comes nowhere close to going over-center. Since that could lock up the ailerons if it happened in flight, this is also a good thing.

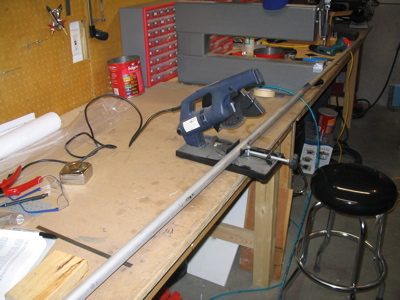
Luckily the servo brackets are anodized, because it was too cold and snowy to prime anything today. Before calling it quits I secured the bolts that go into the tapped holes in the servo with safety wire and Loctite, and lubricated both aileron bellcrank bushings with whatever weight of Aeroshell is in my grease gun (#14, I think) before installing them permanently. I was going to start in on the pitot tube, but the order from Van's I placed last Monday still hasn't arrived, and I was counting on having the angle stock from that order to mount the pitot mast. Oh well.

Update: Oops, I realized later today that I have to finish the aileron gap seals before I can permanently mount the ailerons. So, off they came. No big deal, it's only a five minute job to remove them, and not too much more to put them back on now that all the attach hardware and spacers are fitted.

Actually, now that I think about it, there's really no point in permanently attaching the ailerons just yet. The control surfaces can stay in the storeroom until I really need them. Okay, well at least I'll have the aileron gap seals and flap braces to work on while I wait on the next visit from the UPS man.

Hung the left aileron

Saturday, December 17th, 2005

First order of business today was to rivet on the remaining aileron hinge bracket. You can see where I repaired the enlarged rivet hole with a 5/32" rivet (left side in this photo).

Then I pulled the left aileron out of the airplane parts storeroom:

Pretty much the only thing you have to do to these quickbuild ailerons is to drill and bolt on these pivot brackets. I used a #14 drill followed by a 3/16 reamer to get a slop-free fit on all the bolts.

Each end of the aileron is captured by a bolt and a collection of washers or spacers. These photos are for future reference in case I need to remove the aileron. In the first photo the pivot looks crooked because the other end wasn't in place yet. Once both pivot bolts are in place everything lines up perfectly.

I swear it took me an hour to get all these washers in place. It looks simple but everything is very close together and when you slip or mess up, all your little pieces wind up on the floor.

I clamped a straightedge along the tooling holes in the aft rib and used it to get the aileron alignment in the ballpark. The rigging will be adjusted later on by shortening or lengthening one or more pushrods to get everything into perfect alignment.

Here's a shot of the aileron bellcrank with all the pushrods hooked up. The foam rubber is just there temporarily to protect the spar when the aileron counterweight tries to slam it into the full-up position.

After this step was completed, I made Mary come watch me stand at the root end of the wing and make the aileron go up and down by manipulating the pushrod. Fun.

Tomorrow's project will be doing the same series of steps for the right aileron, which will be slightly complicated by the presence of the autopilot roll servo.

Completed aileron pushrods

Thursday, December 15th, 2005

Here are the completed W-716 long aluminum aileron pushrods, with ends blind riveted in place:

And here are the completed W-818 short steel pushrods, with ends welded in place by local EAA guru Ken Perkins. Since the welding process took off some of the powder coat, I primed these parts with my usual GBP-988 and then topcoated them with Rustoleum enamel (machine grey) to prevent rust.

With the pushrods complete I started to work on the aileron bellcranks. Here's how I went about shortening the brass bushings that the bellcranks ride on – I chucked them gently in the drill press (with tape to protect from scratches) and ran them down onto a file until they fit:

Ran out of time to work tonight, but I'll hit it hard this weekend. Thanks to Ken for helping me weld up the aileron pushrods. No thanks to UPS, though: I received a shipment of strobe parts for the wings from Aircraft Spruce today, including one that had a cracked lens. Now I'll have to go through the hassle of return/replace.

An earlier aircraft construction project

Sunday, December 11th, 2005

My dad reminded me that I've been building flying machines since at least age 3:

Since then I've switched from helicopters to fixed-wing aircraft, and from wood construction to aluminum.

Wing work

Sunday, December 11th, 2005

I got the three good aileron brackets riveted to the rear spars without too many problems, although it did take some creative gymnastics to get the squeezer onto all the rivets. If you use the longeron yoke and a 4" no-hole yoke you can get all these rivets set without resorting to the bucking bar – as long as you're not picky about which side the shop head ends up on, since on some of the rivets, the squeezer can only be positioned one way.

Again notice the mix of flush and universal rivets, as called out by the plans:

Then I trimmed, deburred, and clecoed the flap braces in place. I still haven't quite figured out the strategy for attaching the flaps (i.e. what gets machine countersunk and what gets dimpled) so I'll just leave these guys clecoed in place until I get to that stage.

Then I started building the aileron pushrods. The long ones that connect the control sticks to the aileron bellcranks are made of 1.25" aluminum tubing, and the short ones that connect the bellcranks to the ailerons are made of small-diameter 4130 steel tube. My cheap cutoff saw came in handy to cut the tubes to the correct length:

After cleaning up the ends of the cut tubes, I sprayed copious amounts of aerosol primer down the insides until I could see that the innards were evenly coated. Then I also proceeded to prime the exterior surface of the aluminum pushrods – the steel ones are already powder-coated and don't need any further corrosion protection.

Here I've inserted the end cap thingies into the big pushrods and marked the locations for the rivets that hold them on. I'll wait until tomorrow to drill the holes, though, so the primer has a chance to fully cure (so I don't ding them up while working with them).

The plans also call for you to rivet end caps onto the steel pushrods as well, but they give you the option of welding them on too. I may try to find somebody to weld them up for me, since it seems like a welded pushrod end would have a smaller overall size, and thus require less enlargement of the exit hole in the rear spar.