Archive for February, 2007

More static lines

Wednesday, February 7th, 2007

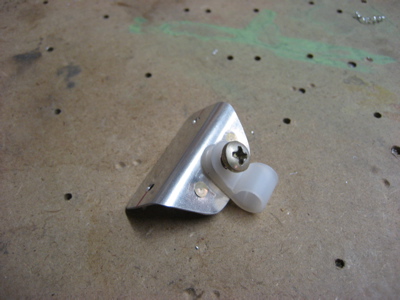
Mary helped me rivet two little brackets to the longeron between the F-708 and F-707 bulkheads. These secure the static line as it runs forward from the tee, and keep it from rubbing on the seatbelt bracket. I know it's probably overkill to use rivets and threaded fasteners here, but I wanted to avoid using those self-adhesive tie wrap mounts because of all the problems I've heard about. Apparently they tend to come unstuck over time, so I'm doing the extra work to make sure my static line will stay put.

Just after the tee, the line transitions from 1/4" ID silicone tube to the 1/4" OD Nylaflow tubing that's standard issue for aircraft pitot/static plumbing. No adapter fitting necessary – I just slipped one tube inside the other for a length of about four inches.

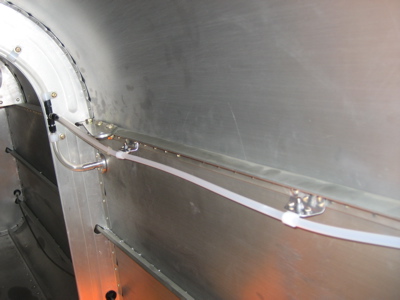
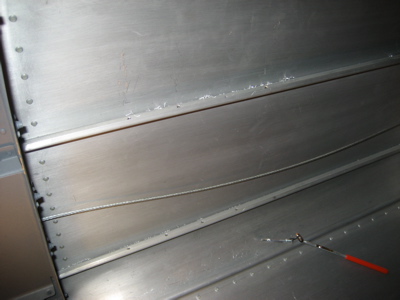
While I was back there I gooped some RTV between the static line and the rivet at the top of F-708. After it cured I removed the popsicle sticks, and now the RTV keeps the rivet from rubbing through the tubing.

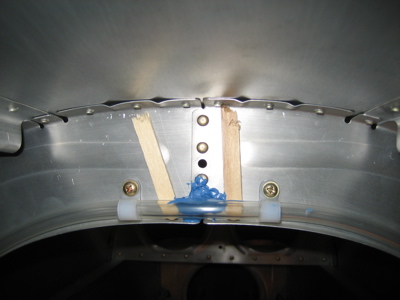
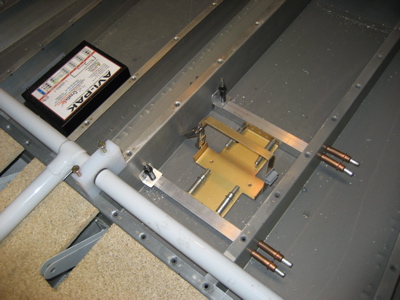
Between F-707 and the F-706 baggage bulkhead, the line angles downward to parallel the F-786B-L stiffener, then disappears through a snap bushing behind the baggage sidewall cover. Two more little angle brackets are pop riveted to the stiffener here to hold the line in place. (The grey blotch is an area that got a shot of primer after I scratched it up a bit.)

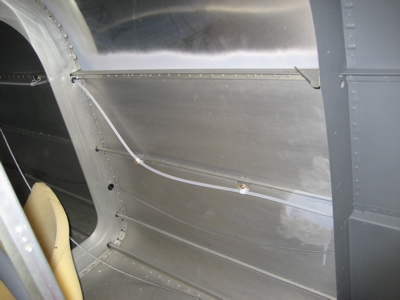
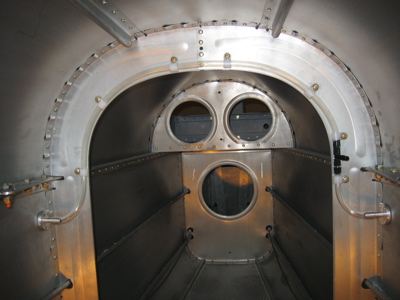
The static line runs forward through snap bushings beneath the baggage sidewall covers, then goes through another snap bushing through the F-705 seat back bulkhead and emerges under the armrest.

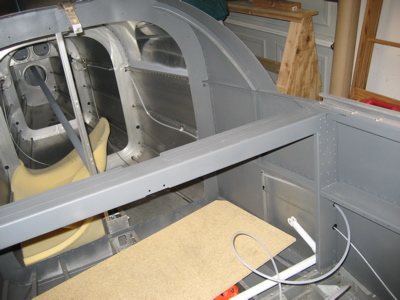
This routing for the static line is nonstandard – I got the idea from Dan – but it will make the tubing totally invisible as it travels from the tailcone to the instrument panel. In the baggage area it runs behind cover panels, and in the seating area proper it will be hidden beneath the armrest and behind the interior upholstery. I still need to figure out how to bring it through F-704, but that job will wait for another day.

Started running static lines

Sunday, February 4th, 2007

After properly anesthetizing myself against the inevitable painful cramping, I crawled way back into the fuselage and installed the first few feet of static plumbing. The two static ports are now tied together, and the line will eventually run forward from the tee along the left side of the fuselage to the instrument panel. Notice that the tubing goes uphill from each of the static ports – that's to help keep water out of the system.

Most people use tie wraps to secure the tubing to the bulkhead, but in my airplane it's held in place by some neat little cable/tubing clamps I found at Ace Aircraft Supply. They are like minuature adel clamps, but made of nylon and not padded, intended to secure household wiring and the like. Each one is fastened to the bulkhead with a #8 screw and nut. As an extra bonus, they also provide enough of a standoff so that the tubing never actually touches the bulkhead anywhere – except for that one rivet at the very top, to which I need to apply some RTV to keep it from chafing through the tube.

Here's a better view of one of the nylon clamps. I made a handful of these little angles with nutplates on them, to be riveted to the longeron at strategic intervals to provide support for the tube as it runs forward into the cabin. Didn't have a chance to install them tonight, though.

Mounted ELT bracket (again!)

Sunday, February 4th, 2007

So I was taking a look at the ELT mounting bracket that I installed last month, and I realized that if the bracket is installed as designed, the rudder cable will rub on it. Argh! That was the last straw for me and the Van's ELT bracket, so I drilled out the rivets and ripped that thing out of there.

It was a pain to install, it was too flimsy to actually hold the ELT, and it interfered with a critical component of the flight control system. So long, you piece of junk!

Okay, I didn't actually throw it in the trash – those nutplates can surely be used for something.

I stole Scott 's idea for how to mount the ELT under the baggage floor. The tray is riveted to pieces of angle stock, and a set of brackets ties the tray to the floor ribs. This is actually a better location overall – it's stronger, it helps move the CG forward, and once I create a trap door in the baggage floor it'll be easier to access too.

To keep the retaining strap from wandering around, I riveted it to the tray. The rivets are double flush because the bottom of the tray has to be pretty close to the bottom skin to let the ELT fit under the baggage floor.

Here's the ELT installed in its new home. The supporting angles are attached to the four little brackets with structural screws and nutplates, in case I ever want to upgrade to a different kind of ELT someday. Note that the tray is offset to the left side of the airplane, to make room for the latch mechanism that lets you remove the ELT for maintenance.

While I was waiting for primer to dry I vacuumed out the inside of the bandsaw. Here's what a year's worth of RV-related aluminum dust looks like:

Replaced brake pedal bolts

Thursday, February 1st, 2007

I crawled into the fuselage and replaced each of the pairs of bolts upon which the brake pedals pivot, with a single AN3-60 bolt that goes all the way through both sides of the pedal. As promised on the VAF forums, this really does make the brake pedal pivot more smoothly and want to bind up less. But let me tell you, this would be sooo much easier to do before the pedals are installed in the airplane. There's not a lot of access under there to fiddle around with washers and cotter pins, but I managed to get it done.

Something closer to an AN3-56 would have worked even better here, but only -55 and -60 lengths are commonly available. I just put a few washers under the bolt heads and nuts. Done deal.