That's me holding the Flying Magazine Editor's Choice Award for a little thing I helped cook up at work. I didn't get to keep the statue, though – they just let me hold it for the photo.

That's me holding the Flying Magazine Editor's Choice Award for a little thing I helped cook up at work. I didn't get to keep the statue, though – they just let me hold it for the photo.
I spent another couple hours inspecting the fuselage tonight, still going through the plans and marking off what's done and what isn't. Not much there worth photographing. I did get curious about the amount of twist in the QB fuselage, so I got out the digital level and took measurements at three stations, starting with the center spar carrythrough:
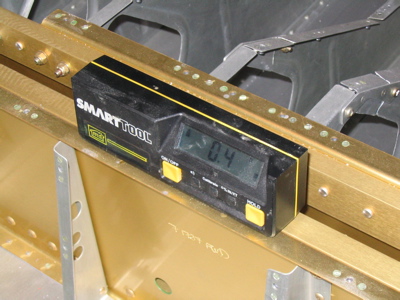
At the seat back bulkhead:

At the tail:
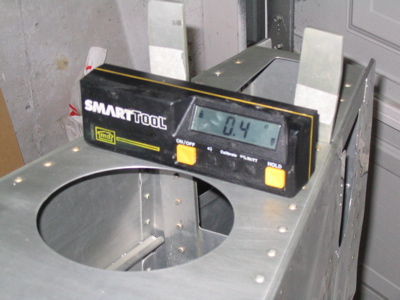
Yup, pretty straight I'd say. While I was back there, I put in the remaining rivets that secure the aft bulkhead:

Going through the plans, I came across the F-757 gussets, which have to be modified by cutting a notch with a 2" radius out of one end. I trimmed the edge off the lid to a butter container and it came out to just the 4" diameter I needed. Mmm, partially hydrogenated corn oil. I just marked these parts and didn't cut them – I'm thinking of breaking down and finally buying a bandsaw, and this might be the piece that pushes me over the edge.
I clecoed on the aft top skin to see how things were going to line up:
I have some misalighment at the top of the F-706 bulkhead here – I think the top fuselage J-stiffeners are pushing it out and deforming it enough to keep the prepunched holes from lining up. These guys seem to have been left way too long so I can trim them myself, but the plans are unclear. I'll ask Van's about it tomorrow.
METAR KLWC 181752Z AUTO 01008KT 10SM OVC100 M11/M22
That's 12°F and the shop heater just can't keep up.
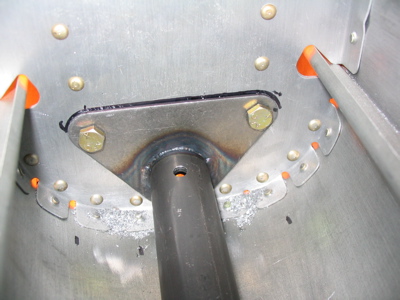
Here's the tailwheel mount back in the plane, after being cleaned, primed, and painted with some grey enamel to keep it from rusting. The aft bulkhead is also back in the plane, after lots of fitting, twisting, pounding, and bad language. I actually had to grind off about 1/16" from the top of it to get it to go back in – this is one area where the slow builders have an easier time, since they can just un-cleco the skins and put the aft bulkhead in and out all day long. I used some random 1/4" bolts to keep the mount in alignment with the forward bulkhead while drilling the holes for the two "keeper rivets" that keep (naturally) the tailwheel mount aligned with the aft bulkhead until the vertical stabilizer is bolted in place to hold all this stuff together.
Here's the same shot, but now it's mostly riveted together. In this and in the above photo you can also see the 0.040" shim I decided to add between the aft face of the mount and the aft bulkhead to take up some of the gap there. The plans say to add a shim between the mount and the forward bulkhead if necessary, but my problem here is that the lower part of the mount is fine, it's just the upper part of the aft face that doesn't perfectly match with the aft bulkhead. I think the aft part is actually welded a little crooked. Anyway, I jammed a piece of alclad down in there, and hopefully the bolts that will go through here later on will pull everything into alignment.
This little tab didn't lay down against the longeron like it should have, so I put a little shim in between and used a longer rivet:
![]()
The skin doesn't lay down over the bulkhead in a perfectly flat manner – it sort of tucks in a tiny bit and then bows back out, probably because the bulkhead flanges aren't 100% square with the skin. I guess I could have taken the bulkhead out, tweaked the flanges, and put it back in over and over until it was perfect, but I figured I'd risk bending something else in the process and decided not to mess with it. Anyway, this caused me to put a couple of light smiles in the skin when driving a few of the rivets, but once it's painted nobody will notice. Note that in the photo below I'm holding the light at an angle that exaggerates the dings and fingerprints – in real life you have to look closely to see this.
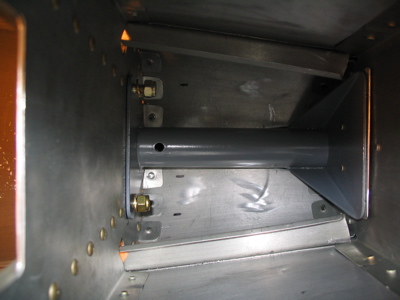
The tailwheel mount and aft bulkhead are completely installed, with the exception of four holes on each side where I plan to use Cherry Max structural blind rivets (there are five clecoes per side in the photo but one is for the rudder stop and will be riveted later). Three will go on each side below the tailwheel mount where you can't get a bucking bar to fit, and one will go through each of the little tabs on the forward face of the bulkhead where I can't get them to lay down on the longeron without a clamp, and I can't fit both the clamp and the rivet squeezer or bucking bar in at the same time.
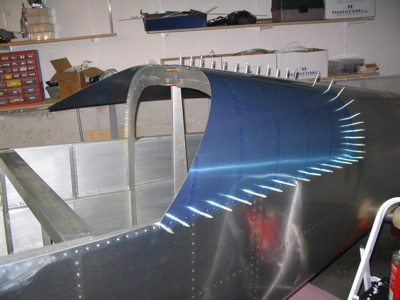
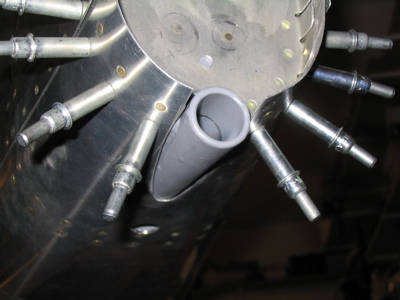
I thought this was a neat view… I think it sort of looks like some kind of spiny deep-sea creature, what do you think?
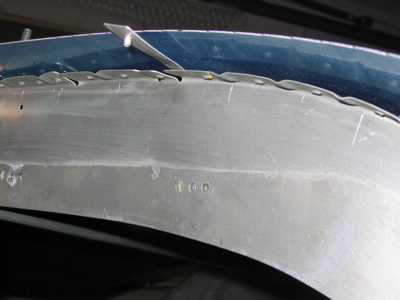
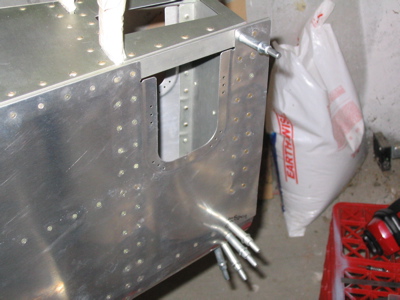
This weekend's project is the tailwheel. There's a steel mount that bolts between the two aftmost bulkheads, and you have to cut an odd-shaped slot in the aft bottom skin to let it poke through. First I removed the aft bulkhead, which in the quickbuild kits is only held in with a few temporary pop rivets – it was still a pain to remove it, though, because of the way the aft fuselage tapers. I xeroxed the full-scale template from the plans, then aligned it on the inside of the skin by shining a light through the bulkhead rivet holes and lining the marks up. It worked out pretty well.
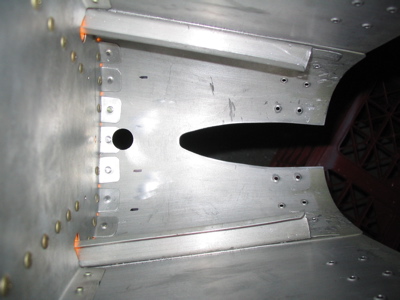
I marked the cutout and started the front end with a unibit:
Like with the landing lights, I rough cut with snips and then used drum sanders and files to enlarge the hole. I probably filed away at it for an hour before the mount fit through. I'll clean up the edges and make it look pretty tomorrow. The hole just aft of the bulkhead there is for a socket to go through later on when I'm installing or servicing the tail spring. It gets pretty close to the center rivet, but it's per plans.
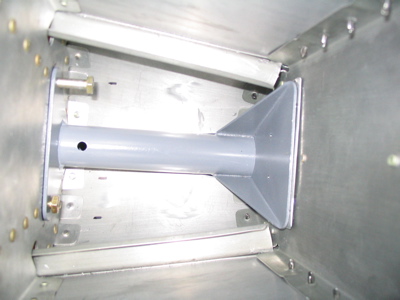
Here's how the mount fits in:
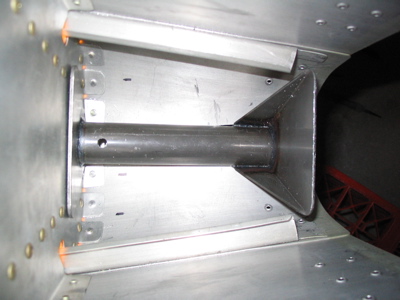
Two 1/4" bolts secure it to the forward bulkhead. These were tricky holes to drill because the tailwheel mount is made of some kind of extra hard steel, and the shape of the mount makes it tough to get a drill in there – not to mention the fact that you have to locate the pilot holes by back drilling from the other side. You have to hold it square with one hand, hold the angle drill with your second and third hands, and hold the shop light with your fourth hand. These bolt holes came out fine though, and the tailwheel mount is straight.
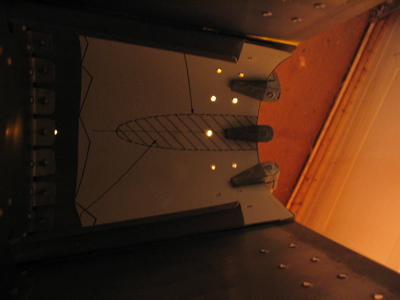
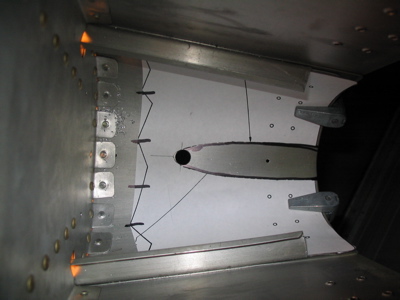
The "mouse hole" at the bottom of the aft bulkhead is enlarged to fit the mount:
Reinstalling the aft bulkhead tomorrow is going to be a pain – it was hard enough to remove. Stay tuned.